Multiple Darts
You do not have to use a single dart. The same amount of fullness can be split into several darts, or turned into gathers, tucks or pleats. It changes the look of the garment, not the fit. These are called dart equivalents.
A common example is turning a single waist dart into gathers at the shoulder. You get soft drape, the shaping over the bust stays, and the stitched points are replaced by loose, unstitched fabric.
Dividing the Dart Intake
To spread the fullness smoothly, you cut several slash lines instead of one. Each line runs from the shoulder straight to the bust point. In the illustration below, five slash points are spaced evenly along the front shoulder seam.
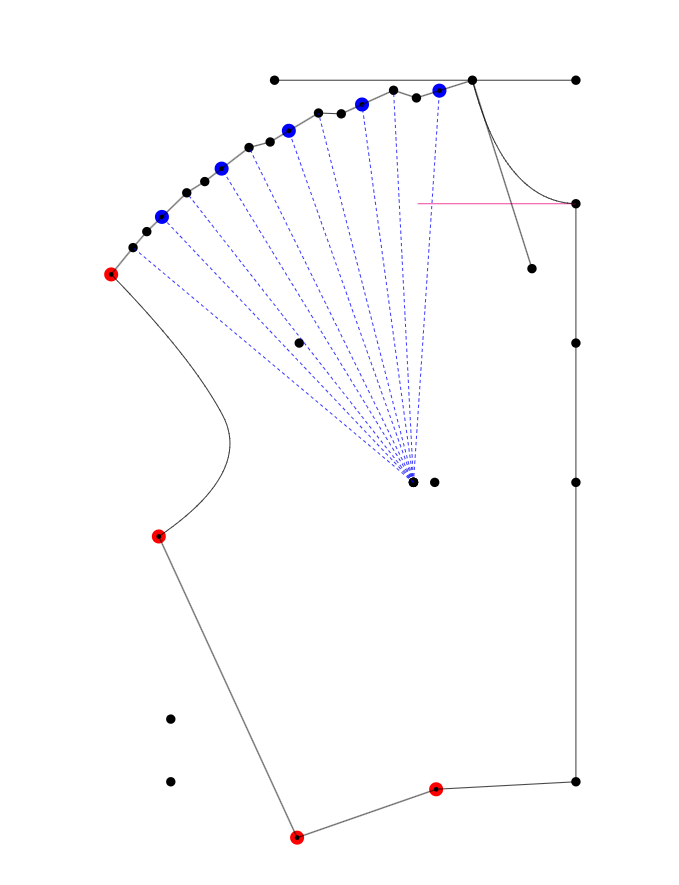
Waist Dart Shifted to Multiple Darts at Shoulder
This draft is the result of the PatternMaker Pro Move Dart to Multiple tool, which makes quick work of the process.
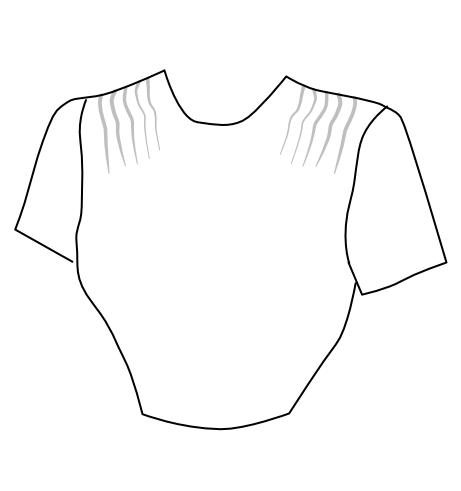
Multiple Dart Transfer Sewn
Drafting It by Hand
- Mark the Slash Points: Mark where the slashes will start along the shoulder.
- Slash the Pattern: Cut each line from the shoulder down toward the bust point. Stop just short of it, so a thin paper hinge holds the pieces together.
- Close the Dart: Pivot the waist dart legs together until they touch. That closes the waist dart completely.
- Spread the Gaps: As the dart closes, the shoulder slashes open. Space the gaps evenly, so the fullness is shared equally across the shoulder.
How Much of the Dart to Move
You do not have to move all of it.
| Method | What It Does |
|---|---|
| Slash and Spread | Moves about half of the dart excess into the gathers. The rest stays as a smaller waist dart. |
| Pivot and Transfer | Moves all of the excess. The waist dart closes completely. |
Truing the Shoulder Line
Opening several slashes leaves a jagged, stepped edge along the shoulder. Trace the pattern, then draw a smooth blending line across it, touching the middle of each spread section. That line is your new shoulder.
Controlling the Gathers
The cut edge of the front shoulder is now much longer, but the finished edge still has to match the back shoulder seam.
- Mark Gather Control Notches: Notch the shoulder about 1/2" (13 mm) in from the neckline and 1/2" (13 mm) in from the shoulder tip. Keep the gathering stitches between those notches, so the fabric lies flat where the shoulder meets the neck and the sleeve.
- Gather to Fit: Gather the extra fabric evenly between the notches until the front shoulder is the same length as the back shoulder seam. Mark the same distances on the back shoulder so the two match.
Cut the new pattern in muslin and gather it before you cut your good fabric. How full the gathers look depends on the fabric, and a test shows you quickly.