2D to 3D
All the drafting and sewing books talk about taking a flat piece of fabric and turning it into a three-dimensional shape that fits a body. I’ve done the same in the Academy. It’s a great concept, but I think you really need to be able to see what this actually means.
Here is a 3D model of Susan, my go-to figure. I’m using Blender, a 3D modeling program for this example because it has a very unique ability. It can take a shaped form and flatten it. That's exactly what we need to see to understand why a pattern draft looks the way it does.
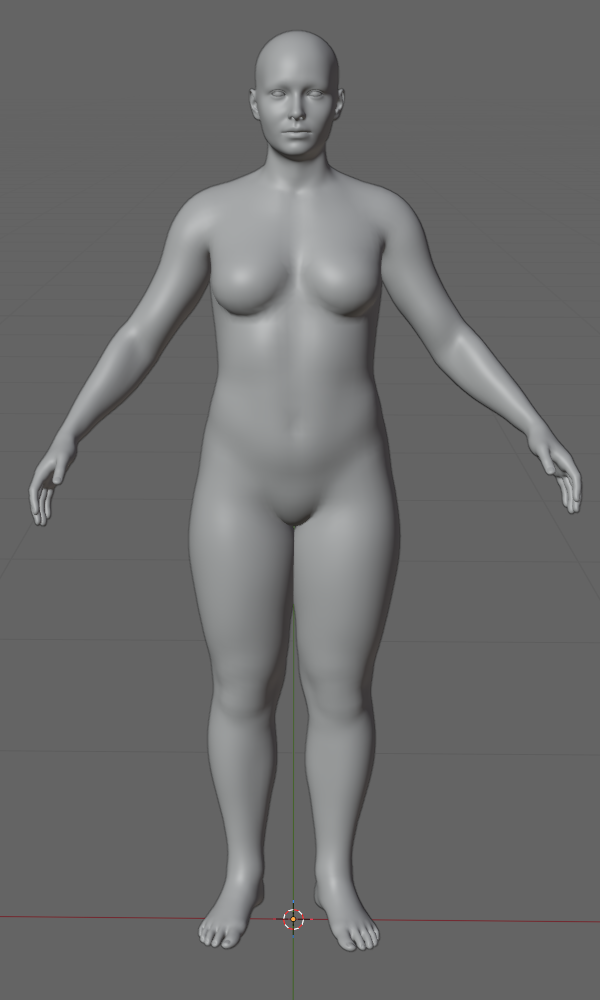
Susan in Blender
You need to remember that my Blender images are purely based on a real dimensional body. All I’ve done is delete some things, like hands, feet and head. I didn’t mess with the geometry in any way. I must say that I was really quite shocked at these results. I didn’t think the comparisons would be so clear-cut.
I split the body in half, since that is how we draft symmetrical patterns. You can see that I’ve also separated the arm at the shoulder and the torso from the legs.
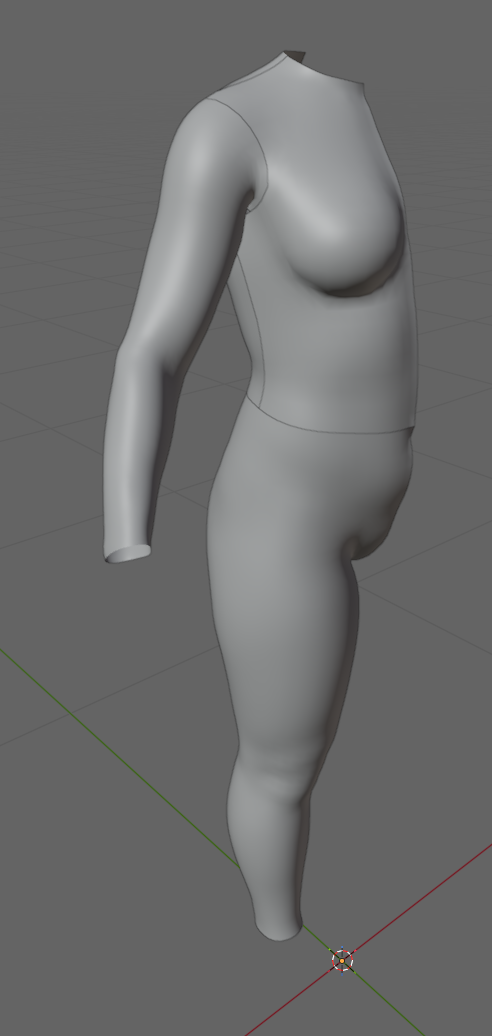
Divided 3D Model
We’ll take a look at the leg first. Here is the leg showing a side seam and there is also an inseam on the other side.
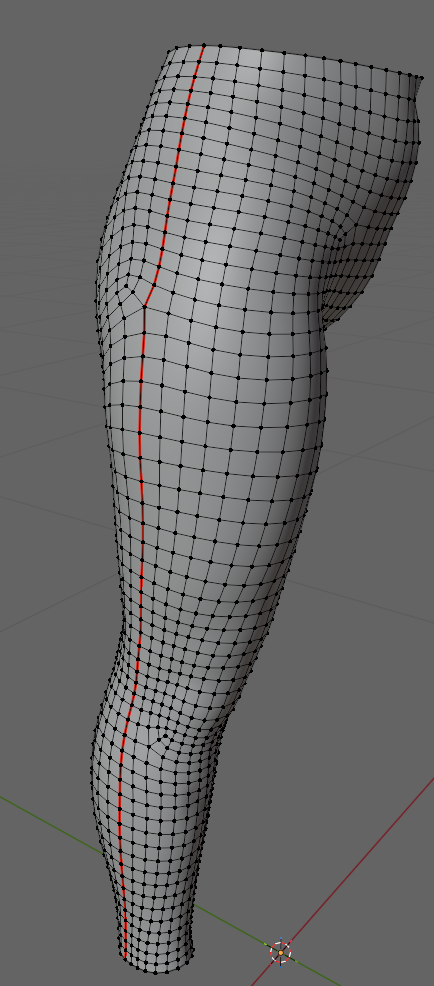
Leg Seam Marked
Here is the leg laid out flat. I’ve put a leggings draft next to it. The draft matches the layout of the body leg. This clearly shows that the back pant, shown to the left is deeper and wider than the front. It is also tilted back at the center back line to accommodate sitting down. You’ll run into this tilt constantly as you draft pants.
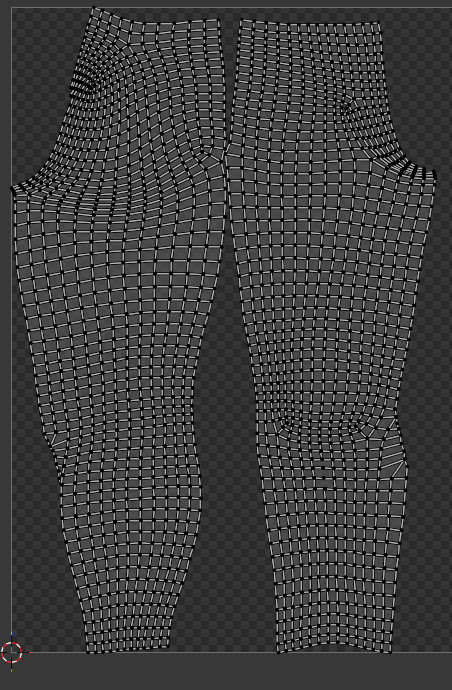
Back Leg on Left - Front Leg on Right
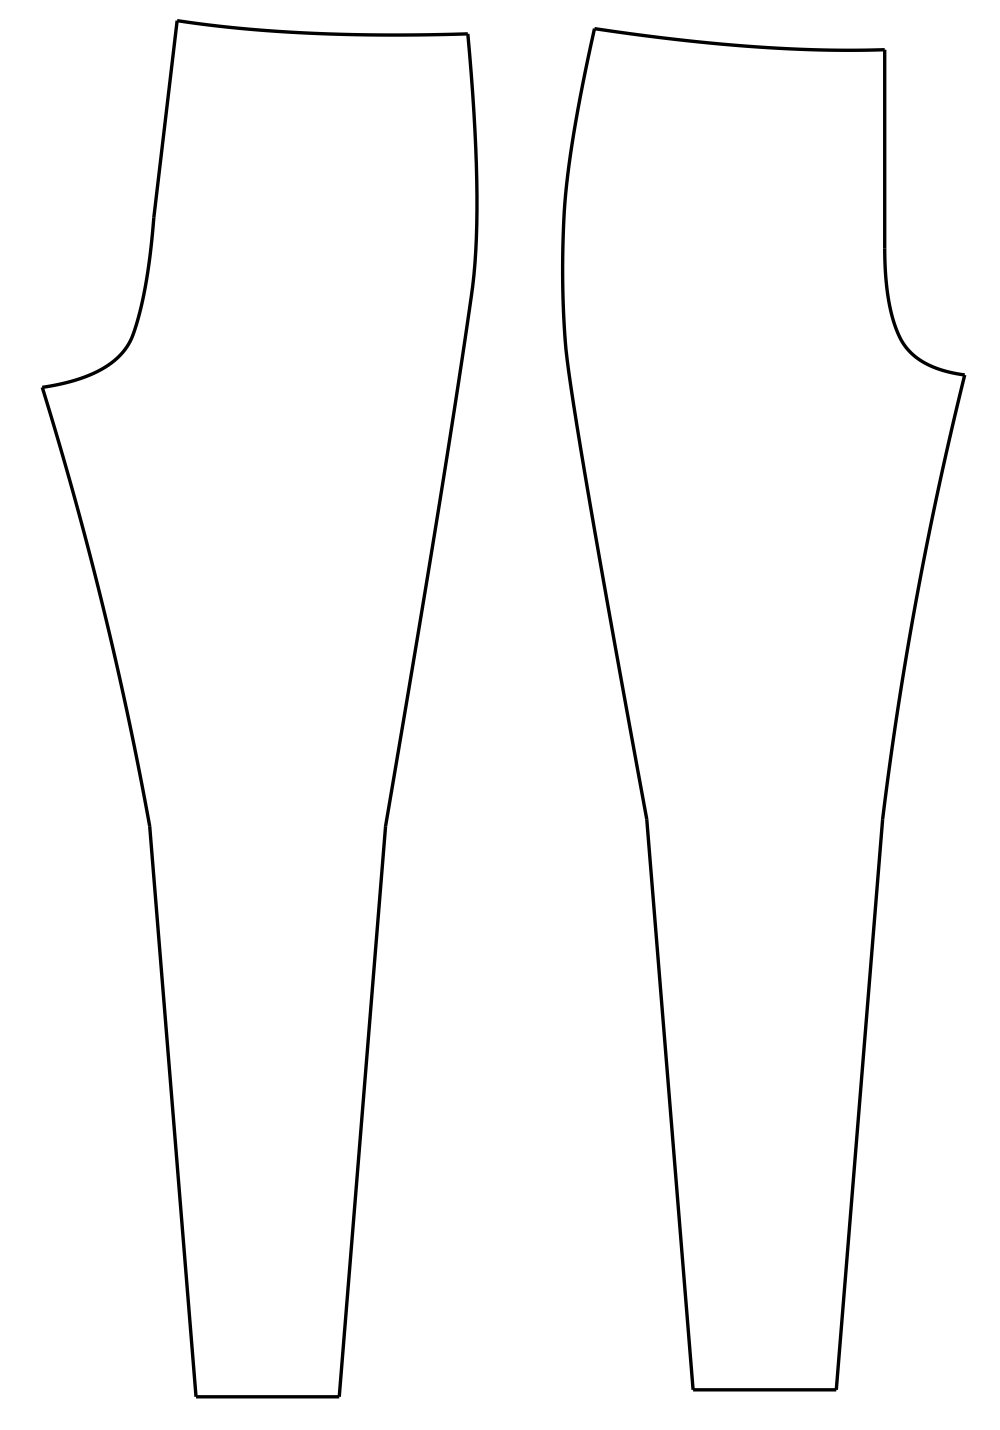
Leggings Pattern Pieces
Here is the arm marked with an underarm seam where it will be split.
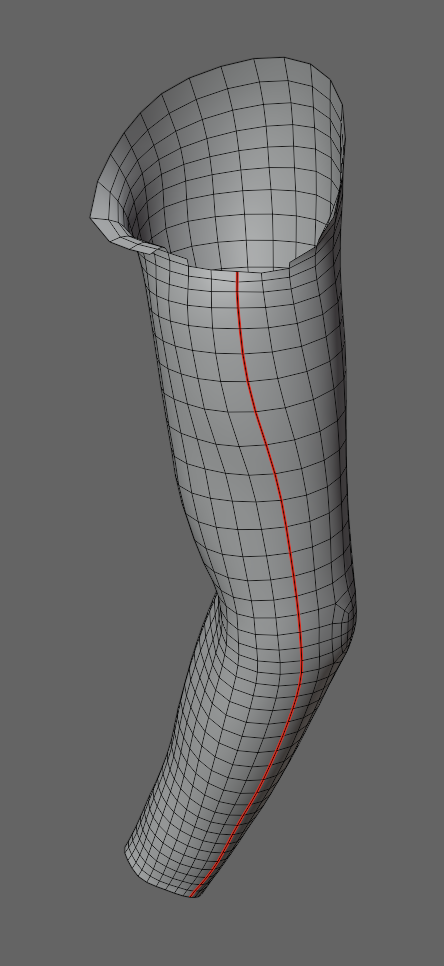
Arm Seam Marked
Here is the arm flattened with a sleeve pattern next to it. The correlation is amazing. You can see where the outline is higher in the center where it has to come up and over the shoulder. This is called the sleeve cap on the pattern. There are curvy dips to each side of the cap really show the shaping as the pattern goes up into the armpit underneath.
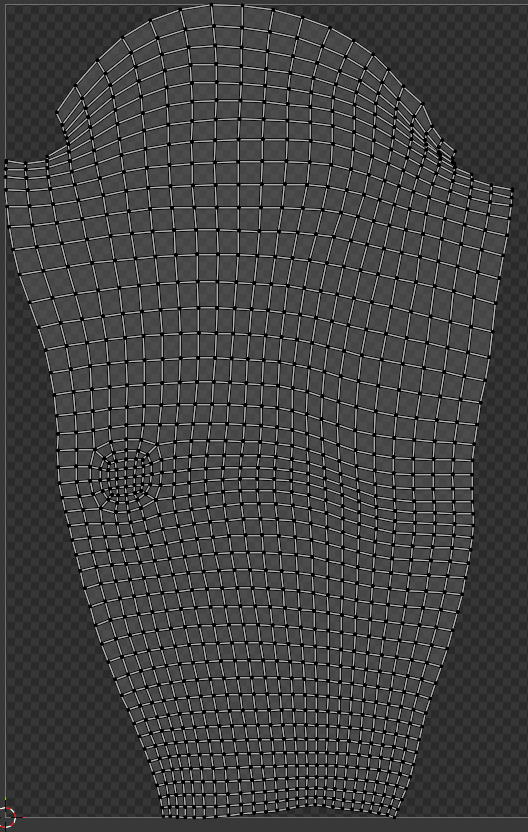
Arm Flattened / Sleeve Pattern
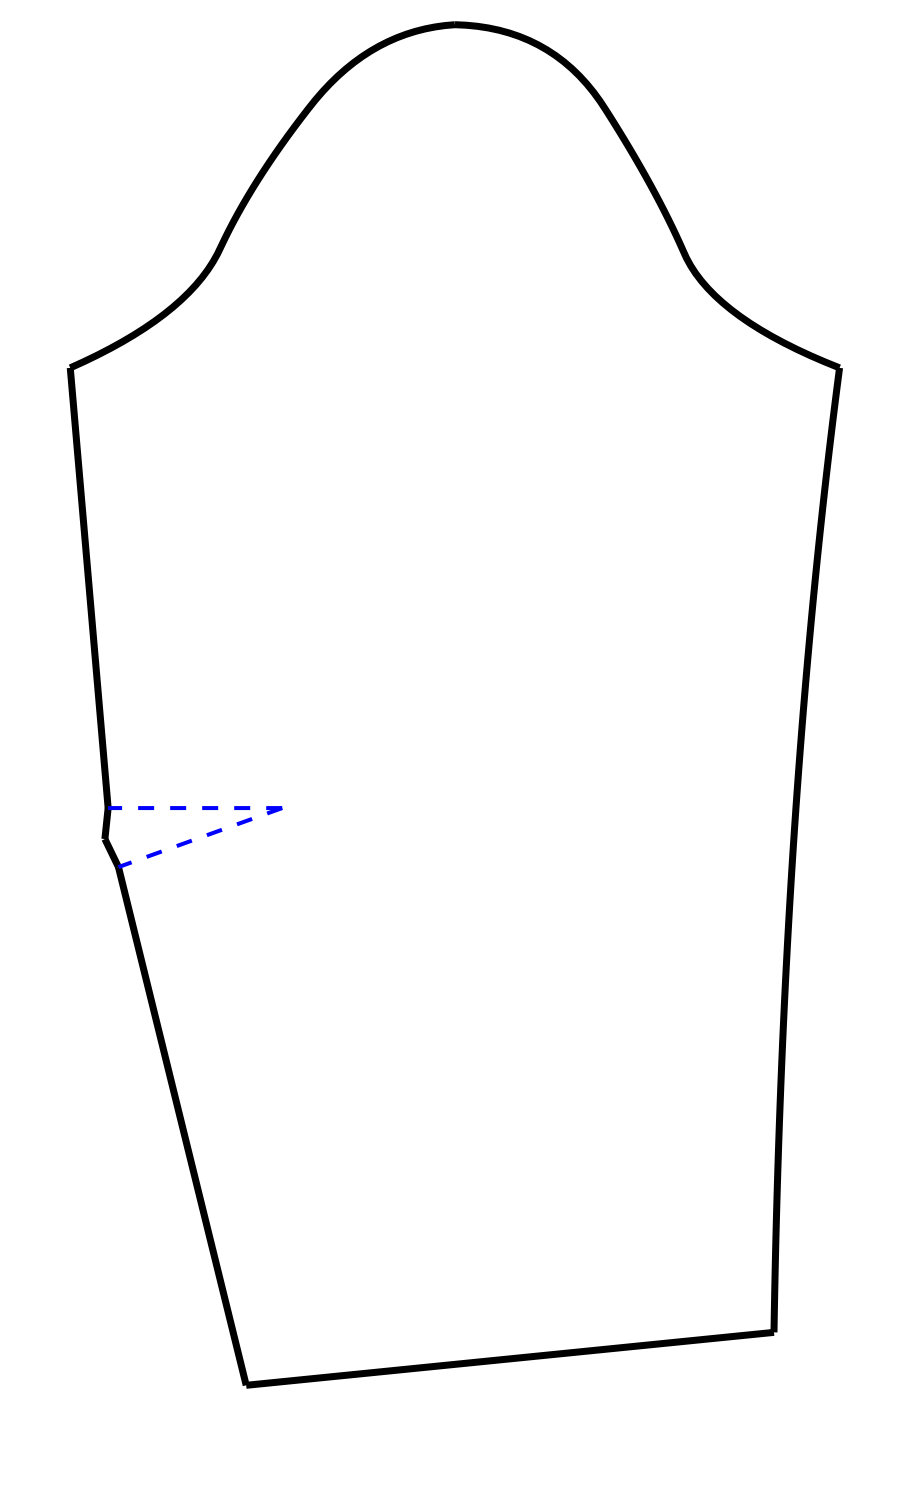
Sleeve Pattern Piece
Here is the back body torso. You can see where I’ve separated it from the front at the shoulder and side seam.
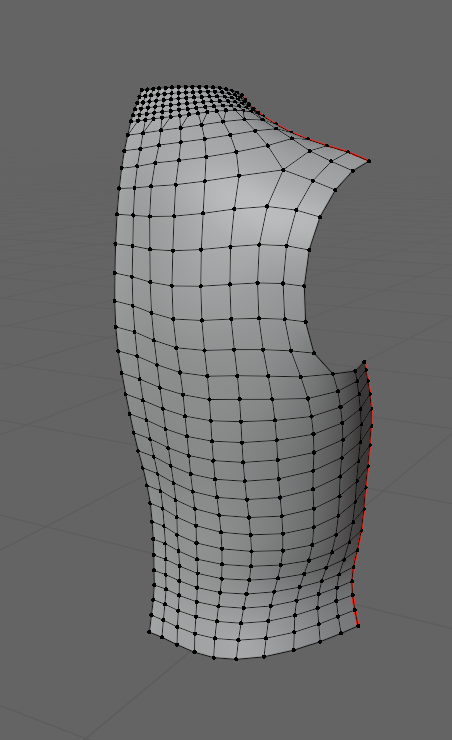
Back Seams Marked
Here is the back torso flattened next to a bodice back draft. These are nearly identical. The pattern has darts at the shoulder and waist for shaping.
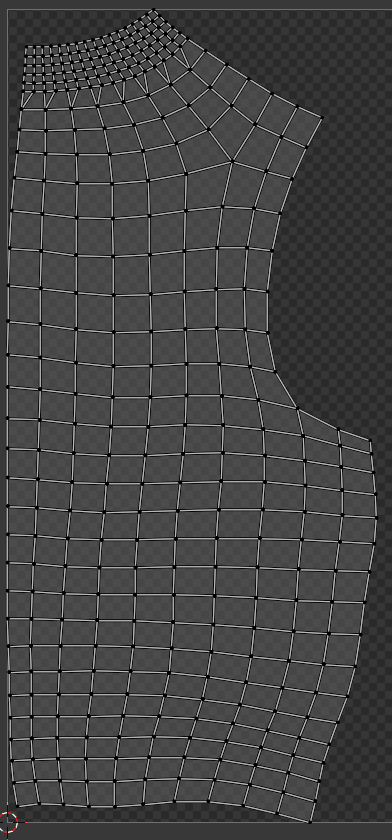
Back Flattened
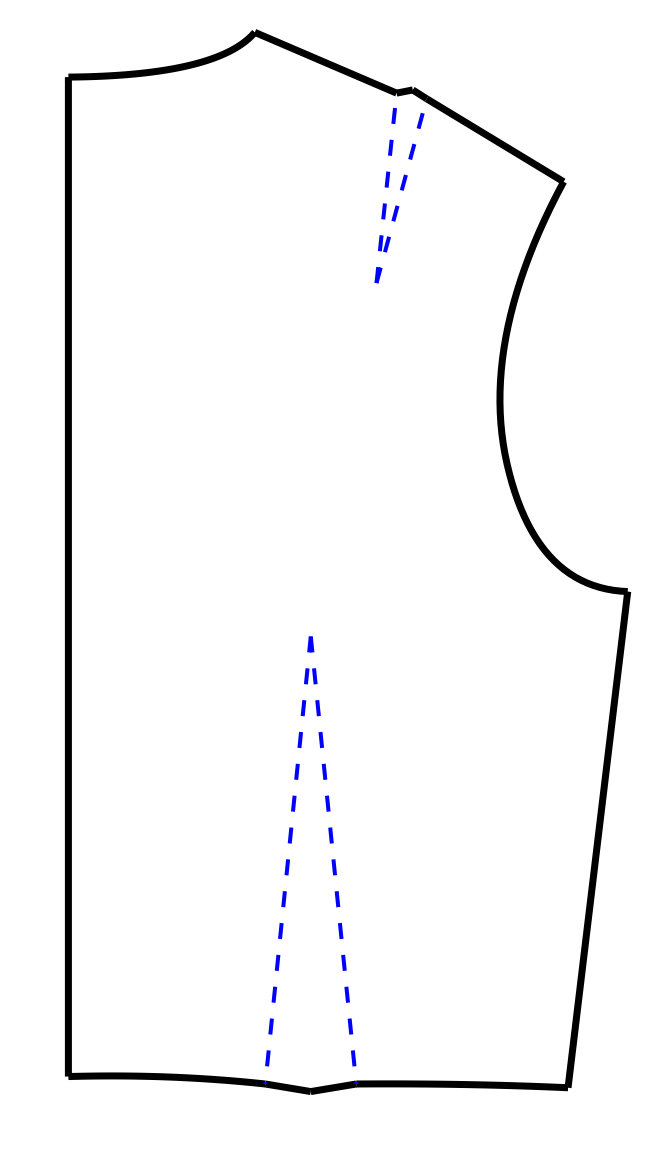
Back Pattern Piece
Here is the front torso flattened. Notice how much deeper a front armhole is as opposed to the back. Also, the pattern totally flayed out where I cut it for the bust. This highlights how much shaping can be achieved with darts. The bodice front pattern clearly shows a dart in the same location.
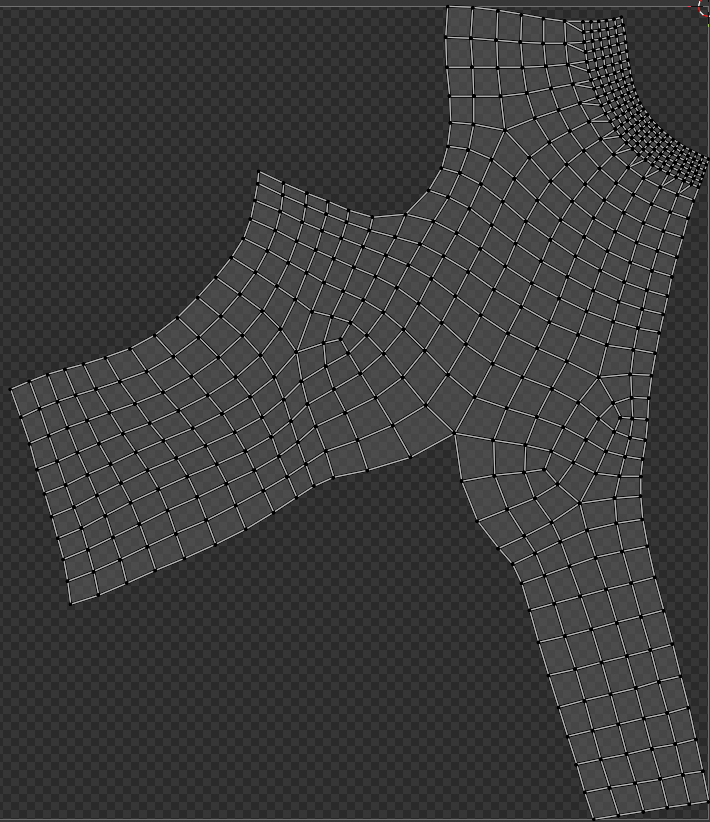
Front Flattened (Neckline top right)
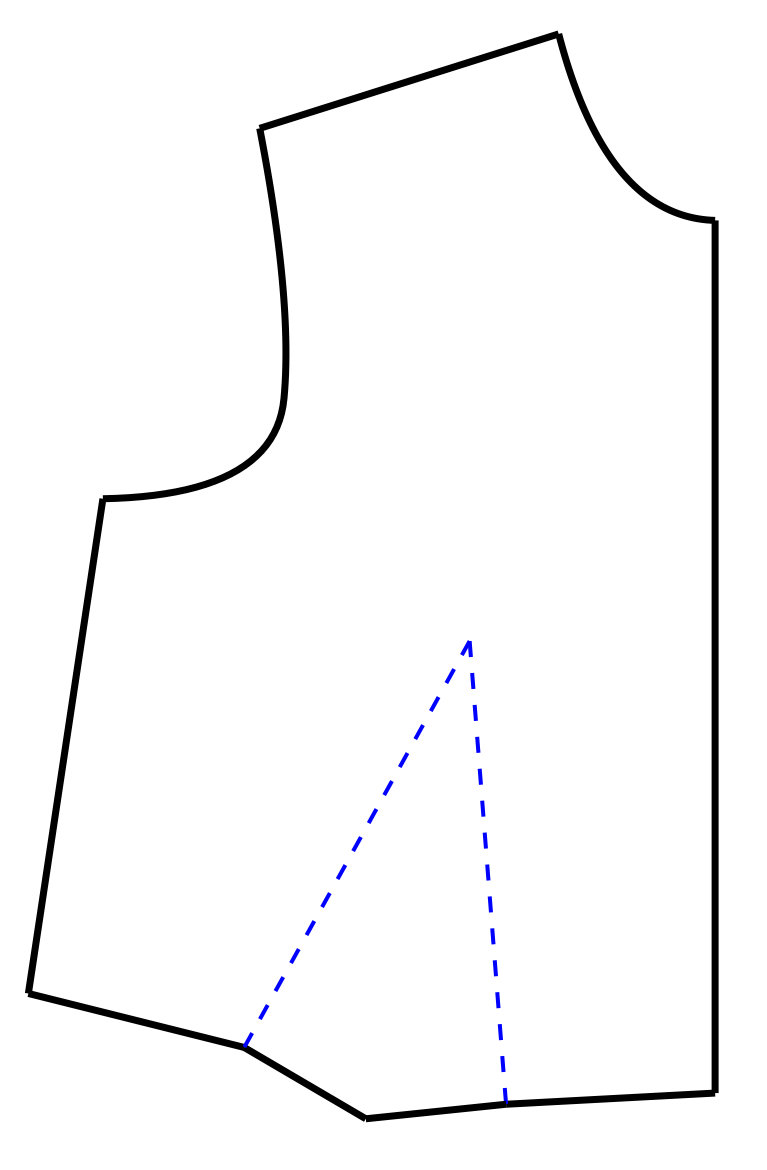
Front Pattern Piece
The fact that you can take an actual 3D body form and flatten it, resulting in nearly perfect “patterns” highlights the purpose of drafting. You are using a few special techniques, like darts and specifically placed seams, to make a flat piece of fabric fit the human form.
I hope these insights make drafting a bit easier, and a lot more fun, as we keep building.