Production Pattern Finishes
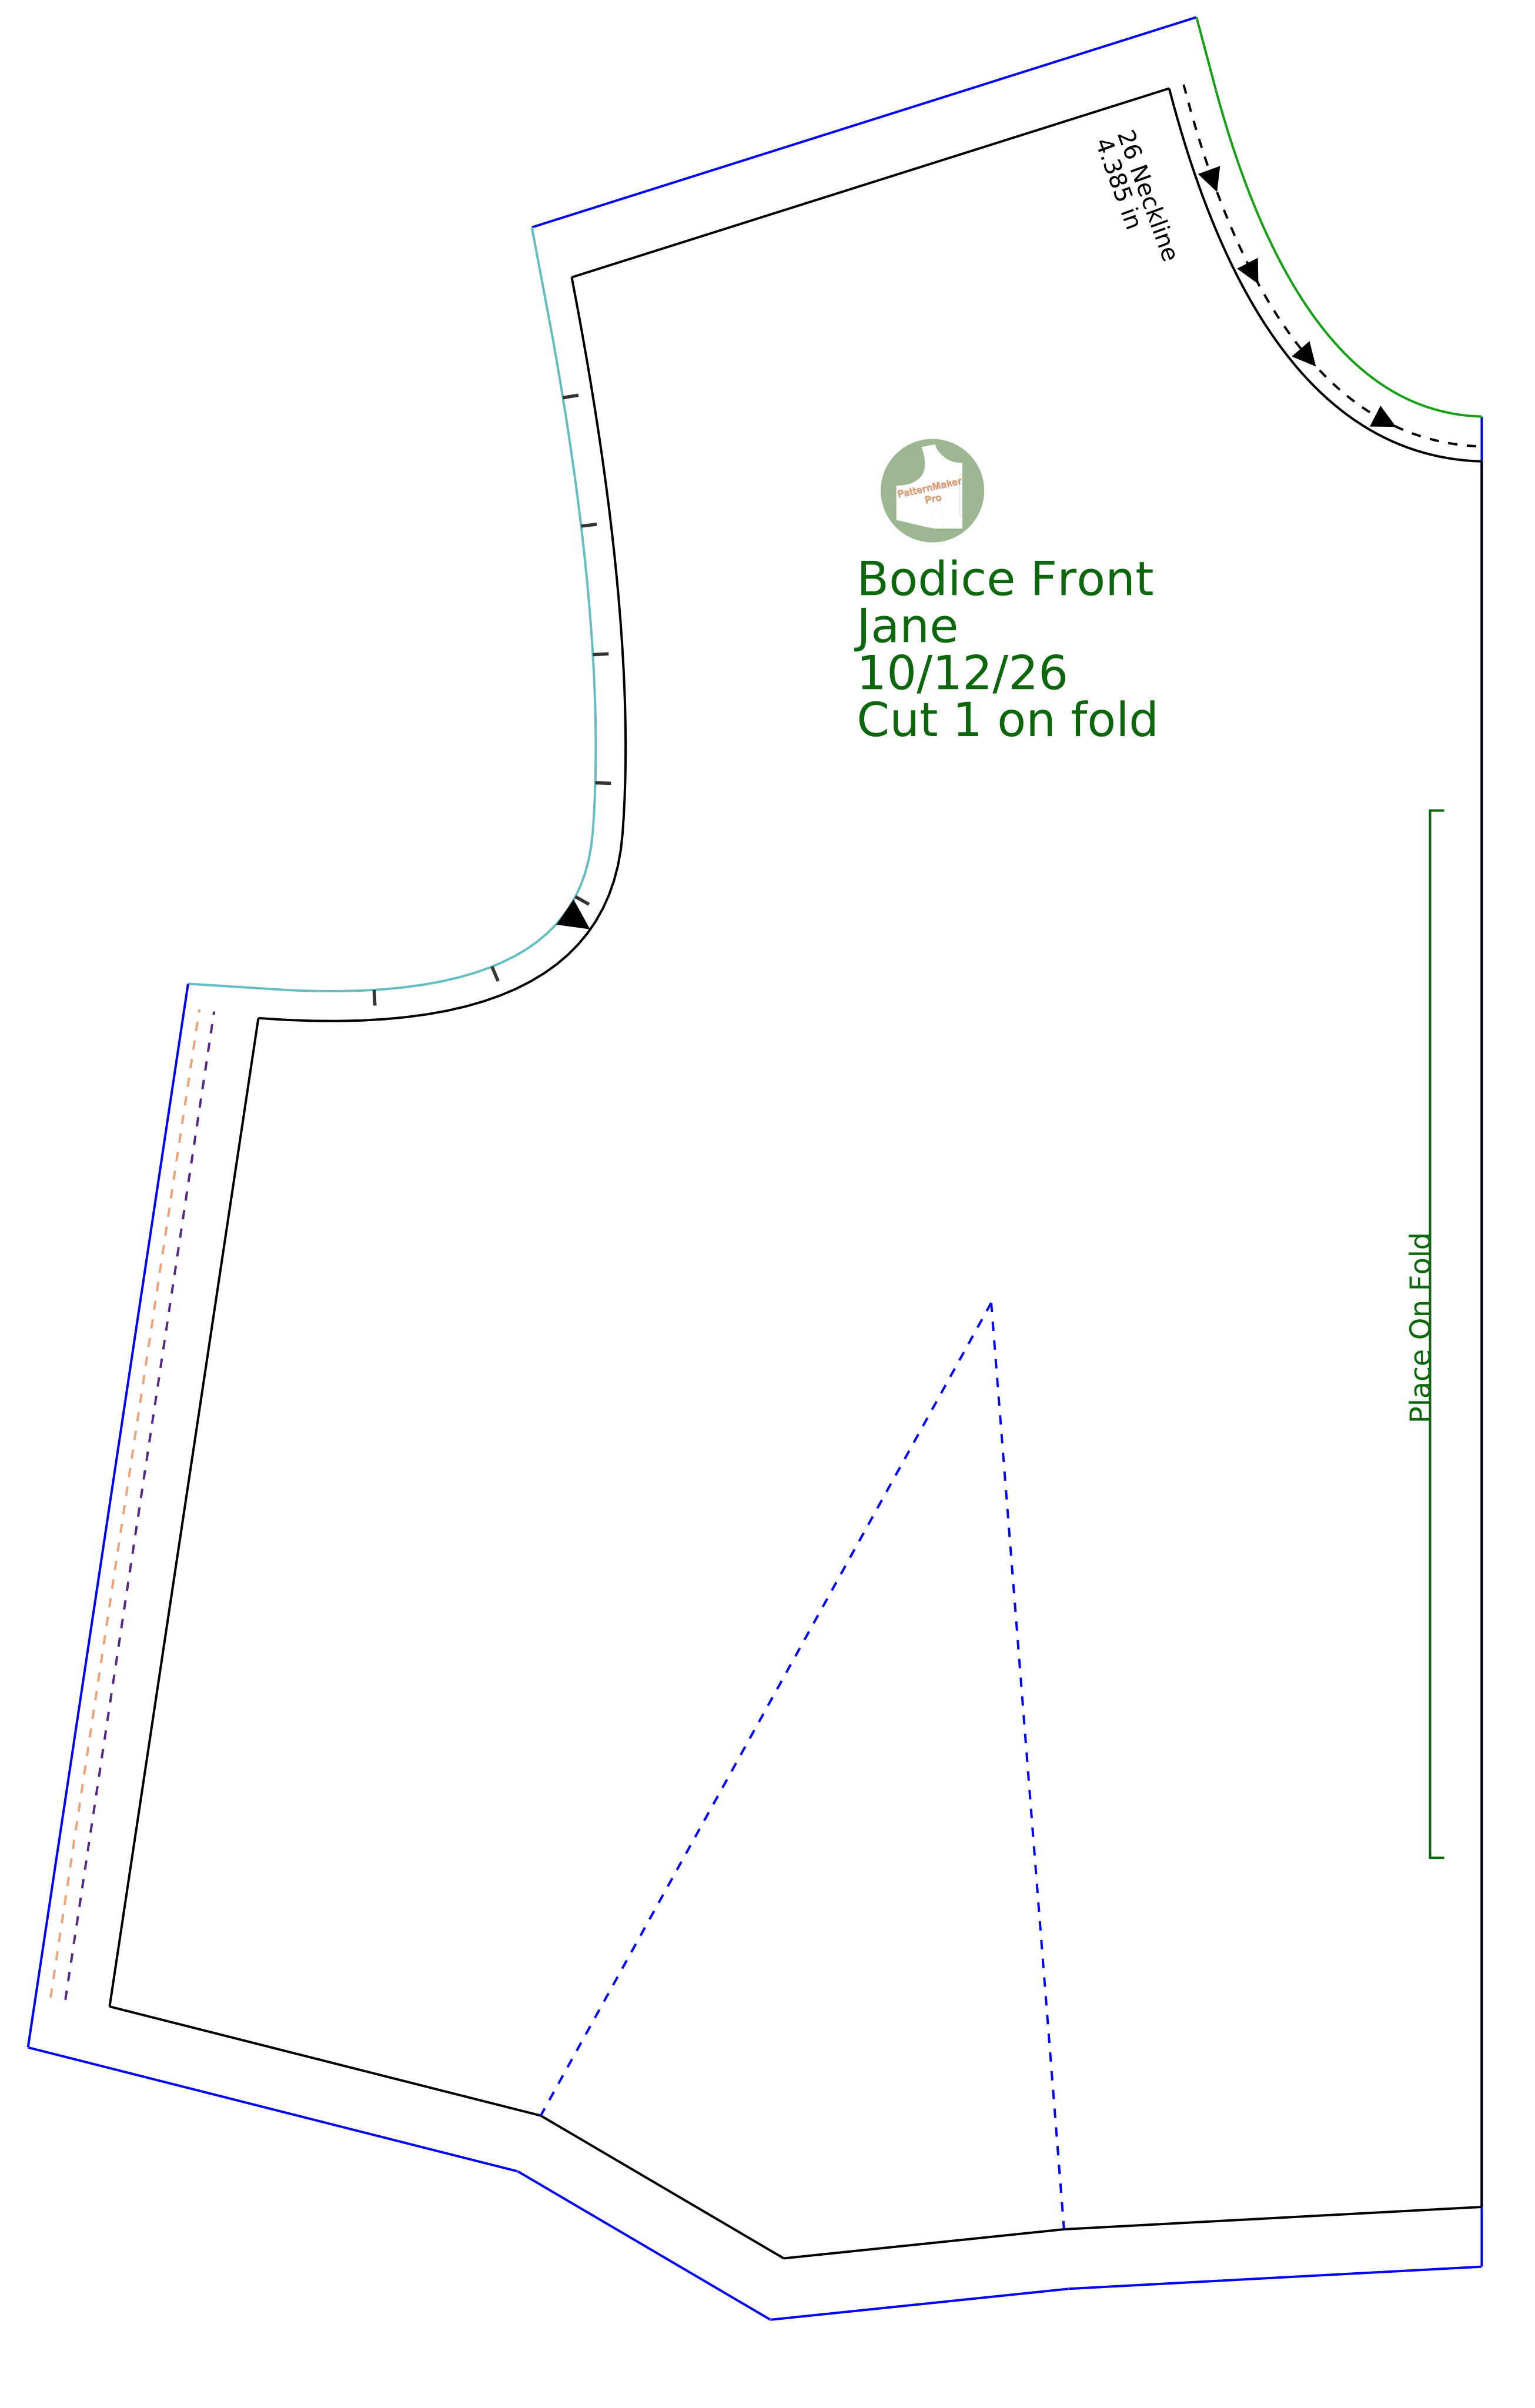
The difference between a working draft and a production-ready pattern lies in the details.
From directional staystitching to designated seam allowances, clear visual standards eliminate guesswork on the cutting table. Follow along as we master the art of finishing patterns with the technical annotations professional garment construction demands.
If you don't have a draft to start from, download the 103 bodice front, back and sleeve SVG as a starting point. Learn how to use the Import PMP SVG tool.

New to these instructions? Practice Basics explains point movement, how to read each step and contains other helpful tips.
Colors & Styles
While the colors in this reference sheet were chosen to illustrate the clarity of visual coding, your design standards are up to you. Take advantage of PatternMaker Pro’s Add Custom Style/Color tool to build a dedicated styling palette that matches your brand or studio workflow.
This is especially useful when a design has variable seam allowances, like the 3/8" (10 mm) neckline and 1/4" (6 mm) armhole here. Give each width its own line color or dash style, and you can tell the edges apart at a glance. You are never limited to the standard presets. PatternMaker Pro lets you choose from over 16 million colors and combine them with ten dash patterns. See the Edit Custom Styles tool for details.
Pattern Markings & Line Legend
The last page of this instruction set includes a sample legend. You may want to include something similar with your pattern sewing instructions.
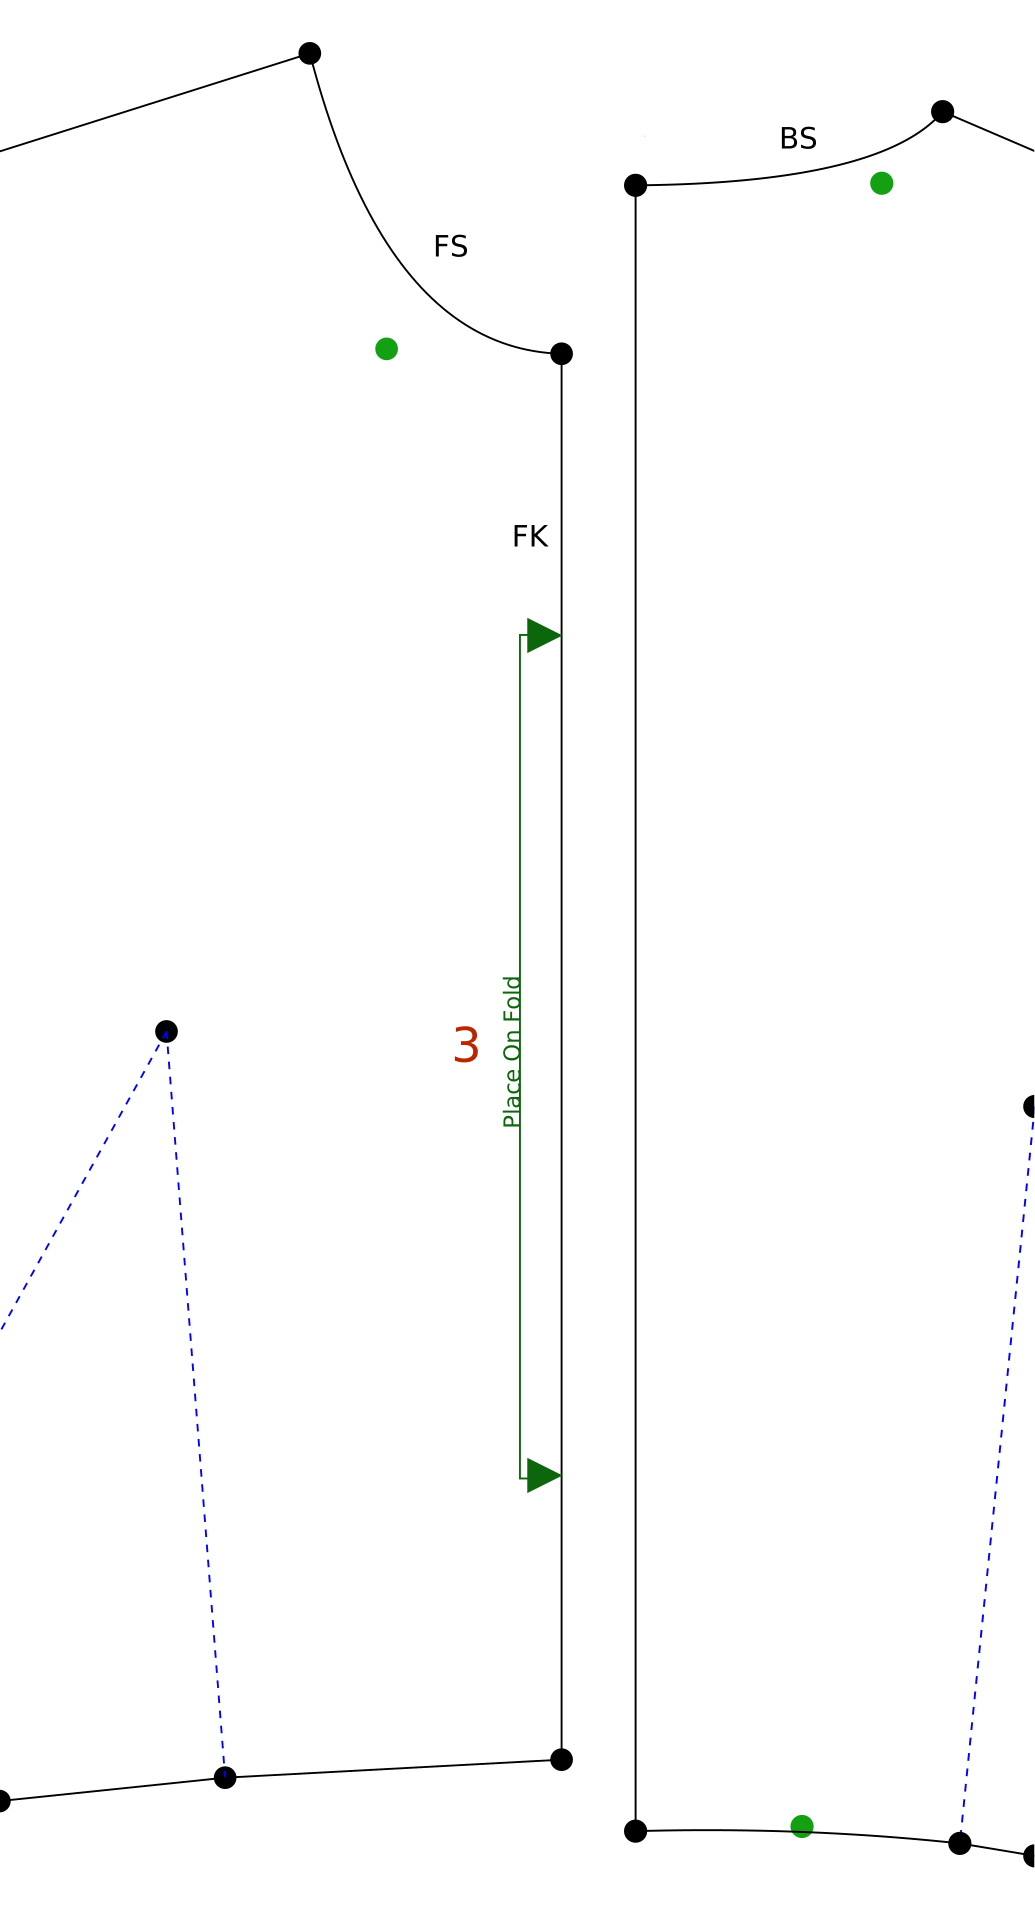
 Finish > Set Seam Allowance Defaults
 Finish > Change Line/Curve Seam Allowance
 Finish > Add Cut on FoldFinish > Change Line/Curve Seam Allowance
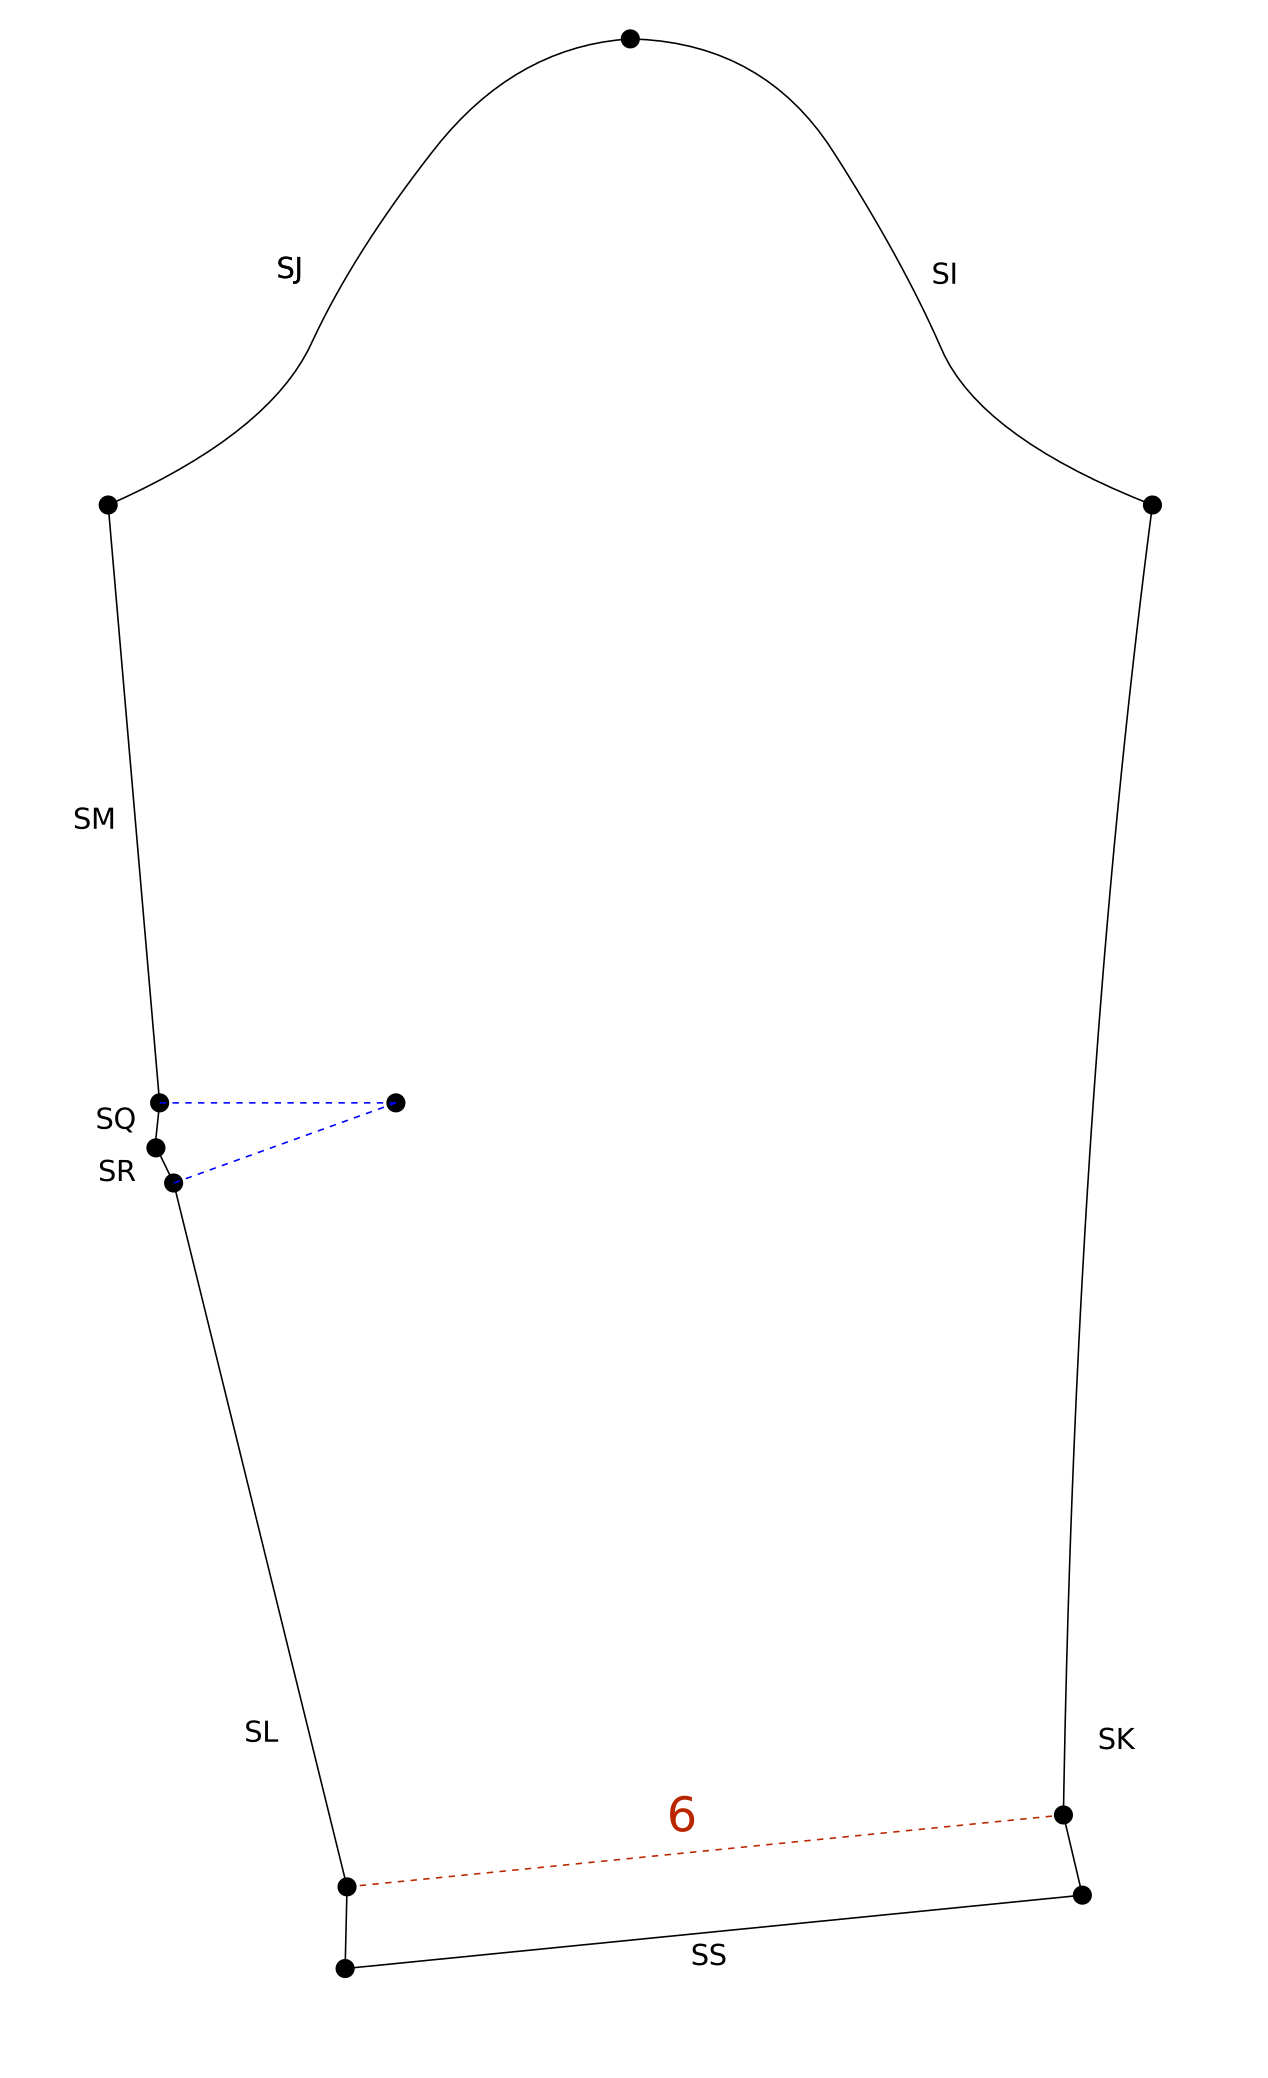 Finish > Change Line/Curve Seam Allowance
 Process > Add HemFinish > Change Line/Curve Seam Allowance
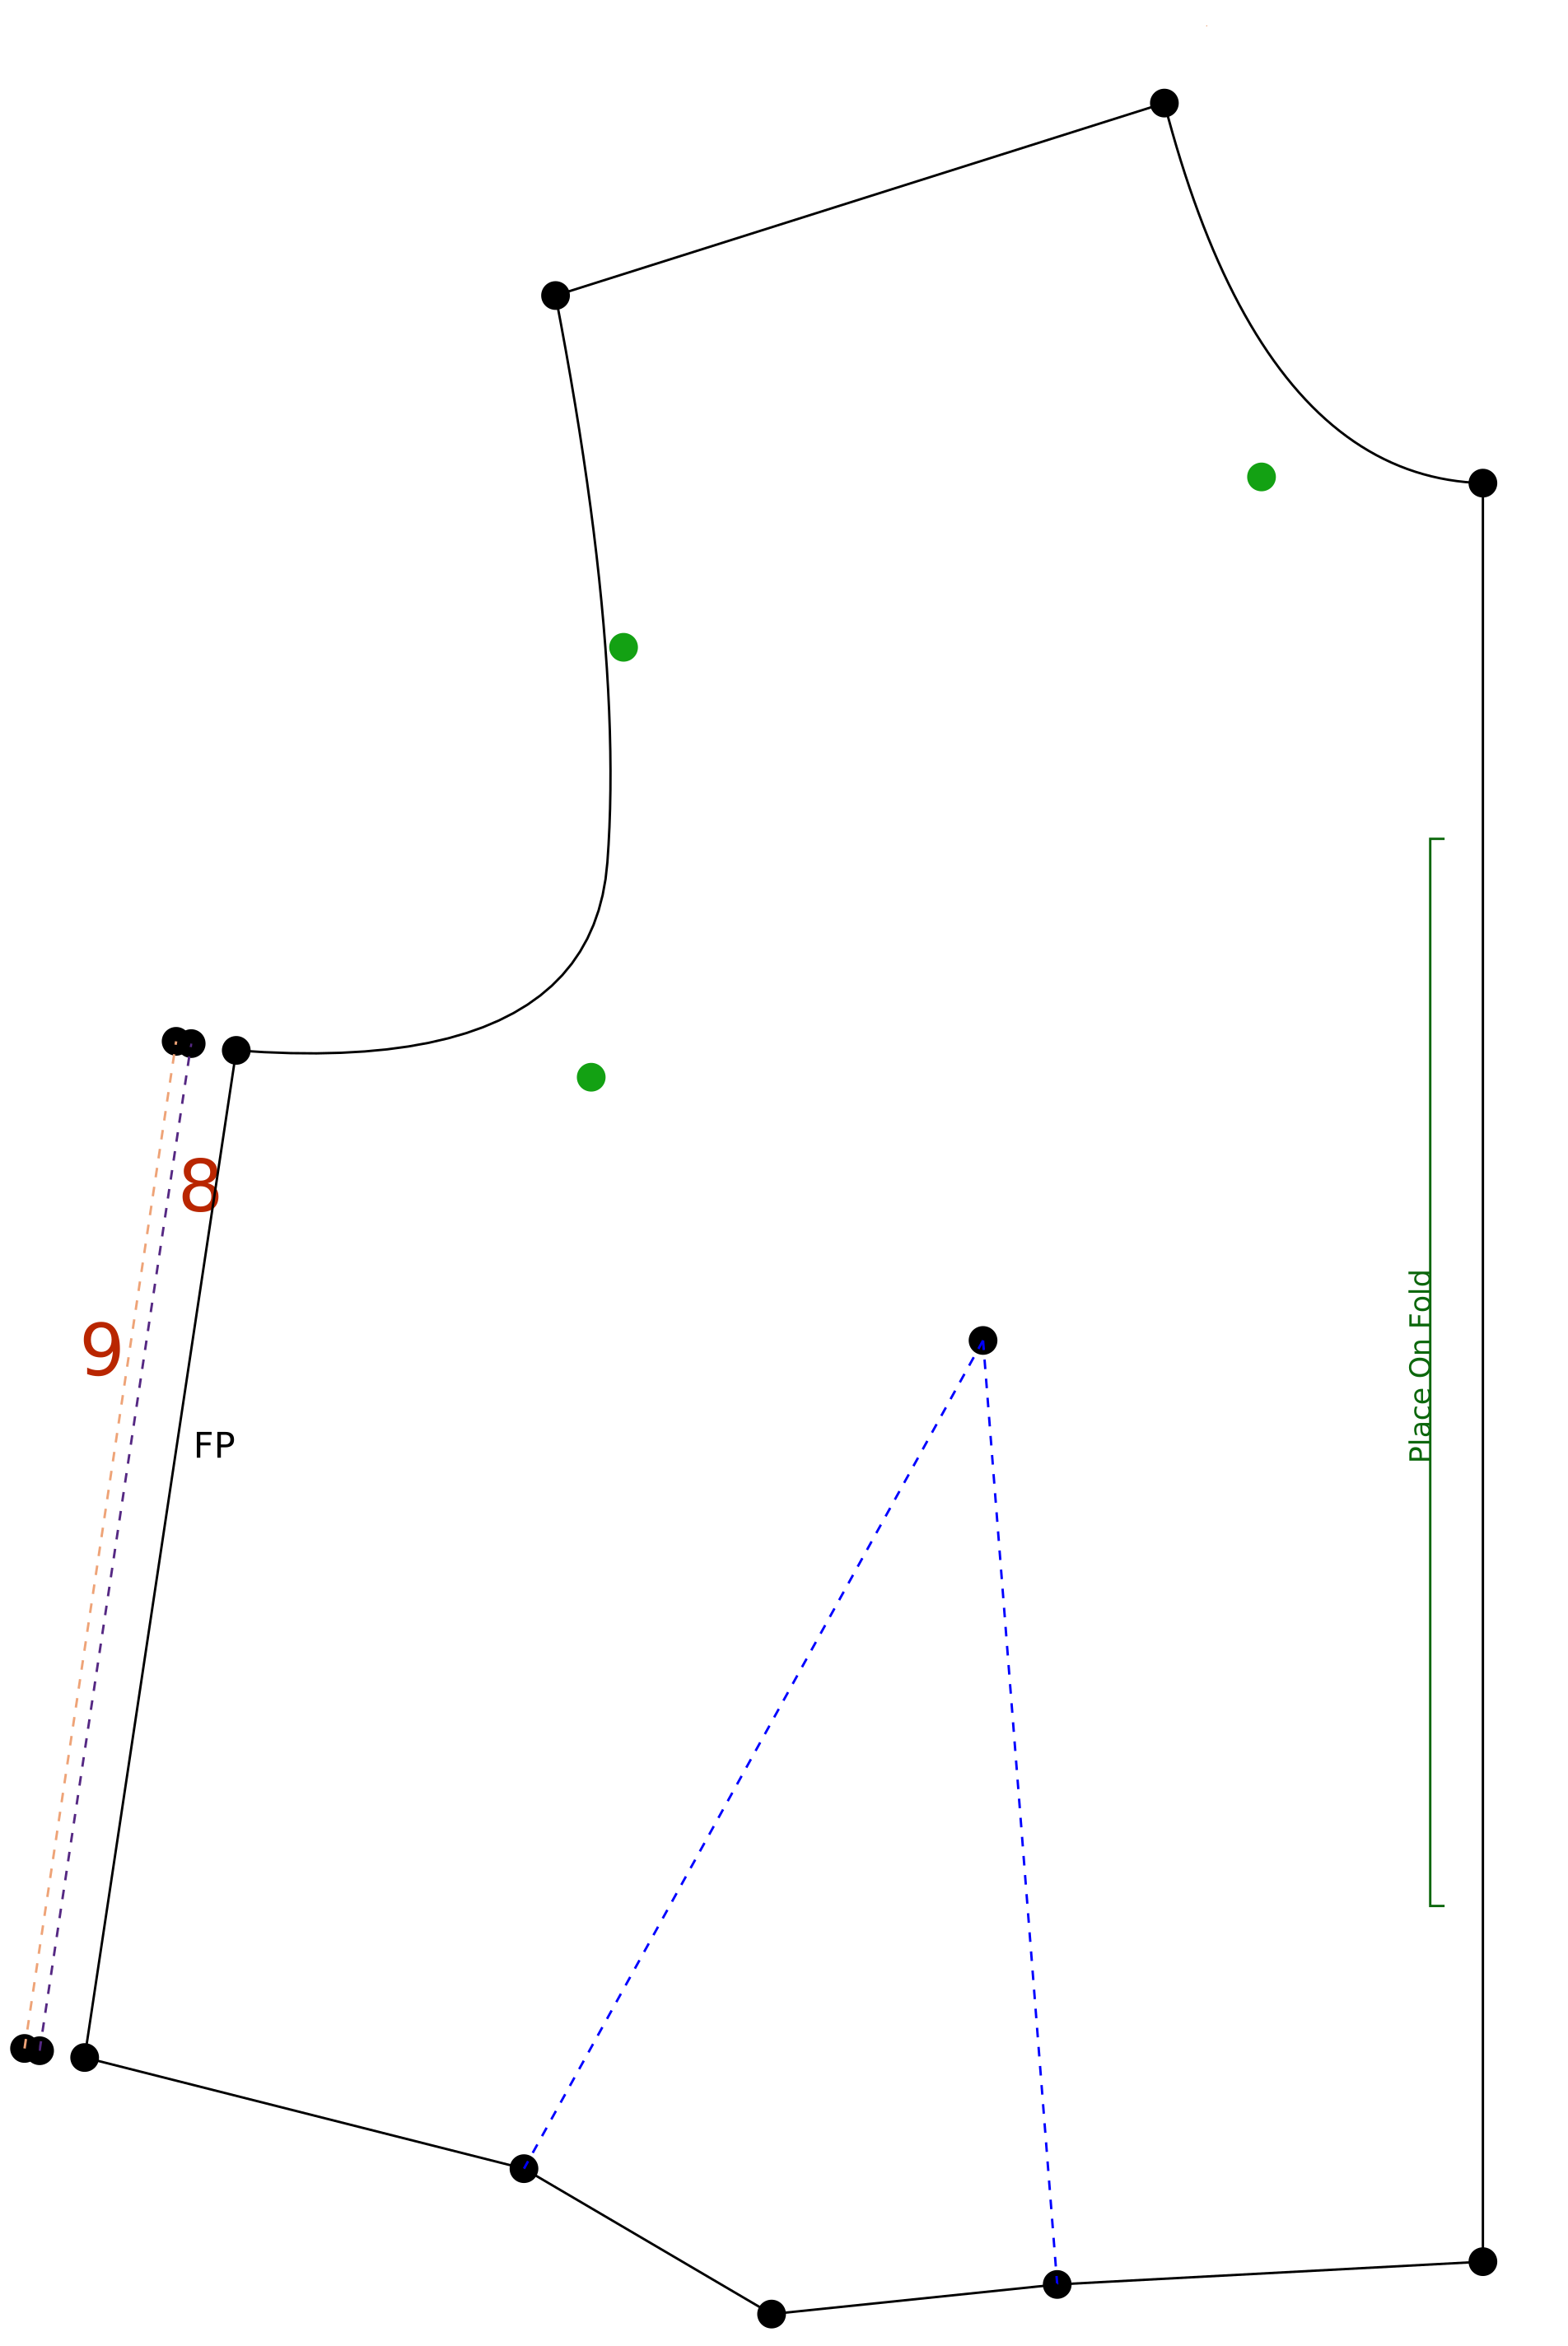
 Lines > Offset LineLines > Offset Line
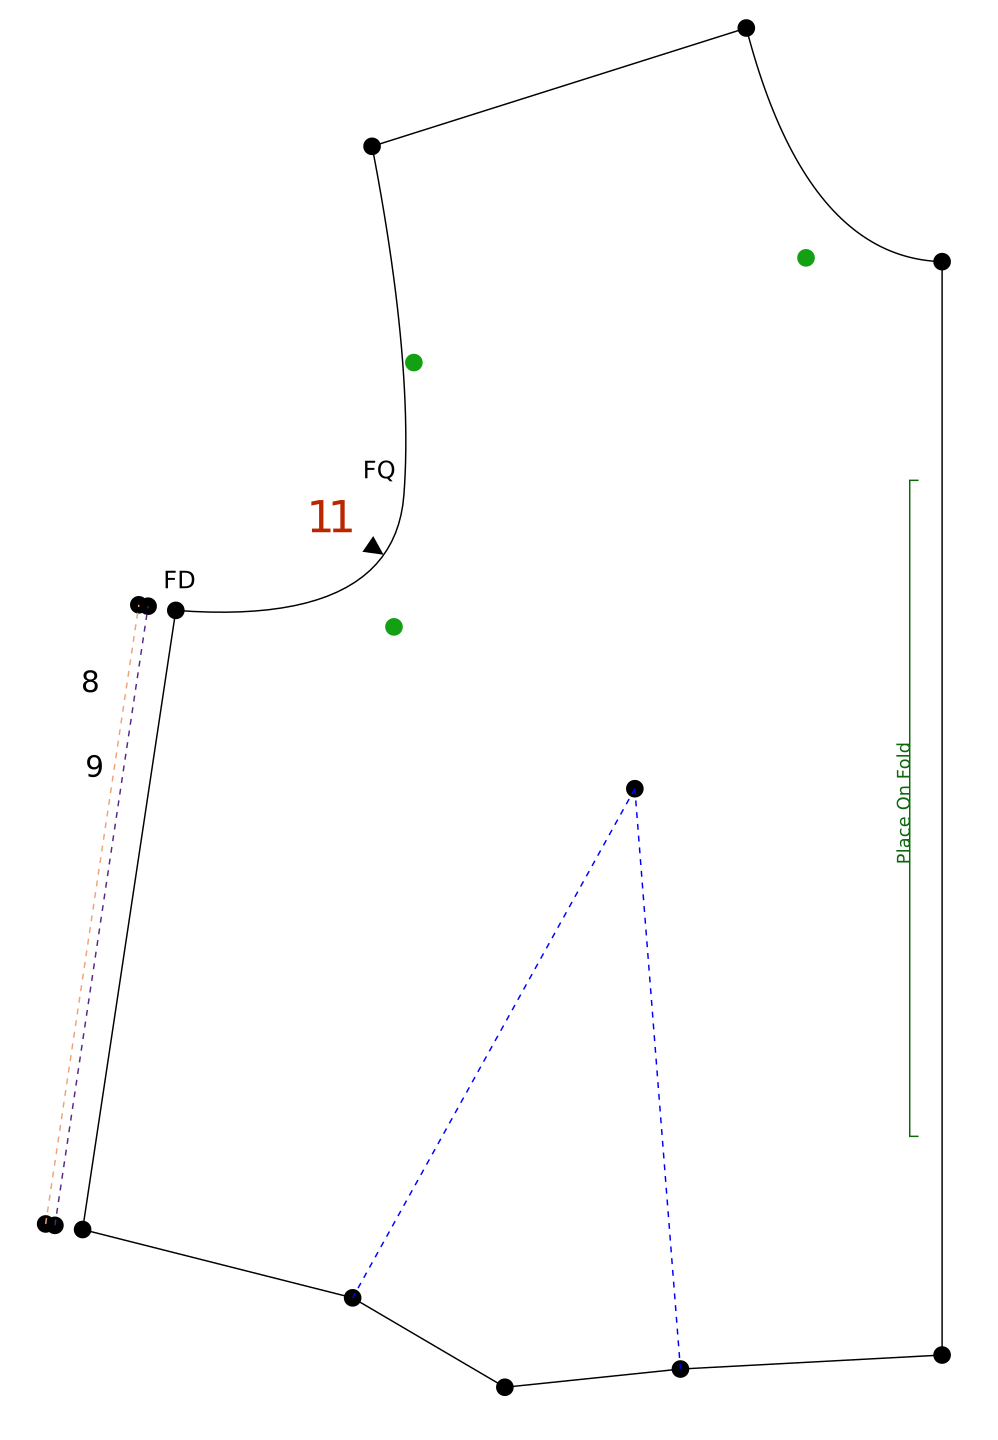
 Finish > Add NotchFinish > Add NotchFinish > Add Notch
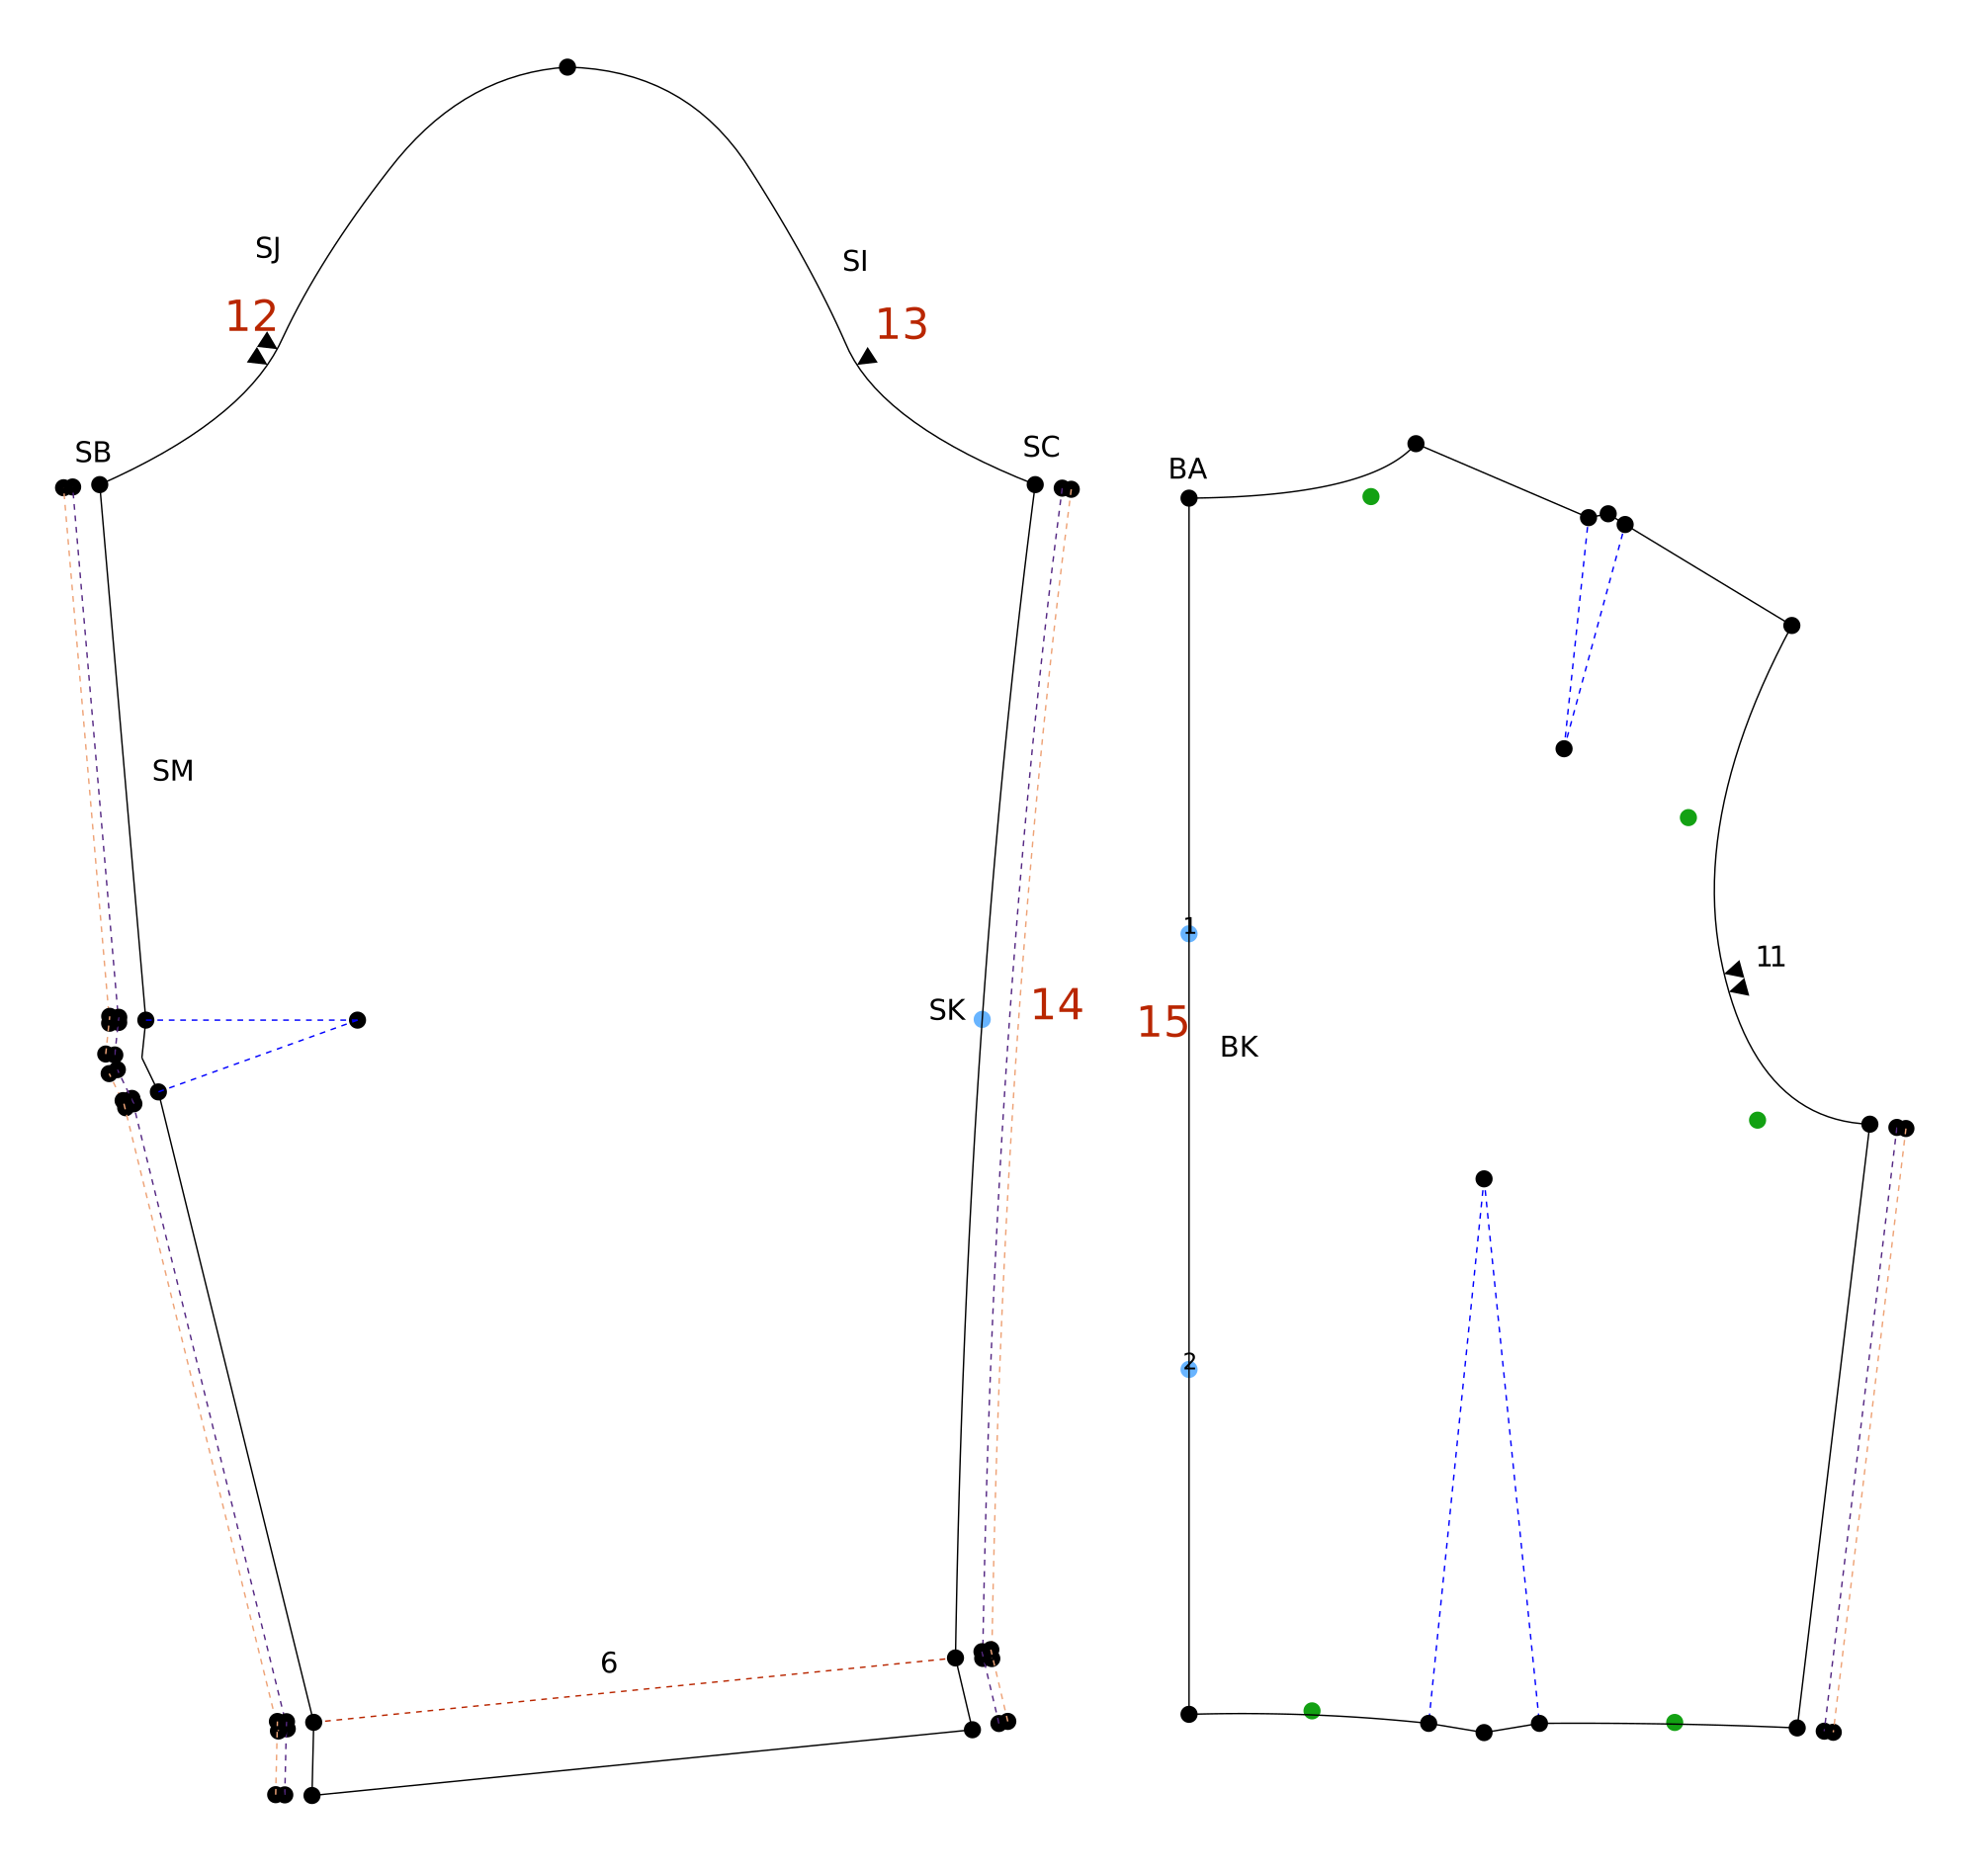 Finish > Add Notch
 Points > Add Point on Line/Curve
 Finish > Add Alignment Marks
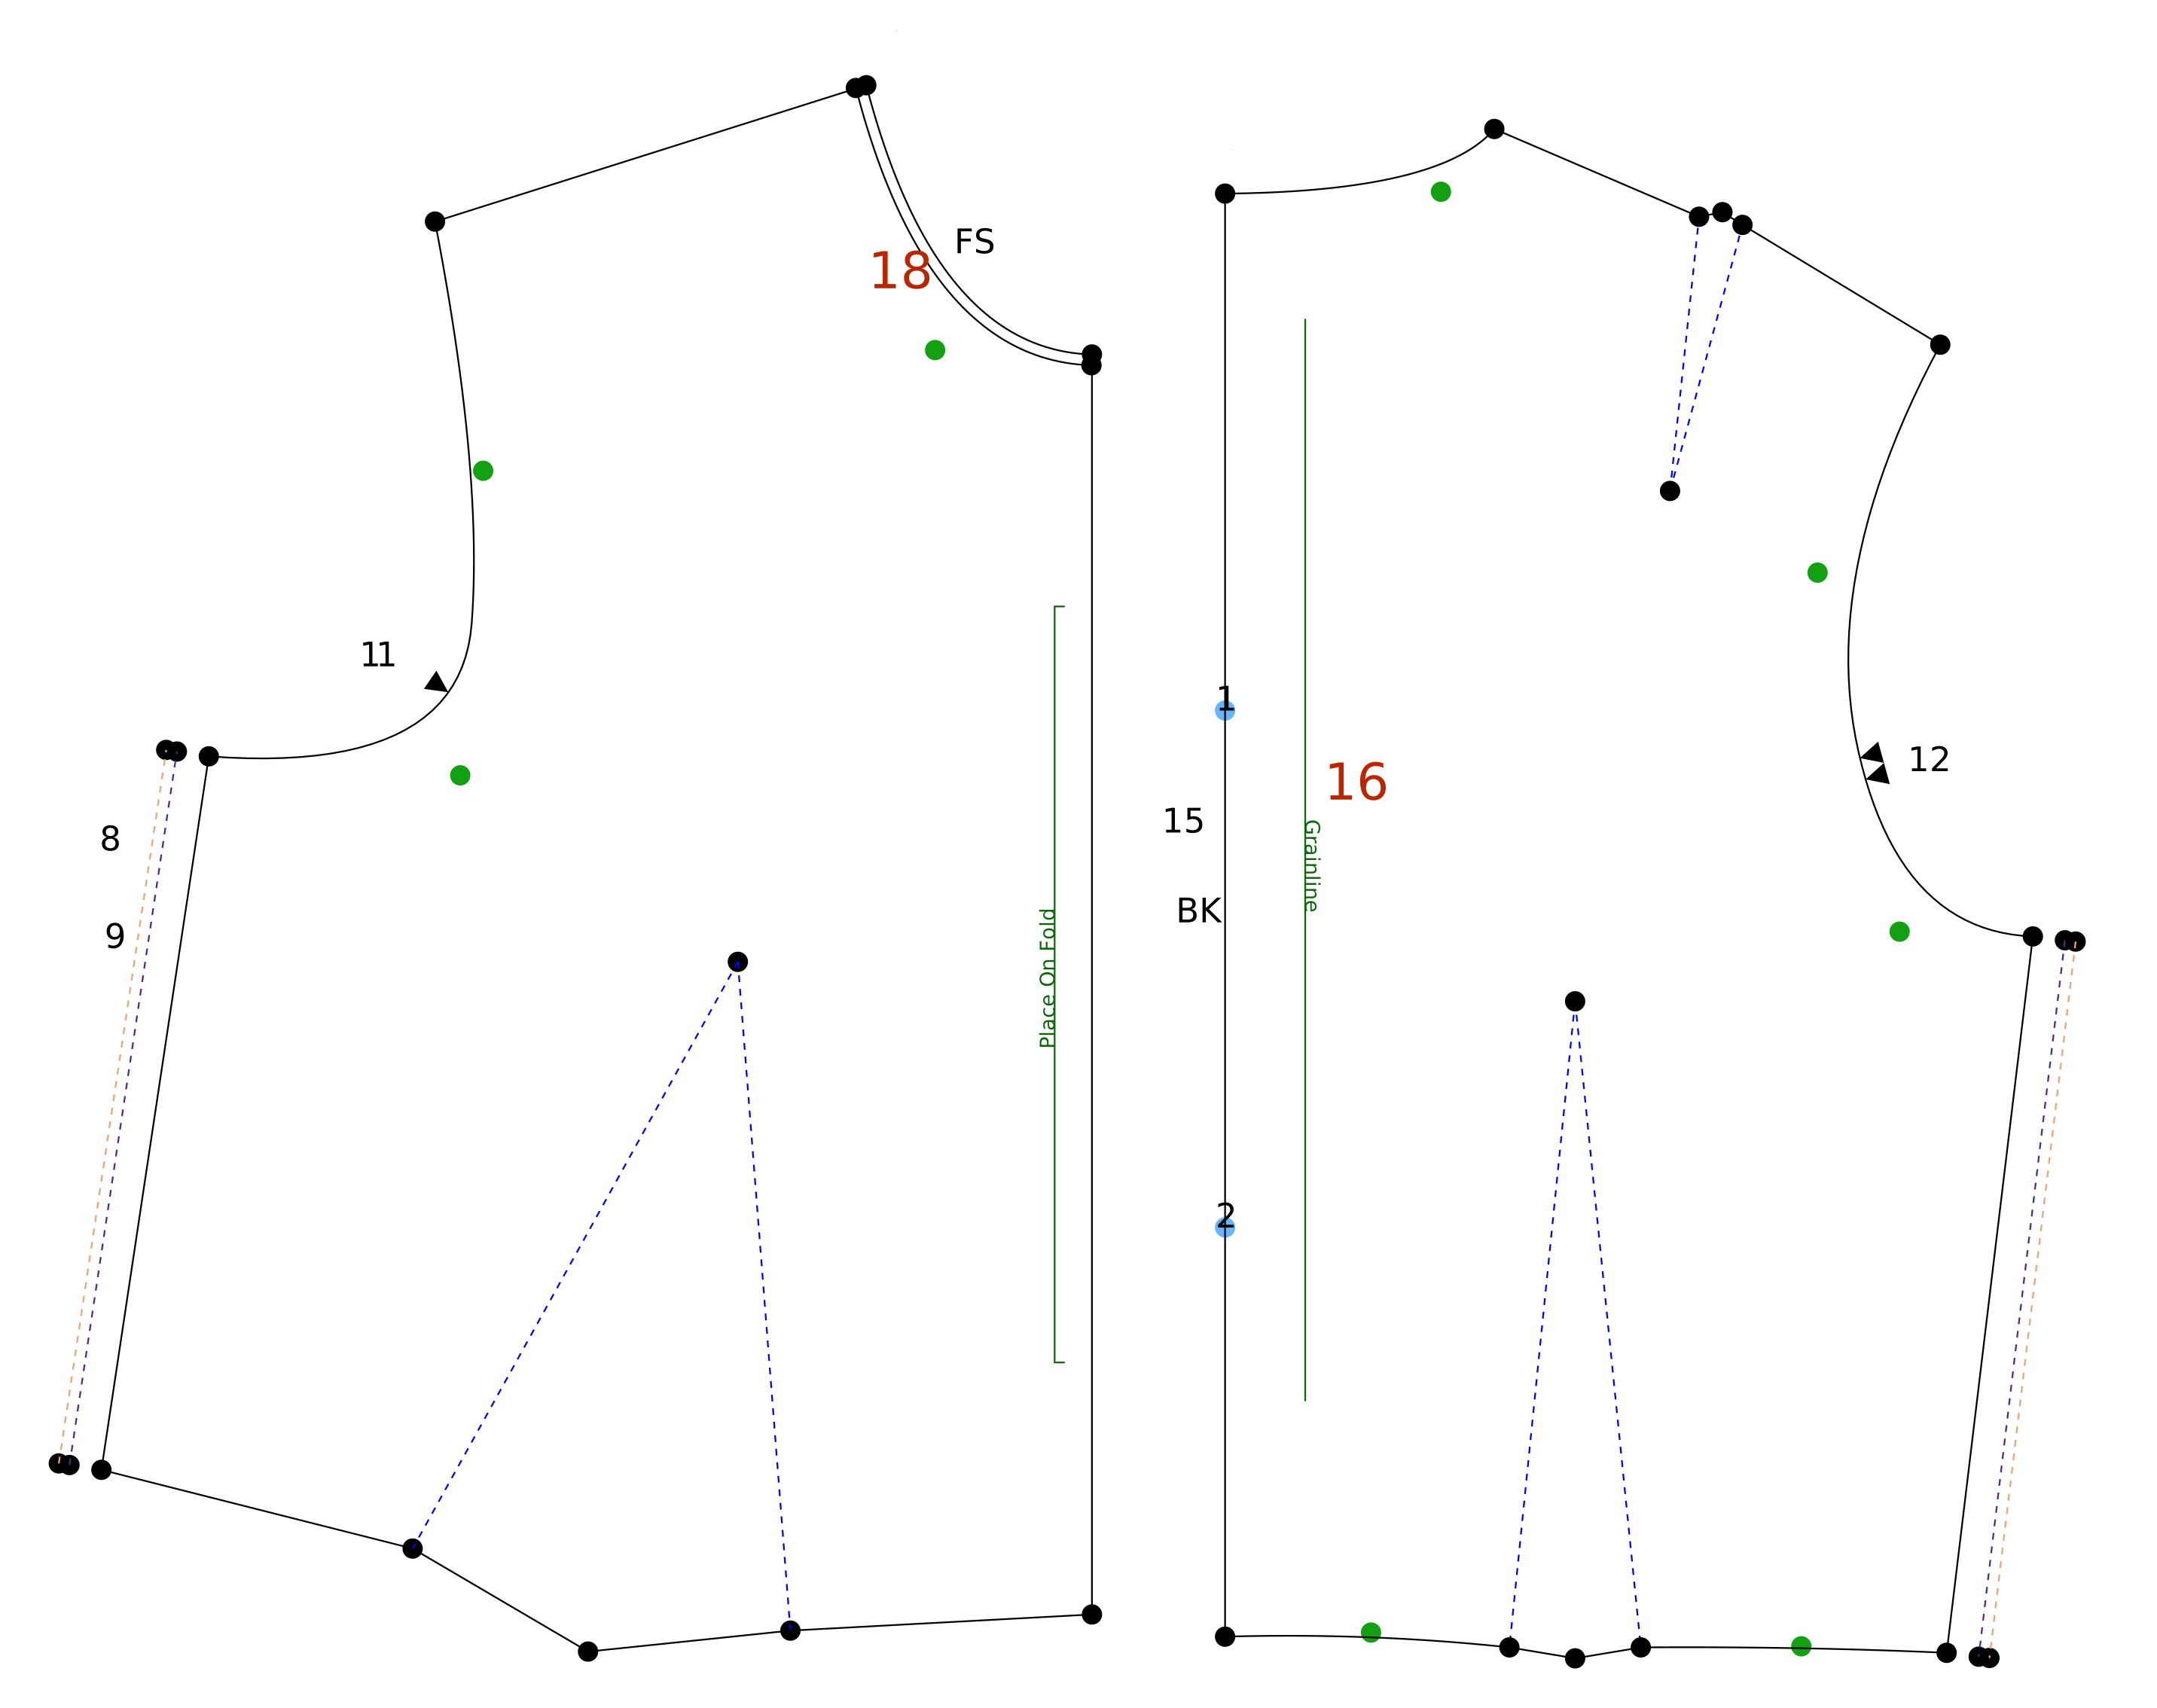
 Finish > Add GrainlineFinish > Add Grainline
 Curves > Offset Curve
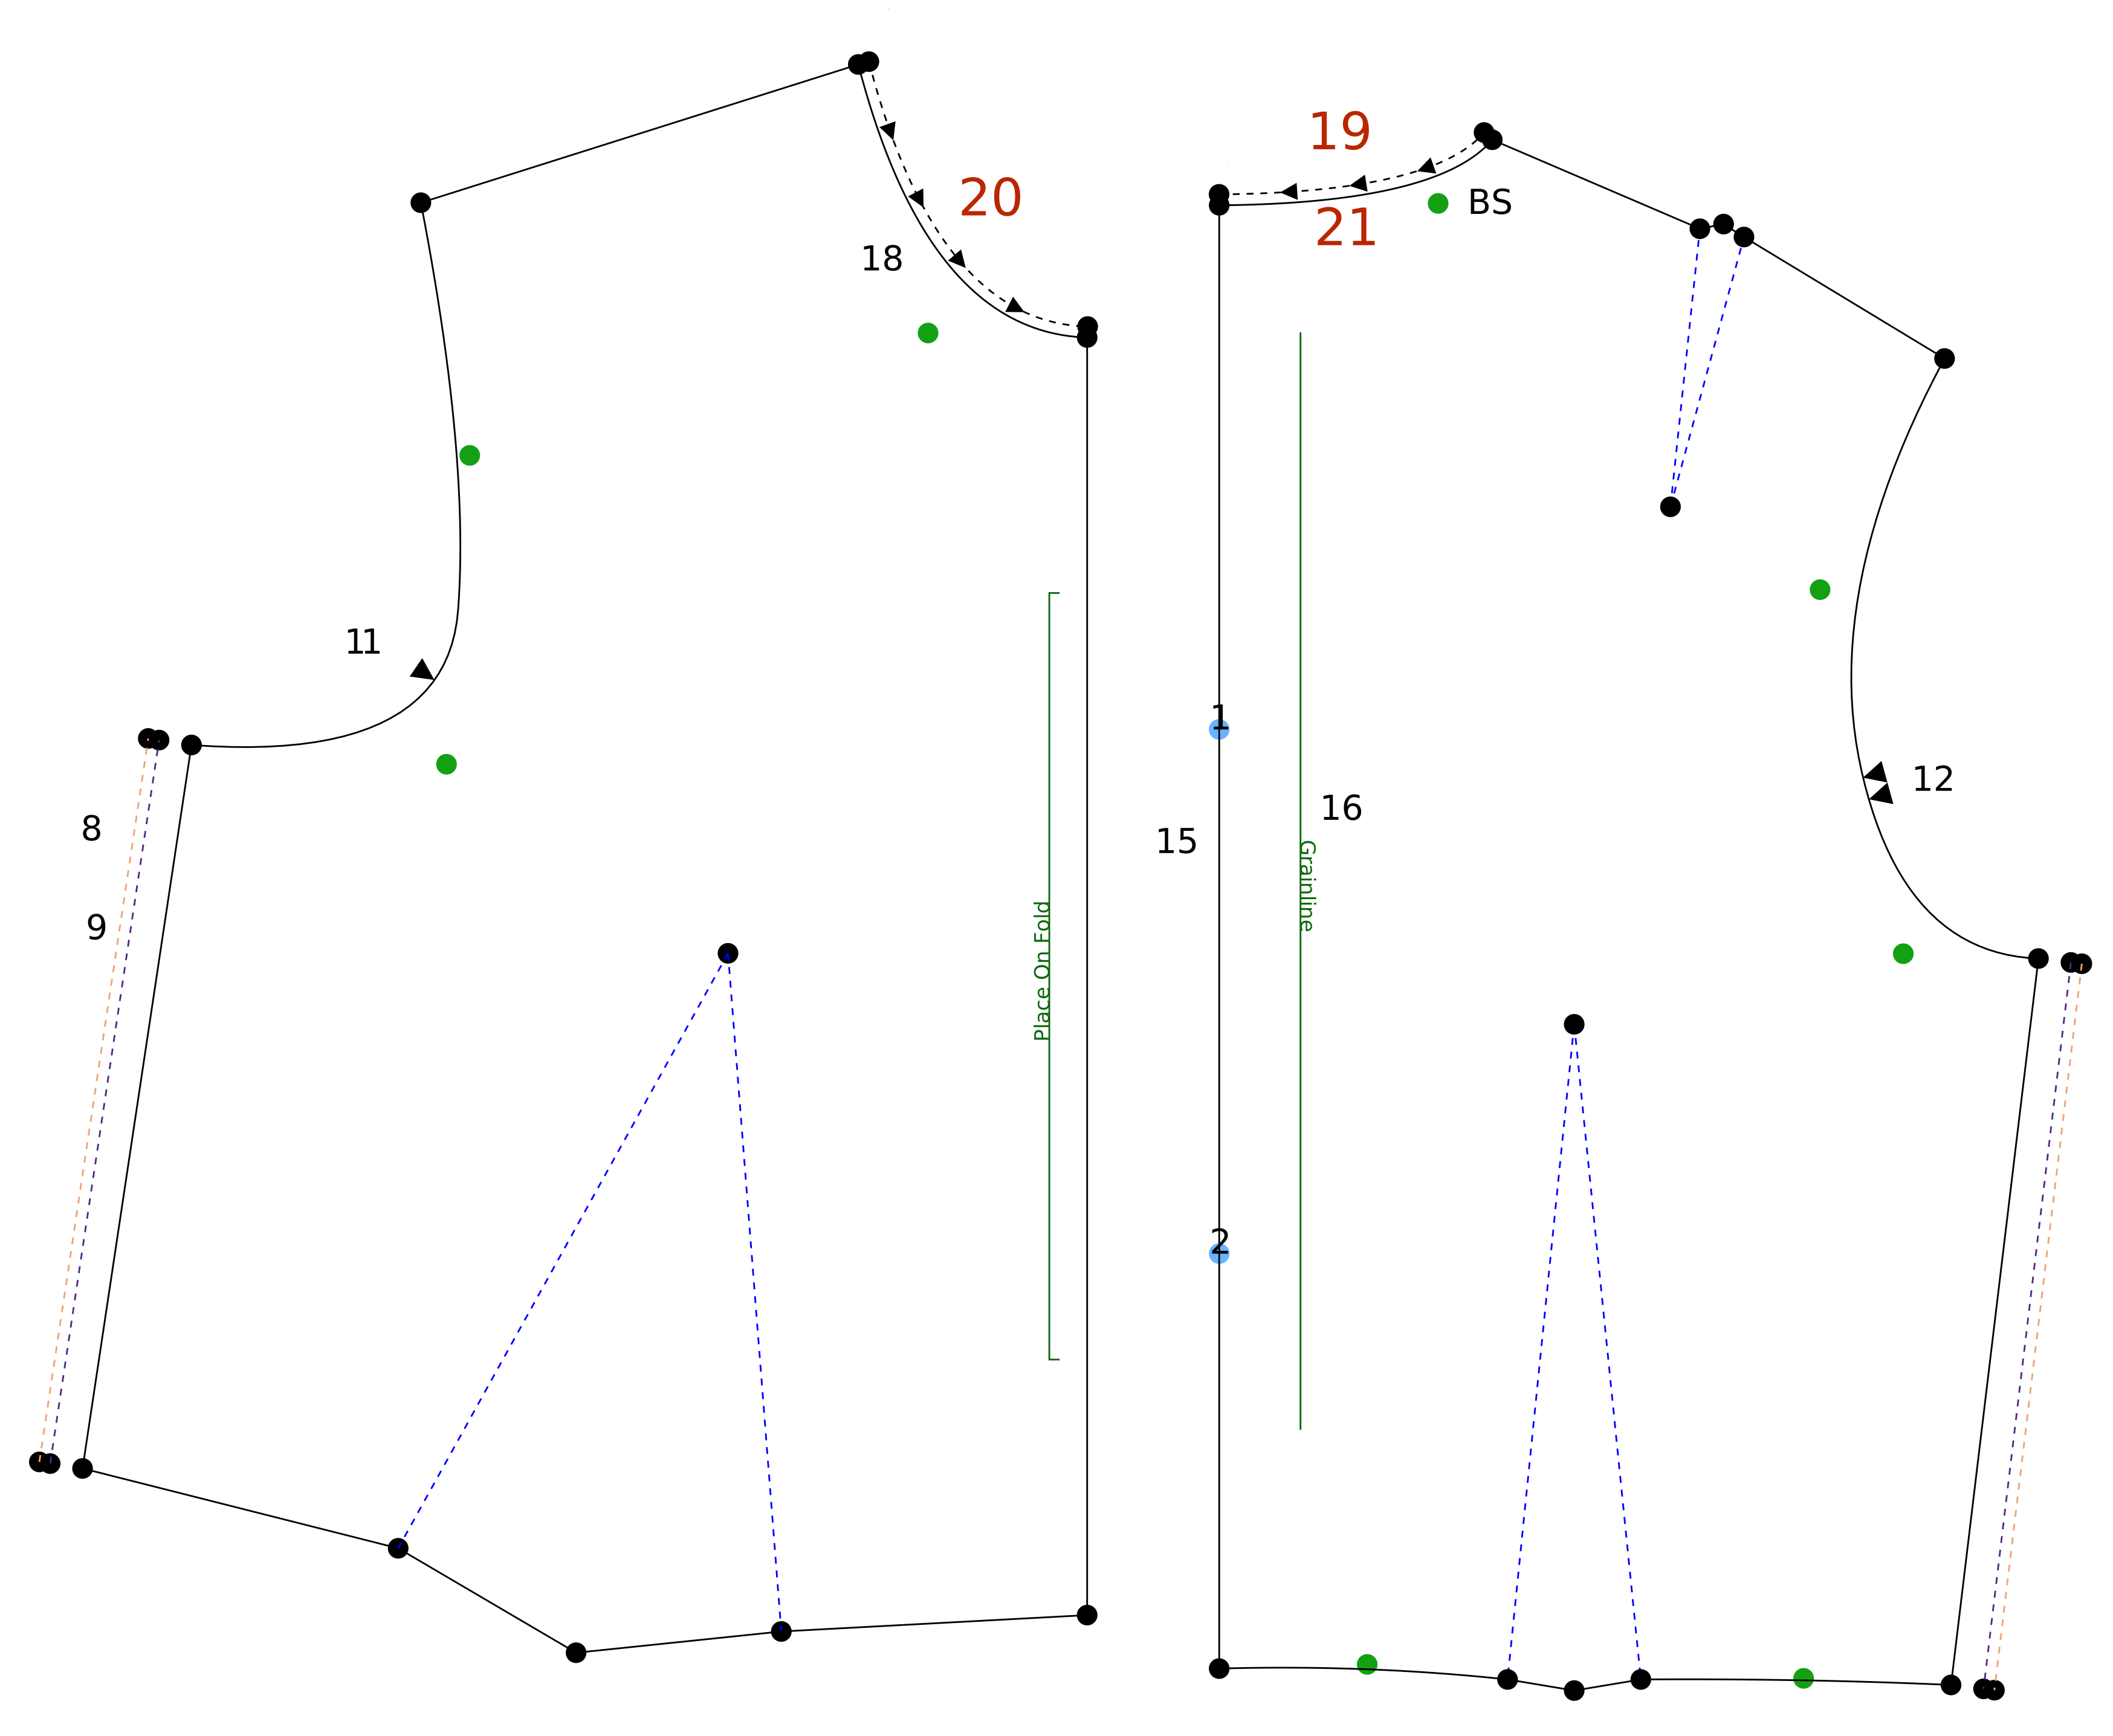 Curves > Offset Curve
 Finish > Add Direction MarksFinish > Add Direction Marks
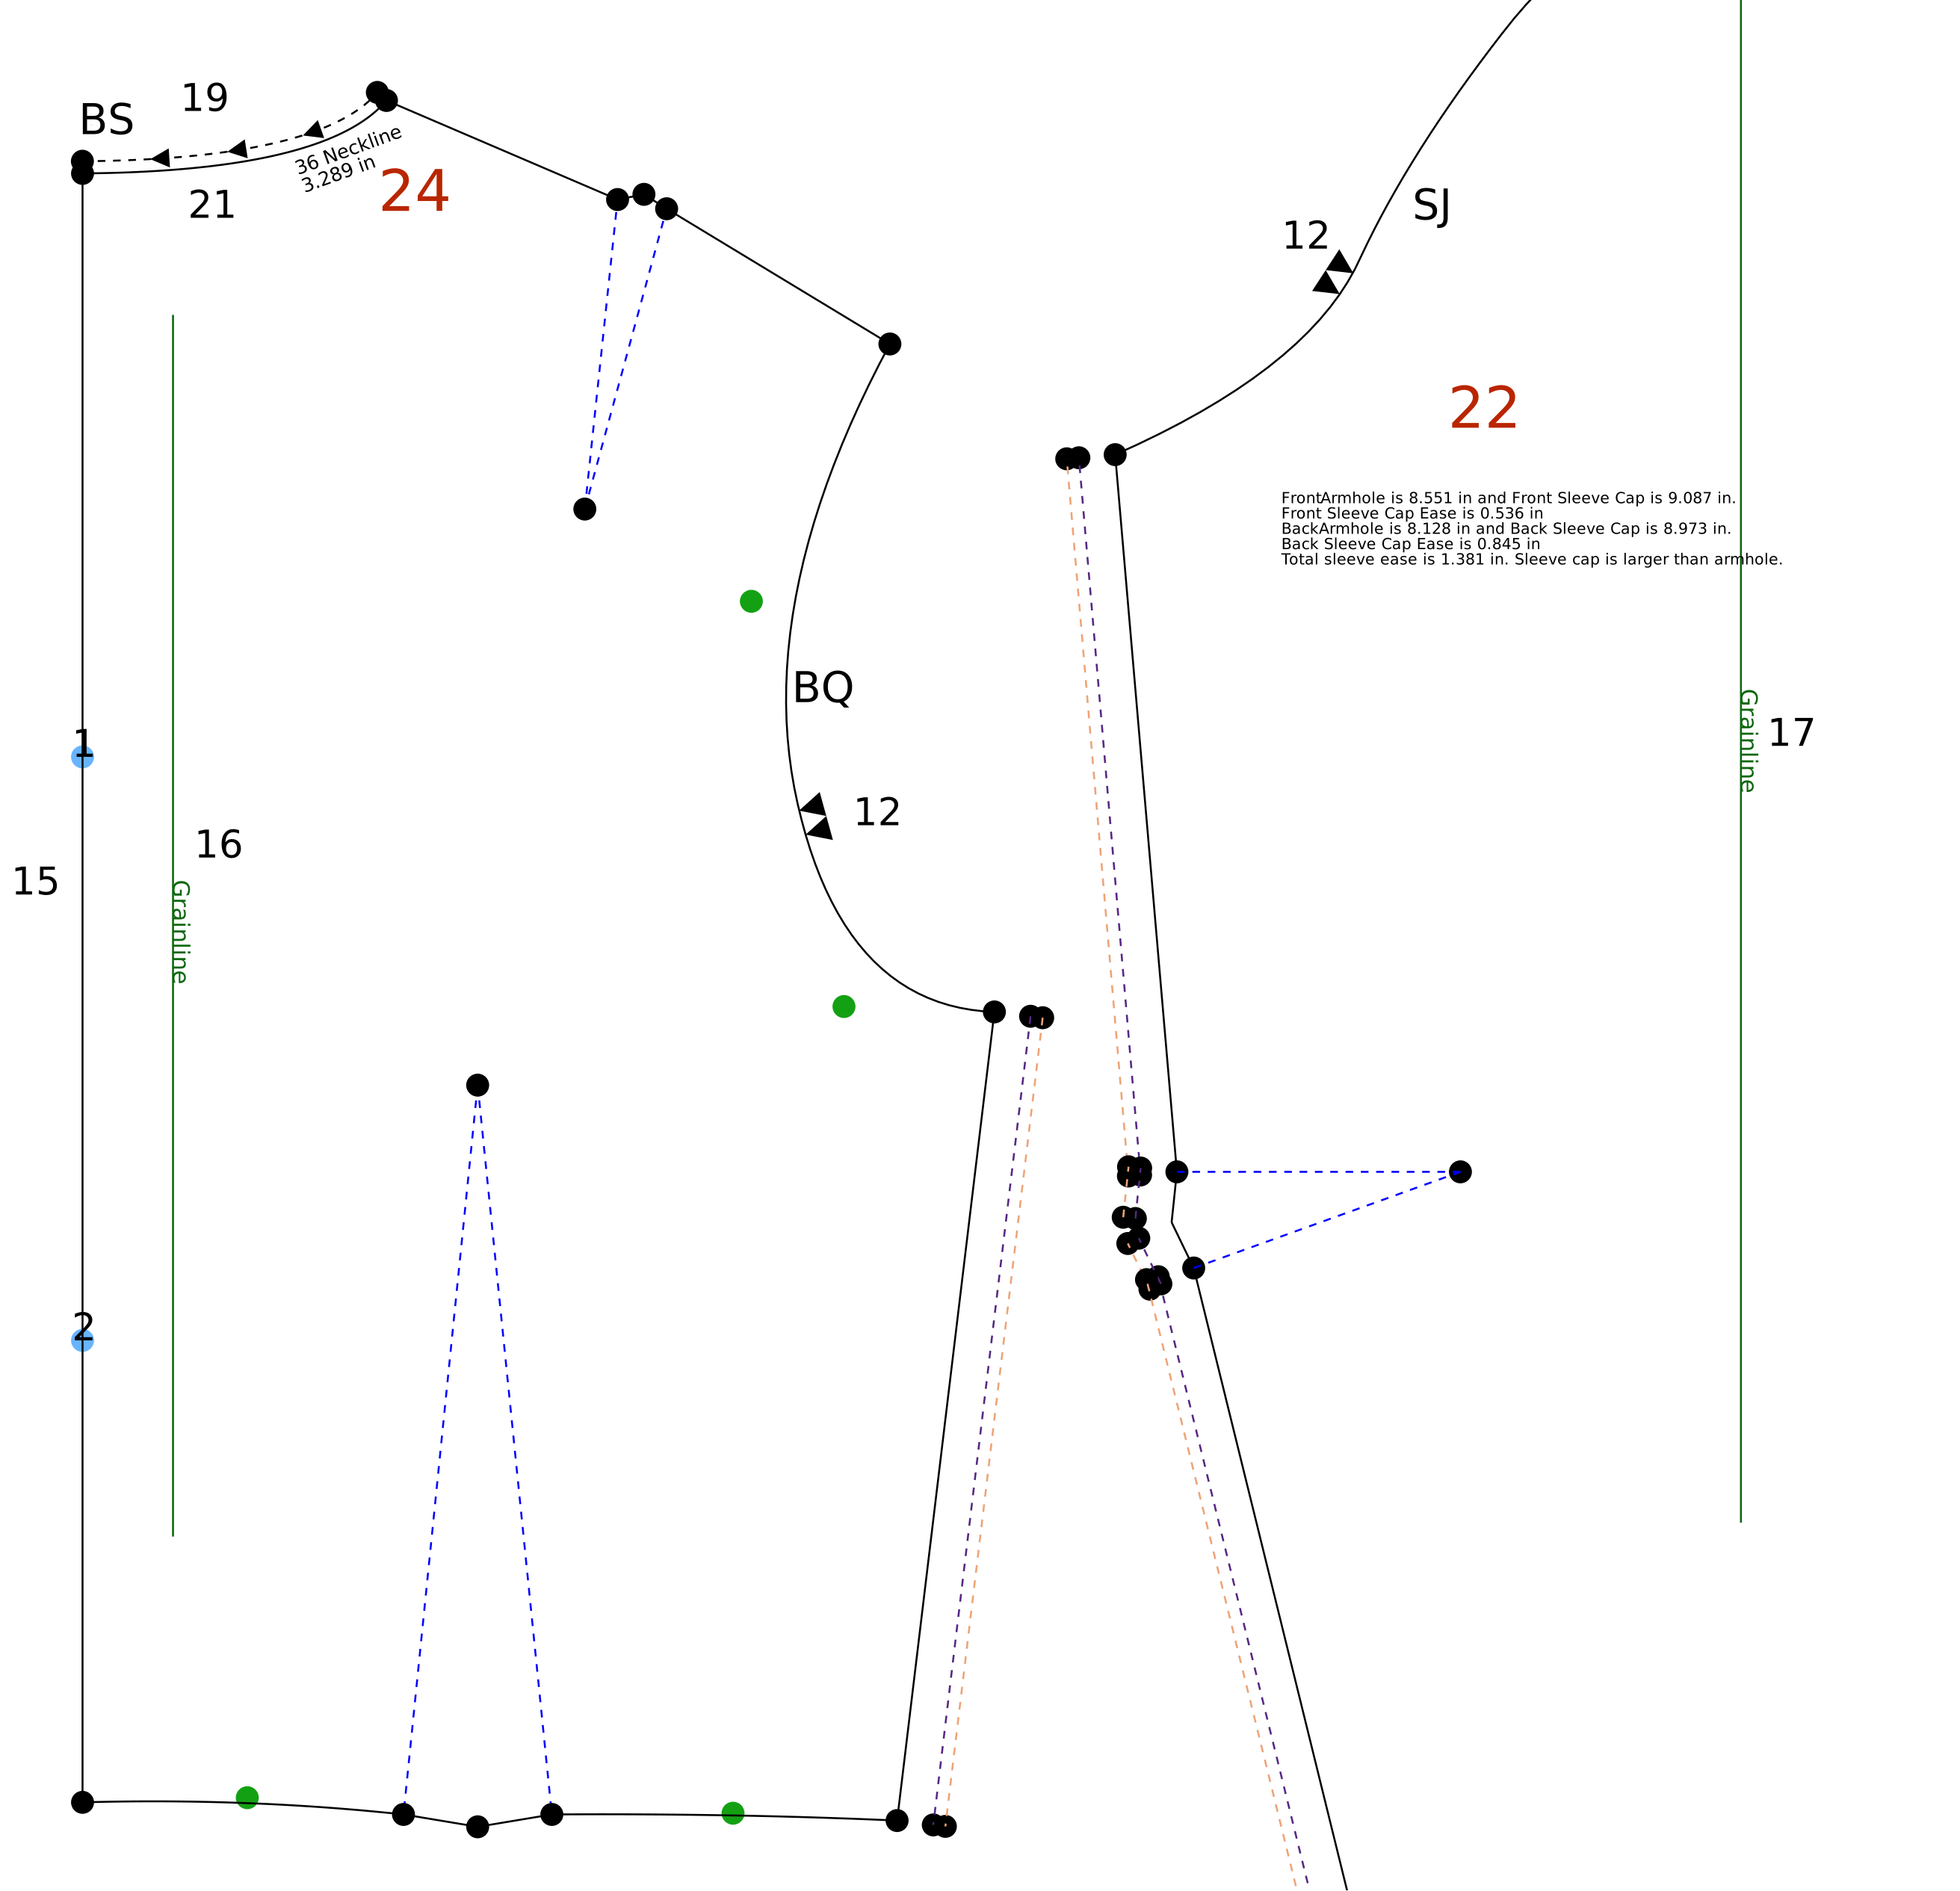
 Finish > Mark Sleeve Ease
 Finish > Add Measurement TextFinish > Add Measurement Text
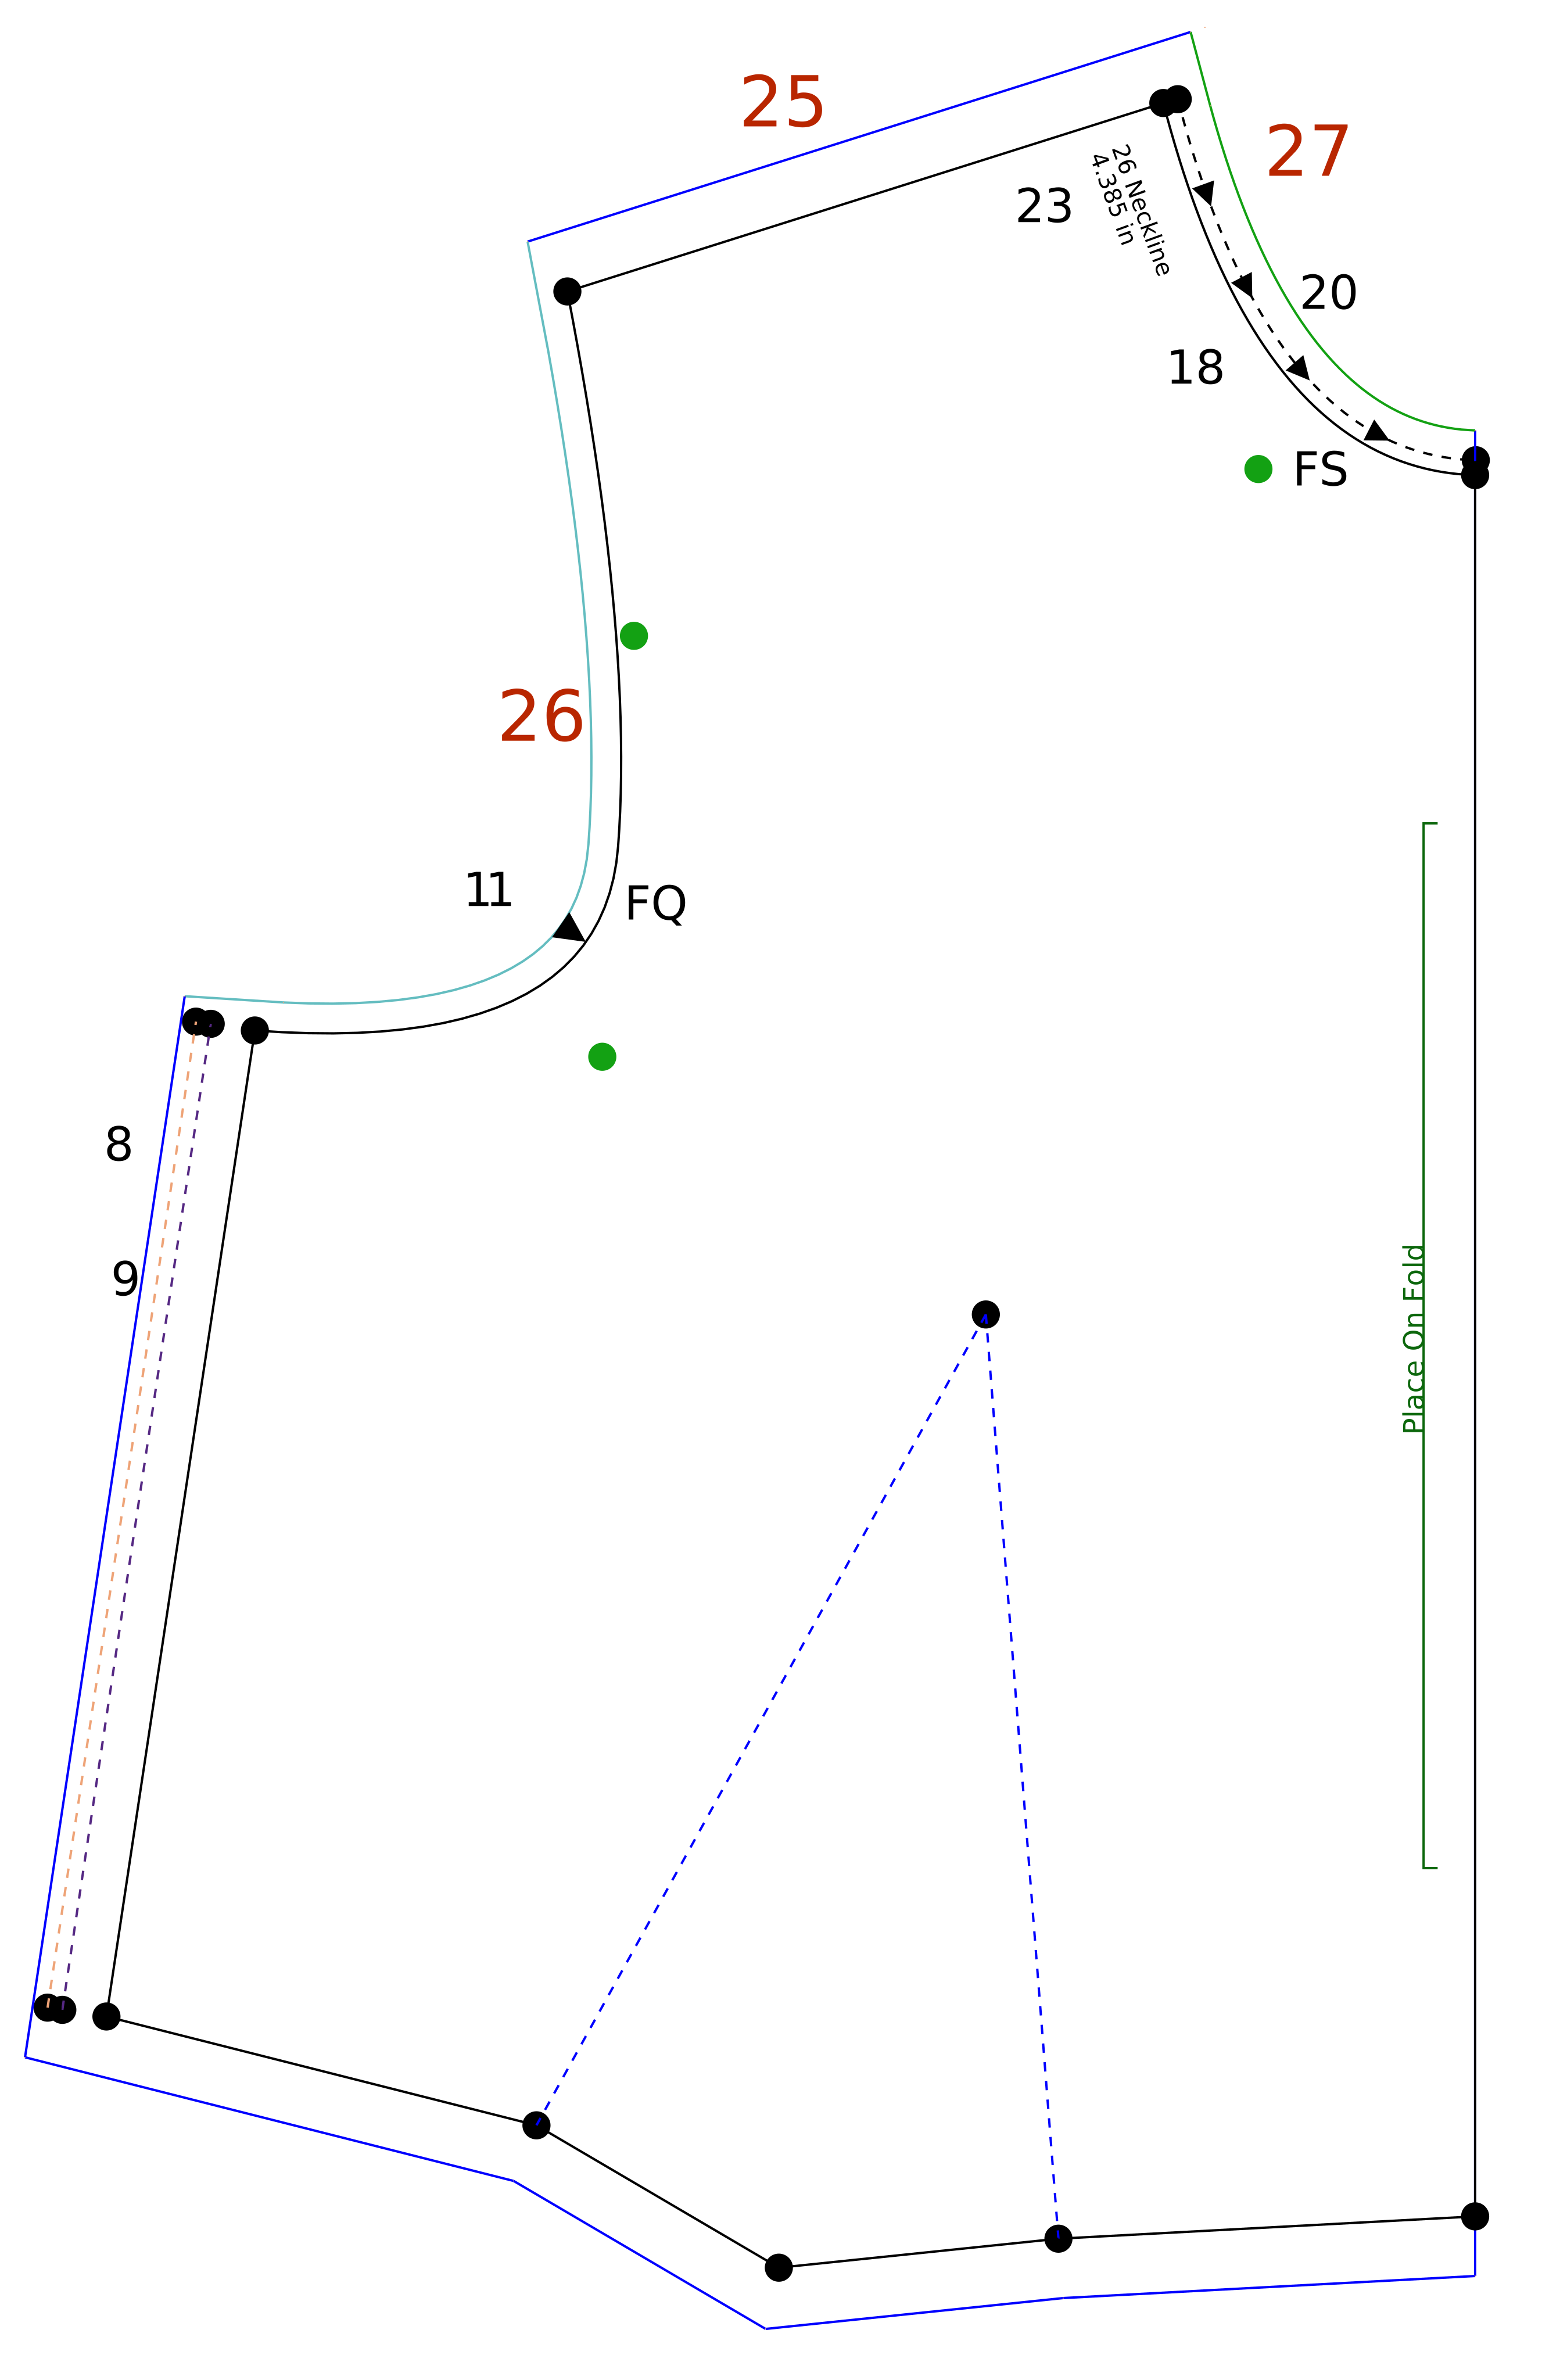
 Finish > Add Seam Allowance to Pattern
 Utilities > Change Style/ColorUtilities > Change Style/Color
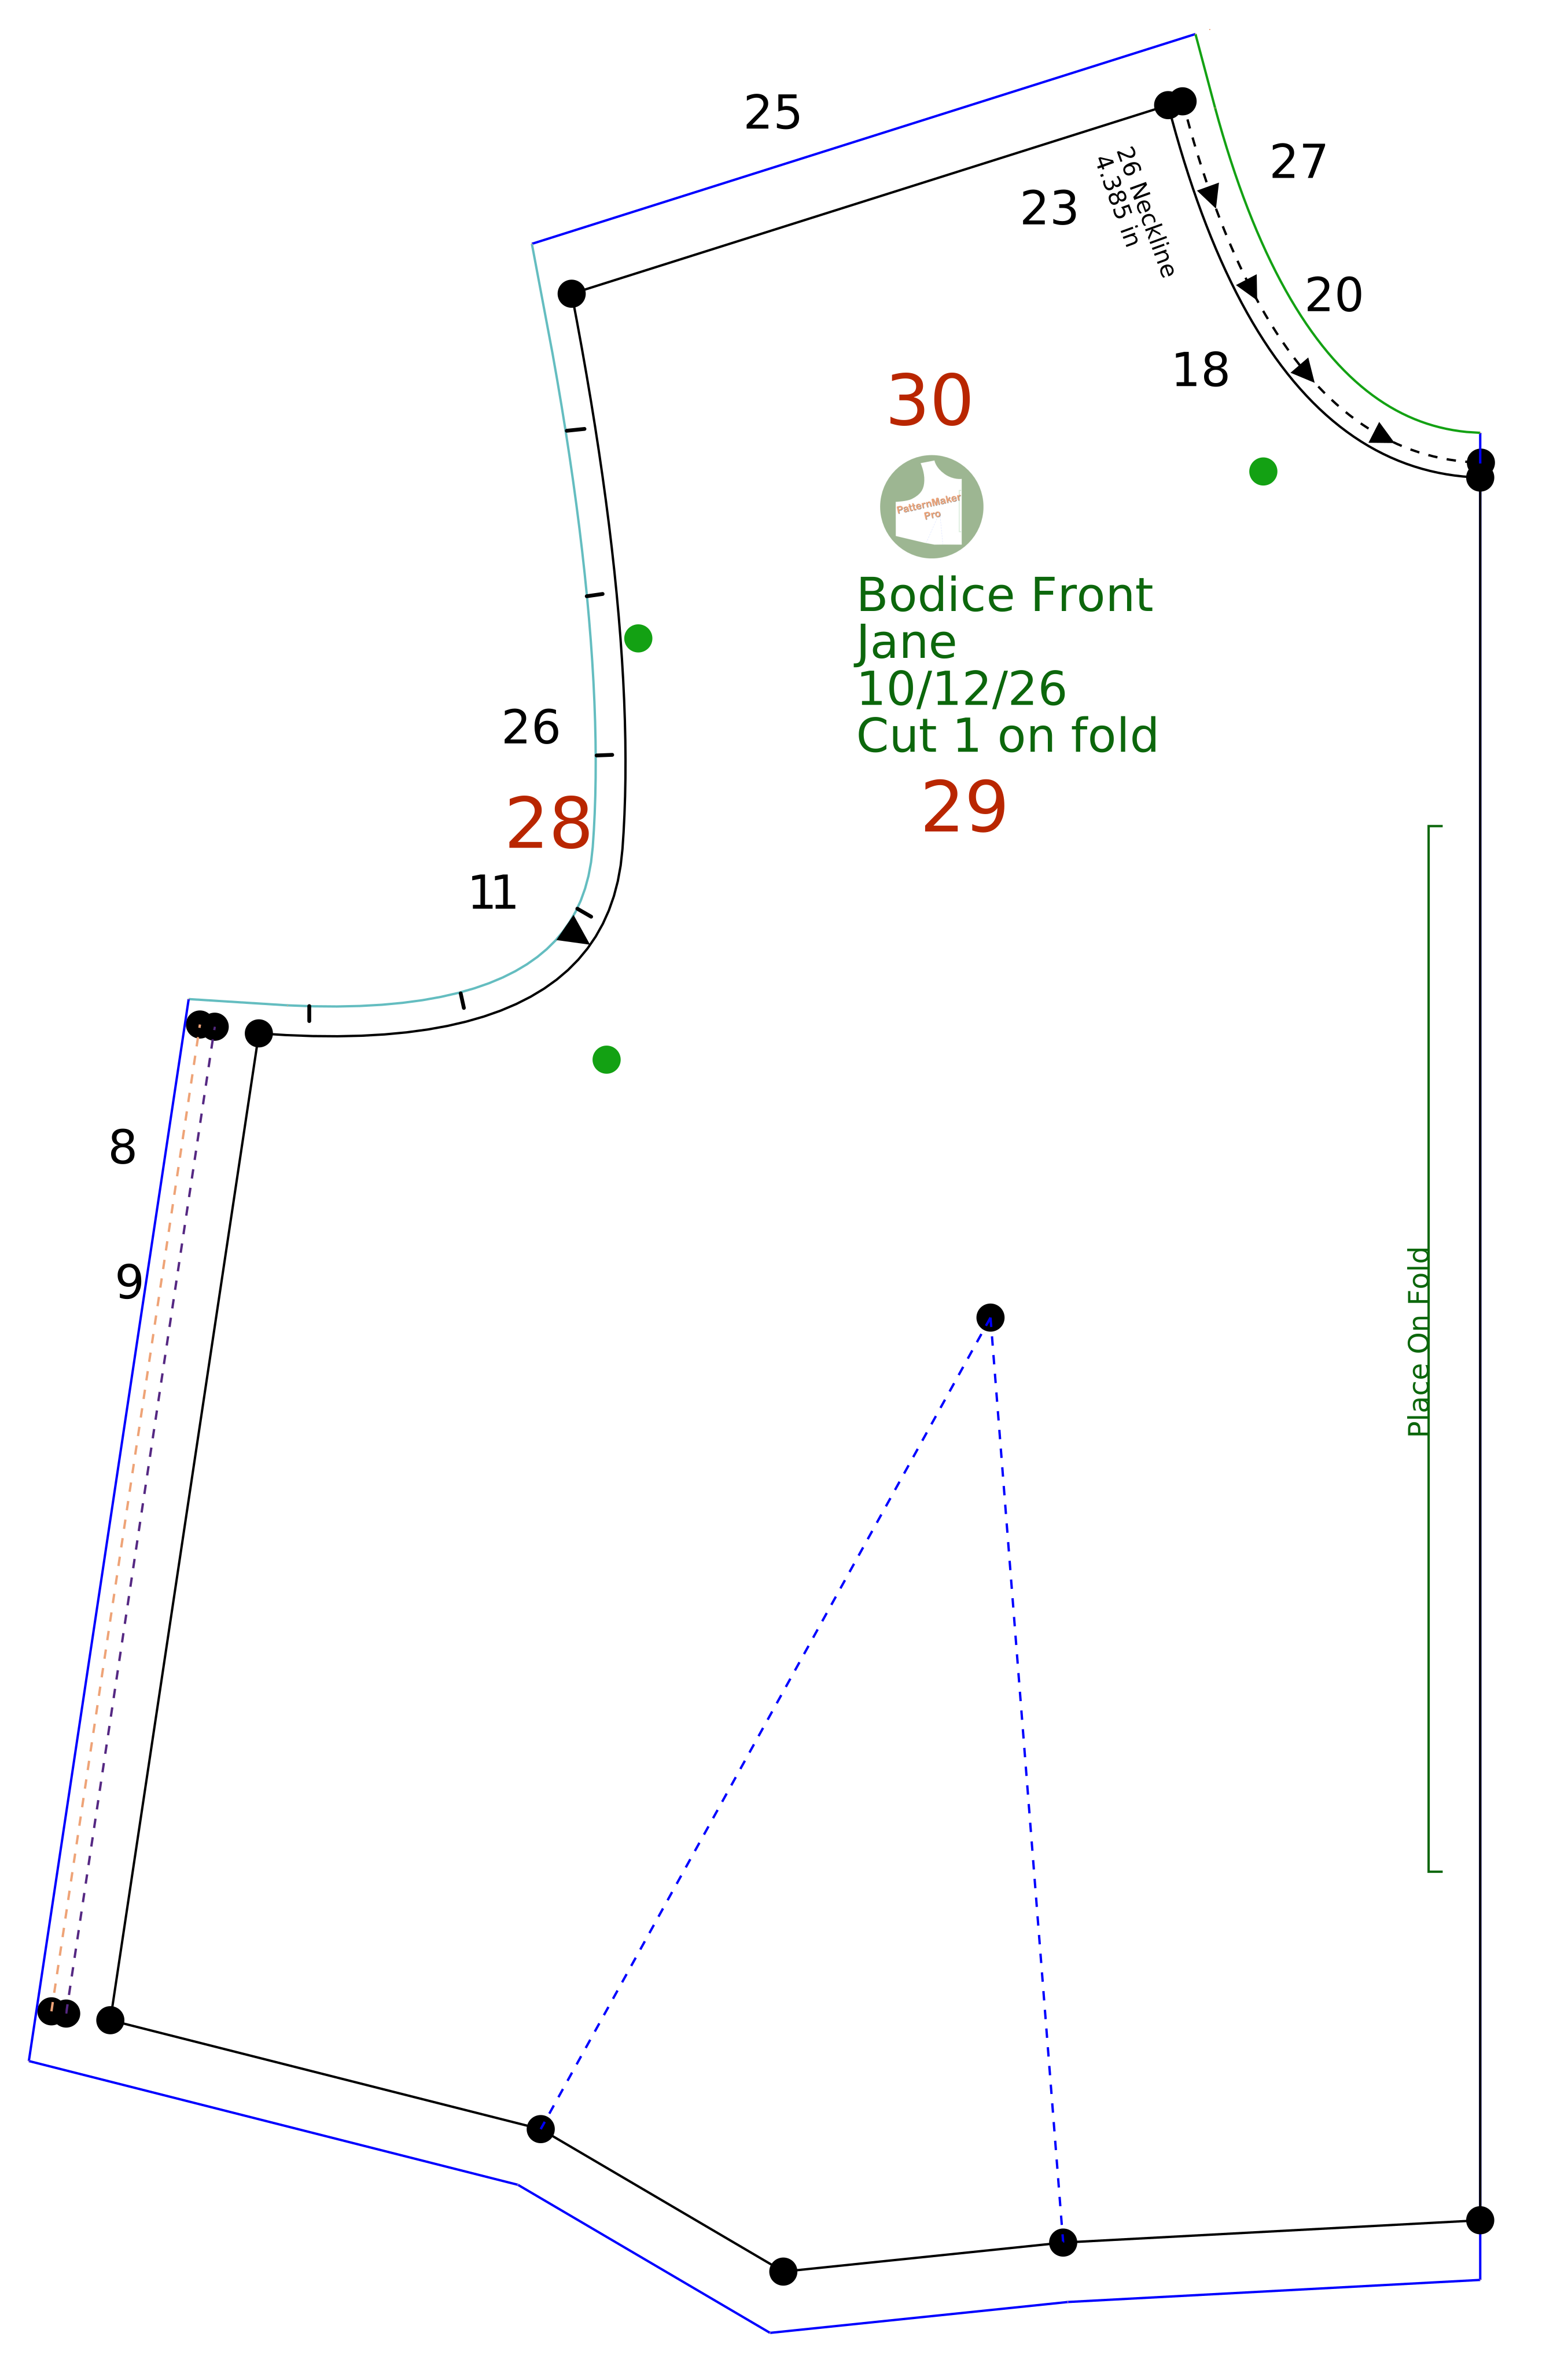
 Finish > Add Clip Marks
 Finish > Add Text at Point
 Finish > Import Logo
If you don't have a logo to practice with, download a sample logo.
Pattern Markings & Line Legend
Seam Allowances & Edges
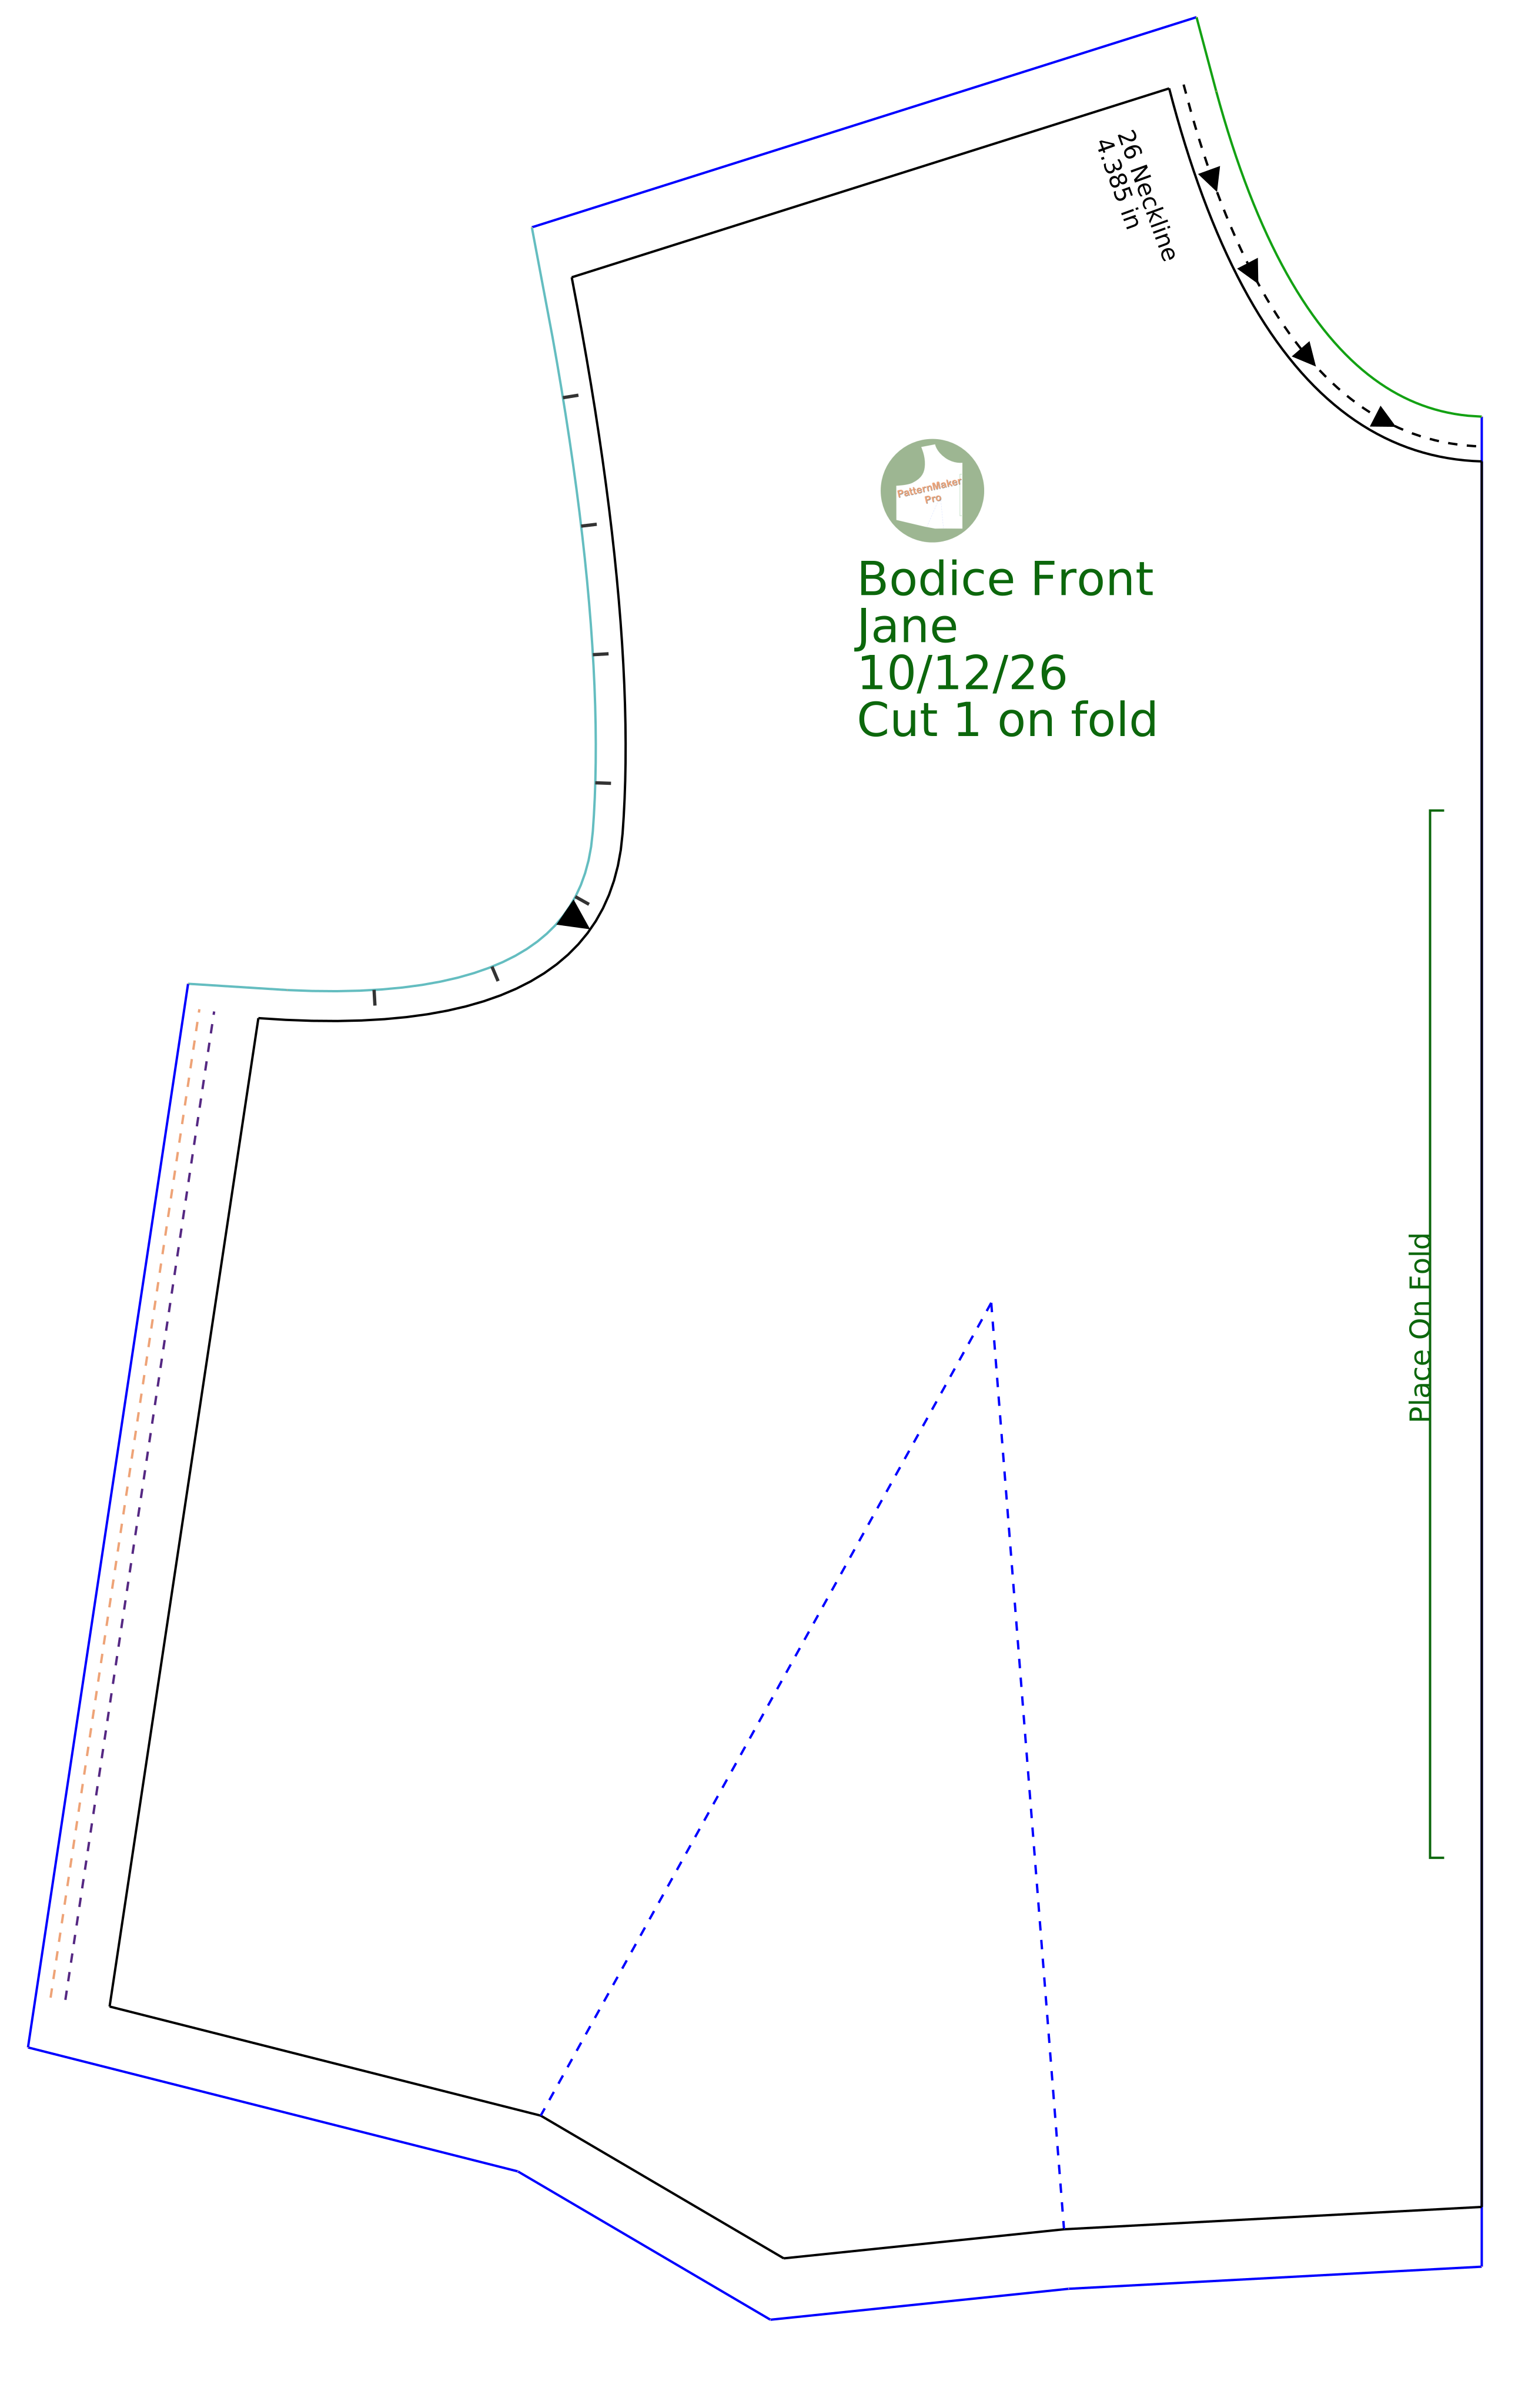
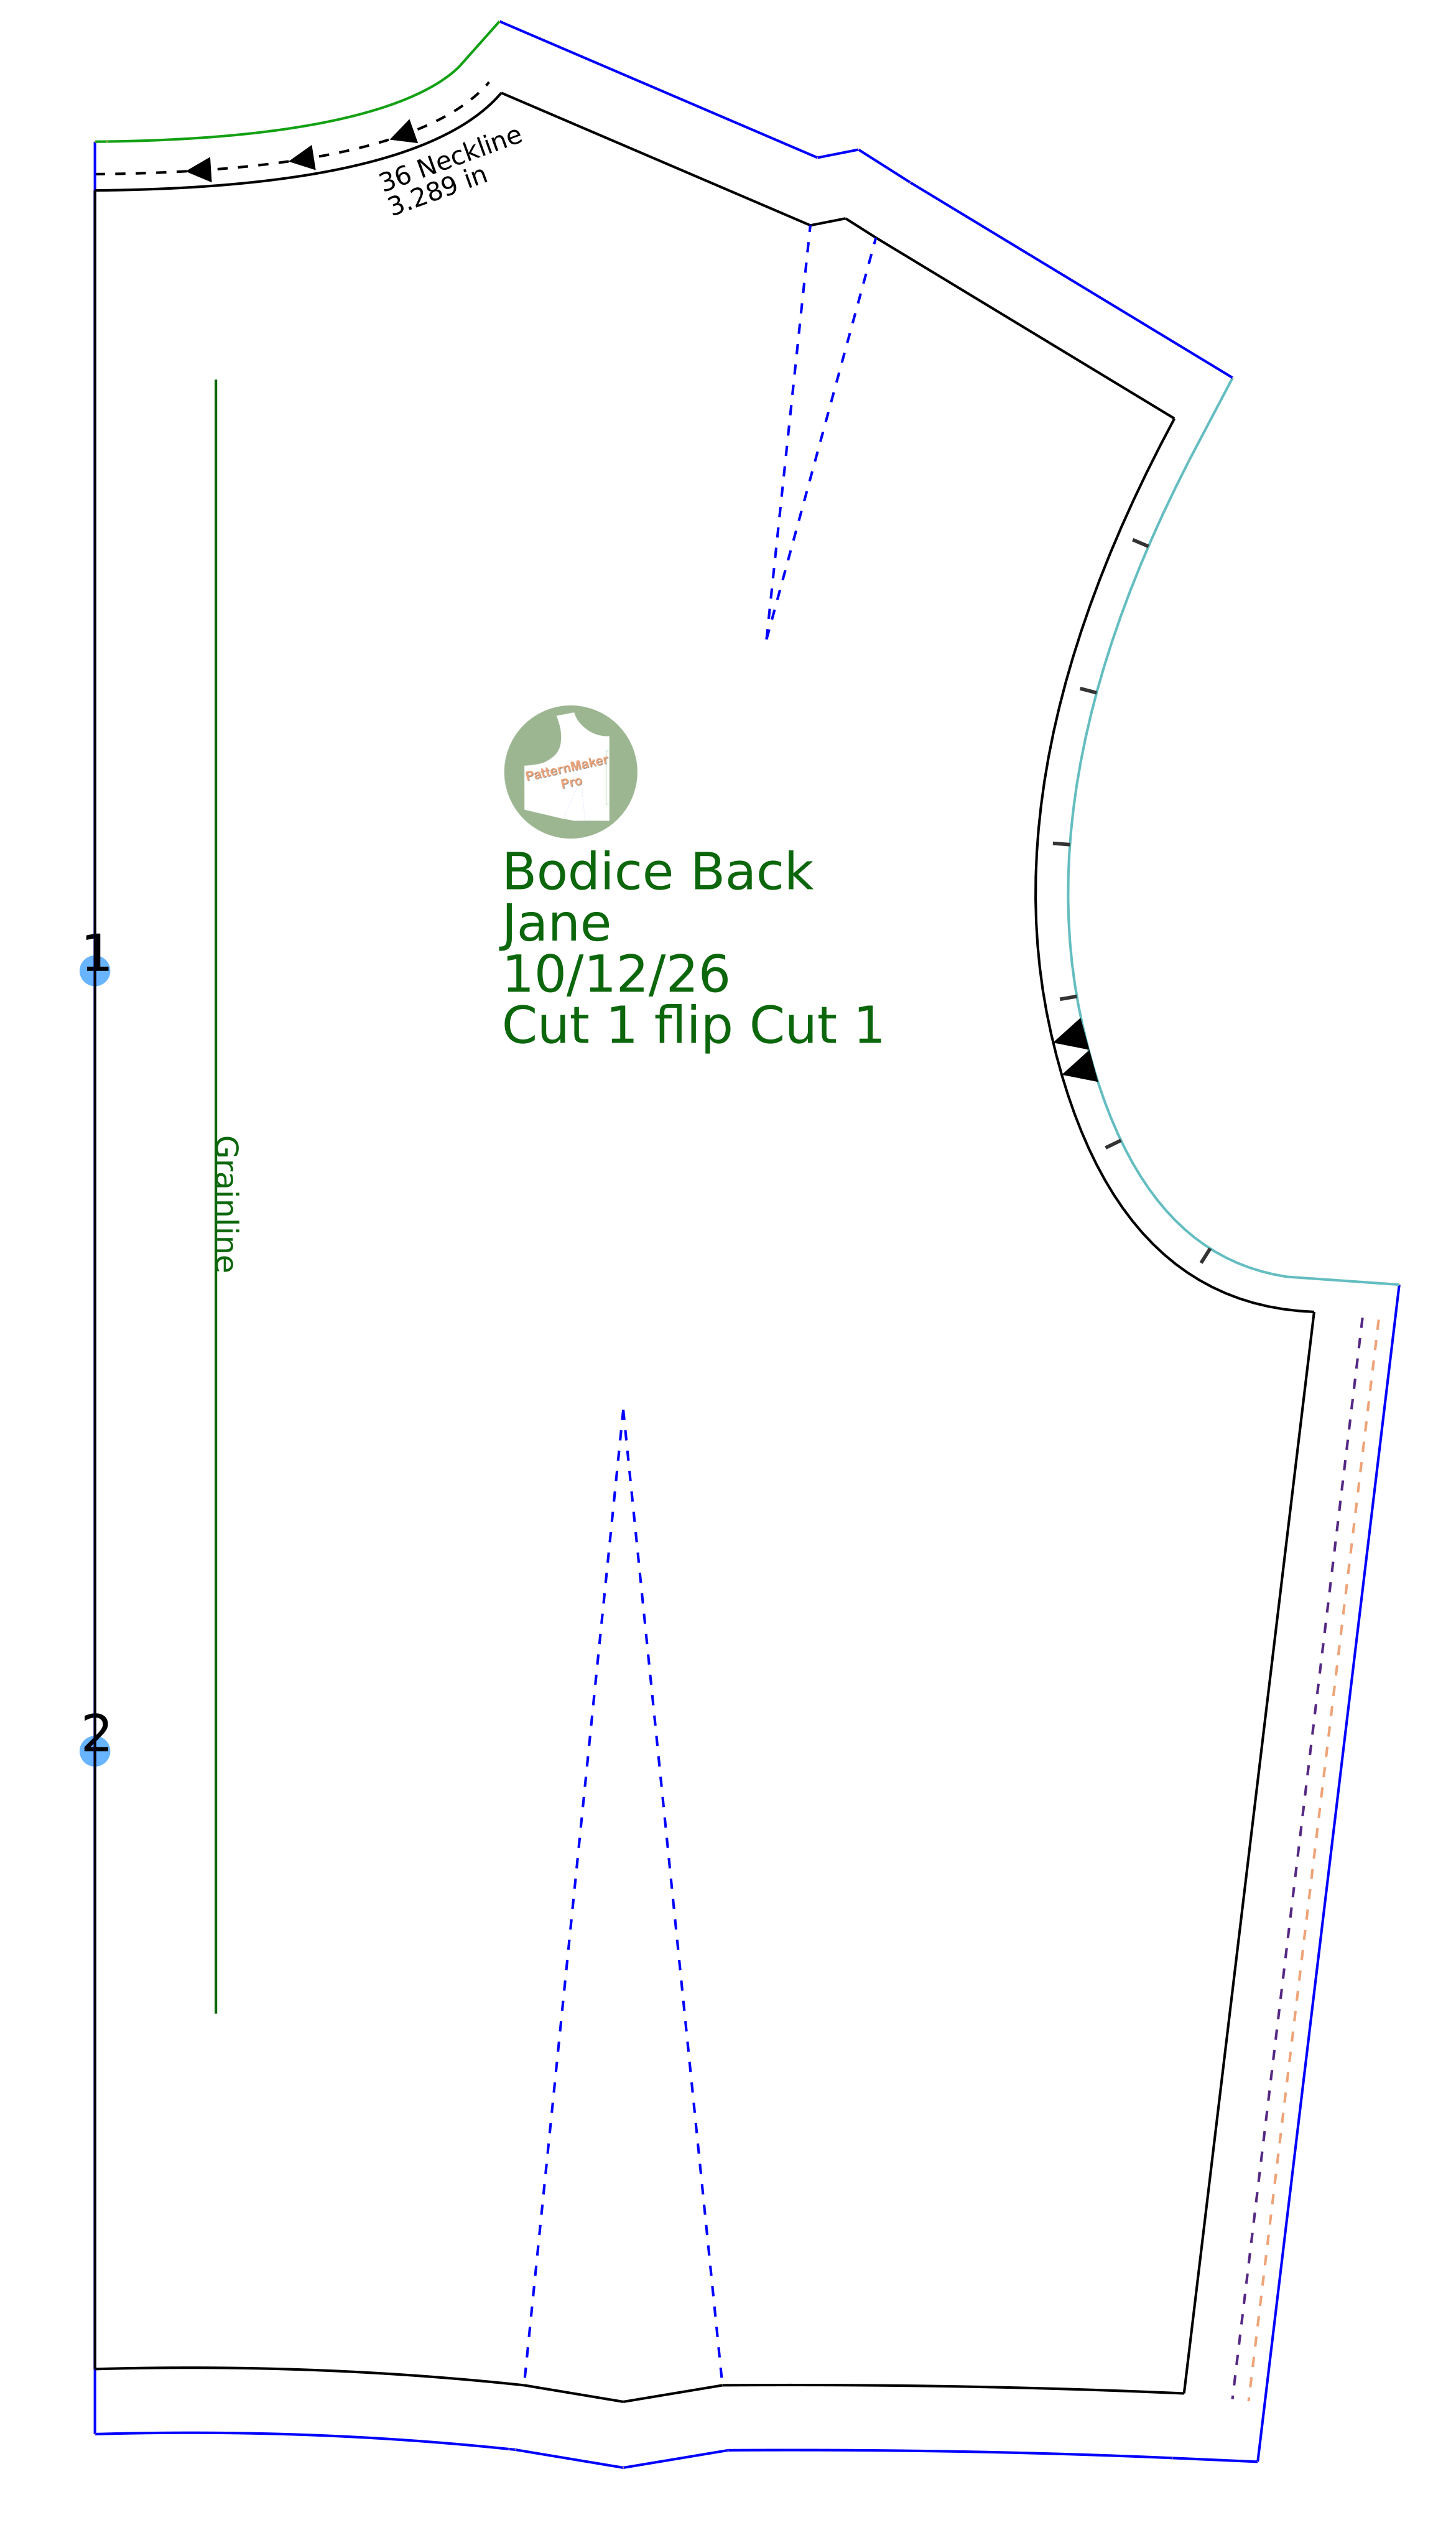
- General Seam Allowance (1/2″ / 13 mm): Solid Dark Blue line
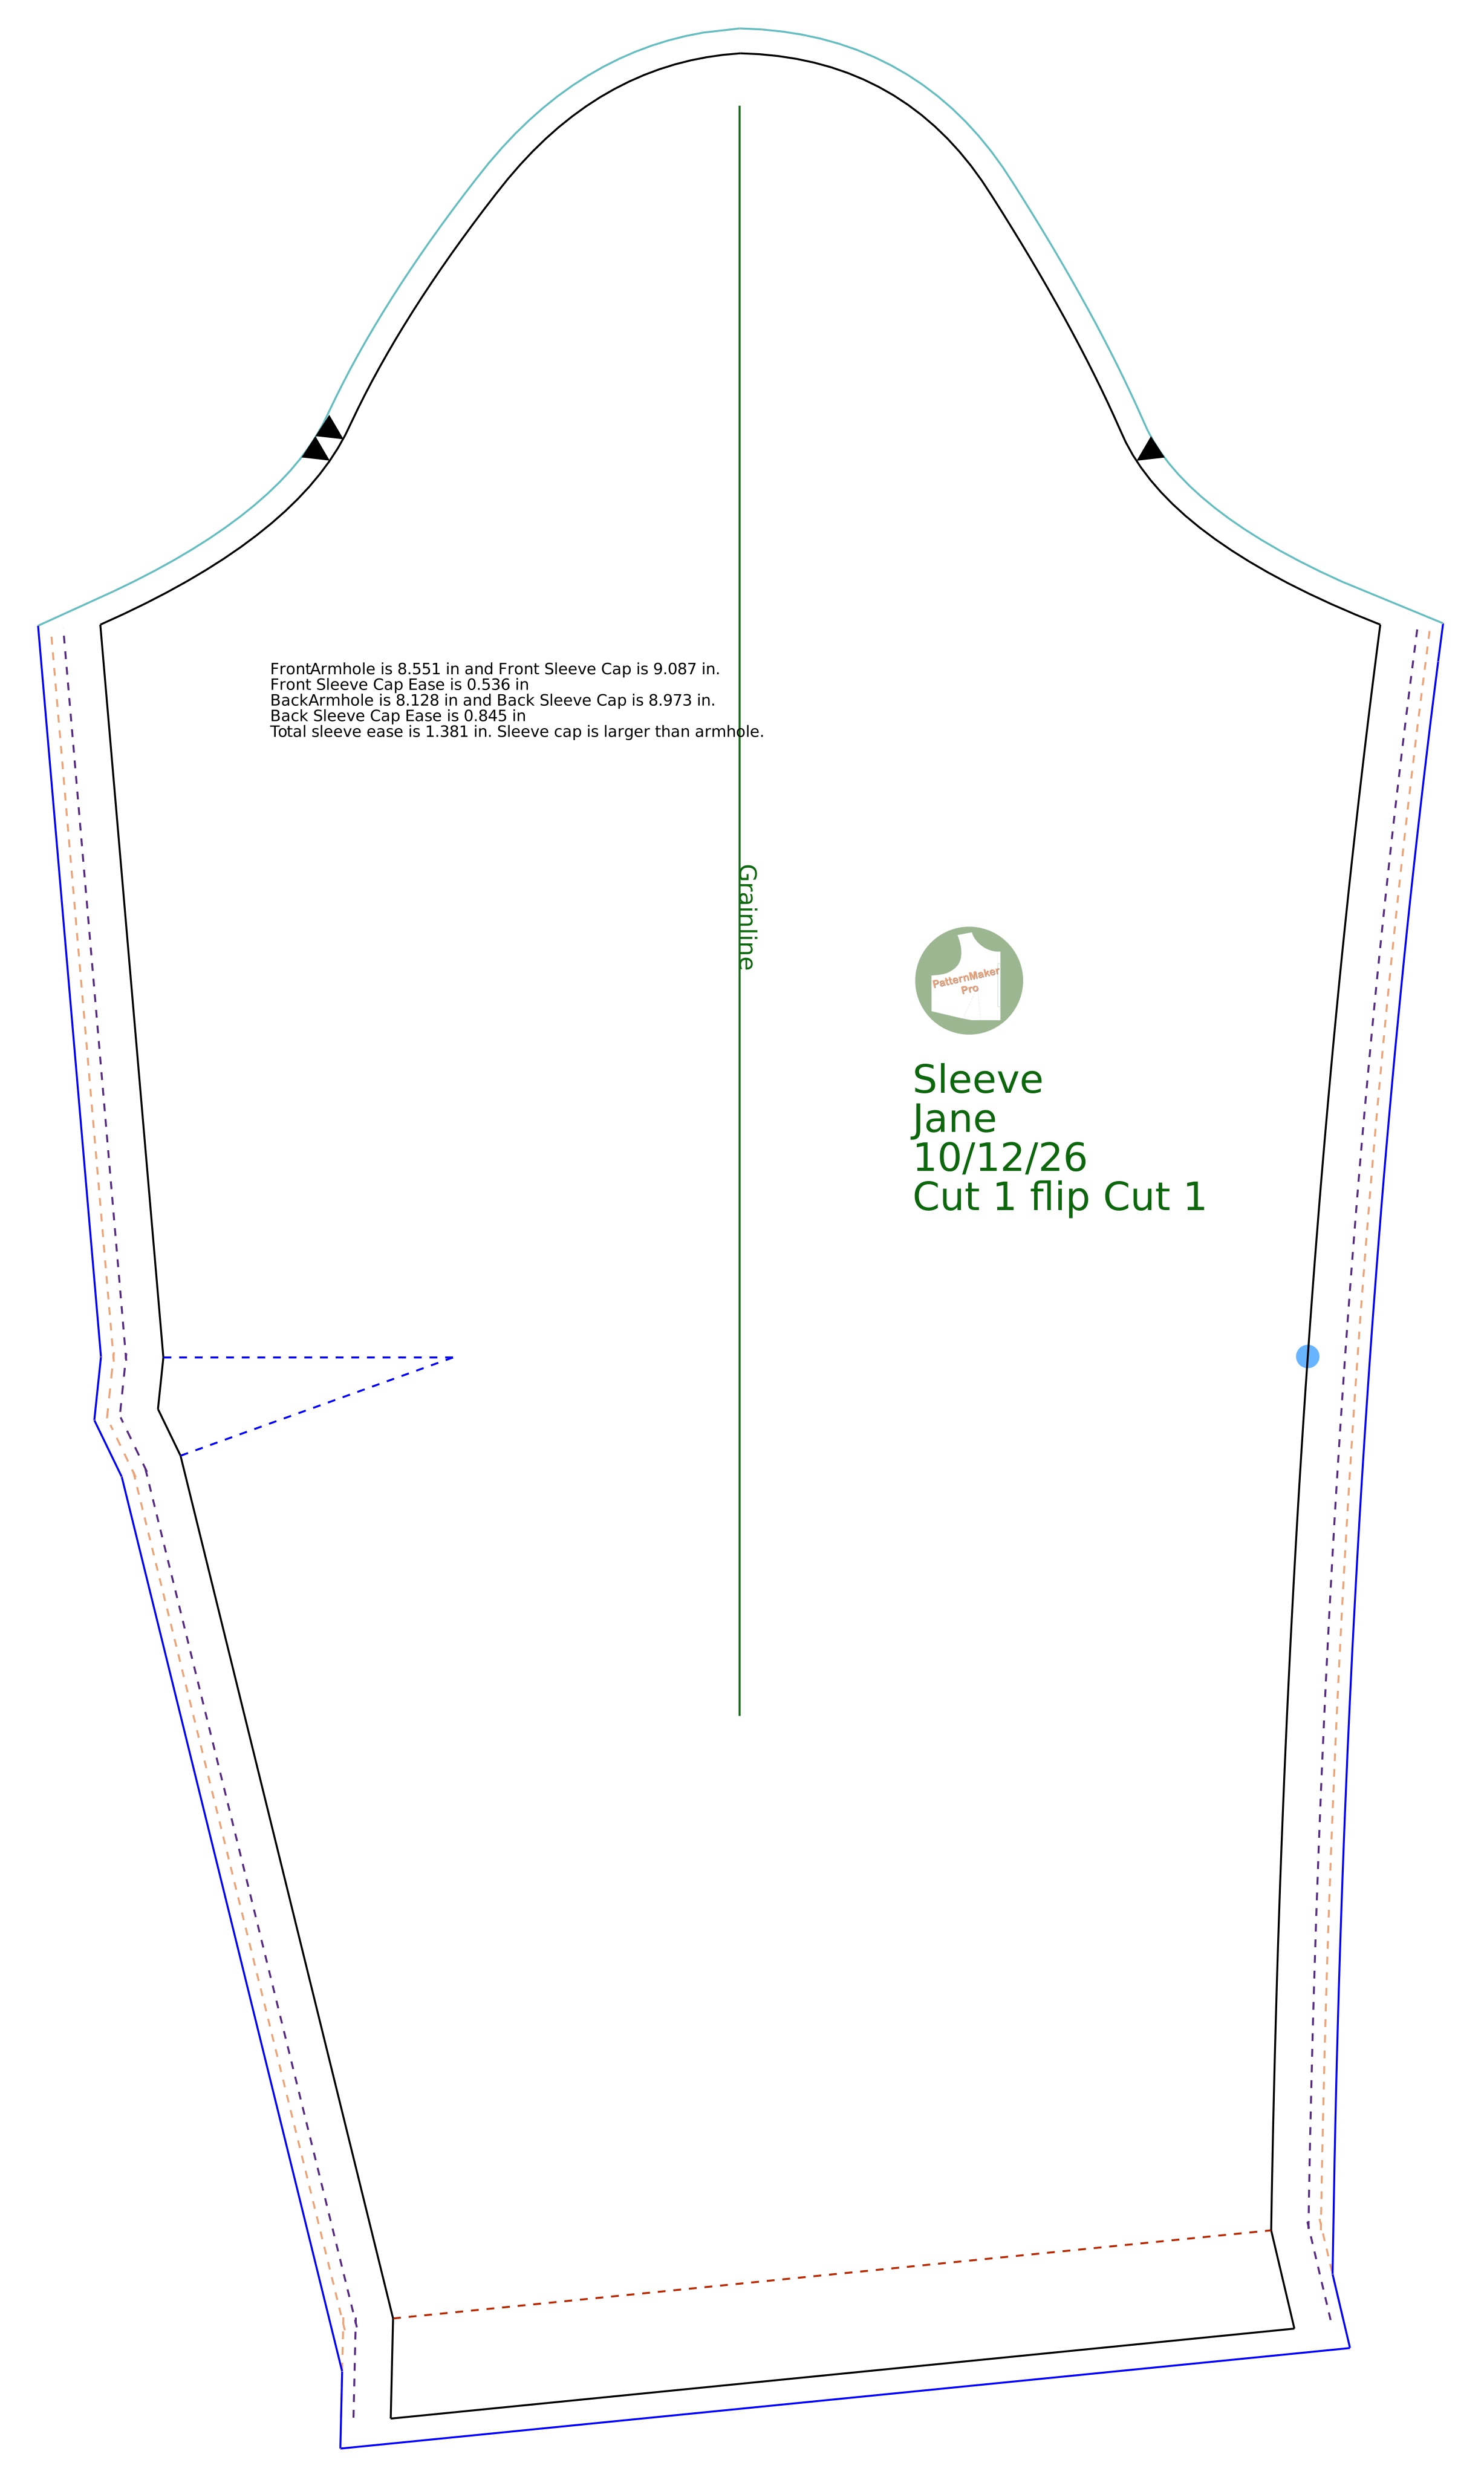
- Armhole & Sleeve Cap Seam Allowance (1/4″ / 6 mm): Solid Aqua line
- Neckline Seam Allowance (3/8″ / 10 mm): Solid Green line
Construction Lines & Special Techniques
- French Seam — Initial Seamline (3/8″ / 10 mm): Dashed Dark Purple line (stitch wrong sides together)
- French Seam — Trim Line (1/8″ / 3 mm): Dashed Orange line (trim 1/8″ outside the initial seamline)
- Dart Legs: Dashed Blue lines
- Staystitching: Dashed Black line with directional arrows (stitch strictly in arrow direction before garment assembly)
Alignment, Matching & Notches
- Single Notch: Front armhole and front sleeve cap matching point
- Double Notch: Back armhole and back sleeve cap matching point
- Alignment Points (Solid Blue Circles):
- Sleeve cap to sewn sleeve dart matching reference
- Center back alignment reference for matching panel edges prior to joining
- Seam Allowance Clips: Front and back armhole curve relief; snip into the seam allowance perpendicular to the cut edge, to allow the curve to turn smoothly without binding.
Pattern Notations & Dimensions
- Green Annotations: Pattern piece labels, grainline arrows, and "Place on Fold" bracketed indicators
- Neckline Lengths: Front and back pattern pieces indicate exact seamline arc lengths for drafting and attaching collars
- Sleeve Ease Data: Direct readout of armhole circumference, sleeve cap arc length, and total drafted sleeve head ease