Non-Convertible & Flat Collars
A non-convertible collar has a neckline edge that follows the curve of the body's neckline. Unbuttoned, it stays put against the shoulders and does not spring open into lapels. Everything in this family, from the flat Peter Pan to wide sailor bibs, is drafted right over the joined front and back bodice patterns.
Anatomy of a Collar
- Neckline Edge: The inner curve that is sewn to the garment neckline. Its shape controls the height of the stand.
- Style Edge: The outer edge. It gives the collar its shape (rounded, pointed or square).
- Stand and Roll Line: The stand is the part that rises from the neckline seam before folding over. The roll line is the fold.
- Collar Fall: The part that turns over the roll line and lies on the garment.
- Upper Collar: The layer you see. It is cut slightly larger than the undercollar so it can wrap around it.
- Undercollar: The layer against the garment. It is cut a little smaller (see below) so the seam rolls underneath and stays hidden.
- Interfacing: Gives the collar body and a crisp roll line. Trim the seam allowances off fusible interfacing to cut down bulk.
Alter the front and back bodice to the finished neckline you want (depth, width, any drop) before you overlap the shoulders and trace the collar. The collar takes on the exact curve of the bodice underneath it.
The 4:1 Shoulder Overlap Rule
The height of the stand at center back depends on how curved the collar's neckline edge is. Place the front and back patterns touching at the side-neck point, then overlap the shoulder tips. The more they overlap, the straighter the neckline edge becomes, and a straighter edge pushes the collar up into a stand before it rolls over.
Patternmakers call this the 4 to 1 rule: every 1" (25 mm) of overlap at the shoulder tip gives 1/4" (6 mm) of stand at center back.
| Stand at Center Back | Shoulder-Tip Overlap | Roll |
|---|---|---|
| 1/8" (3 mm) | 1/2" (13 mm) | Flat roll. Lies flat on the shoulders. |
| 1/4" (6 mm) | 1" (25 mm) | Shallow roll. A slight lift. |
| 1/2" (13 mm) | 2" (50 mm) | Partial roll. Rises partway up the neck. |
| 3/4" (19 mm) | 3" (75 mm) | Substantial roll. Frames the neck closely. |
| 1" (25 mm) | 4" (100 mm) | Full roll. A high stand at the nape. |
As stand height increases, the maximum practical width of the collar decreases. A wide collar with a high stand (1" / 25 mm stand combined with a 4" / 100 mm fall) tends to cup inward, bind against the neck base, and distort the shoulder line. For wide capelets, Berthas, and sailor bibs, keep the overlap at the minimum 1/2" (13 mm).
Even a "flat" collar requires a minimum 1/2" (13 mm) overlap at the shoulder. This creates a tiny 1/8" (3 mm) roll that provides clearance for the seam allowances underneath, preventing the outer edge of the collar from "kicking up" away from the body.
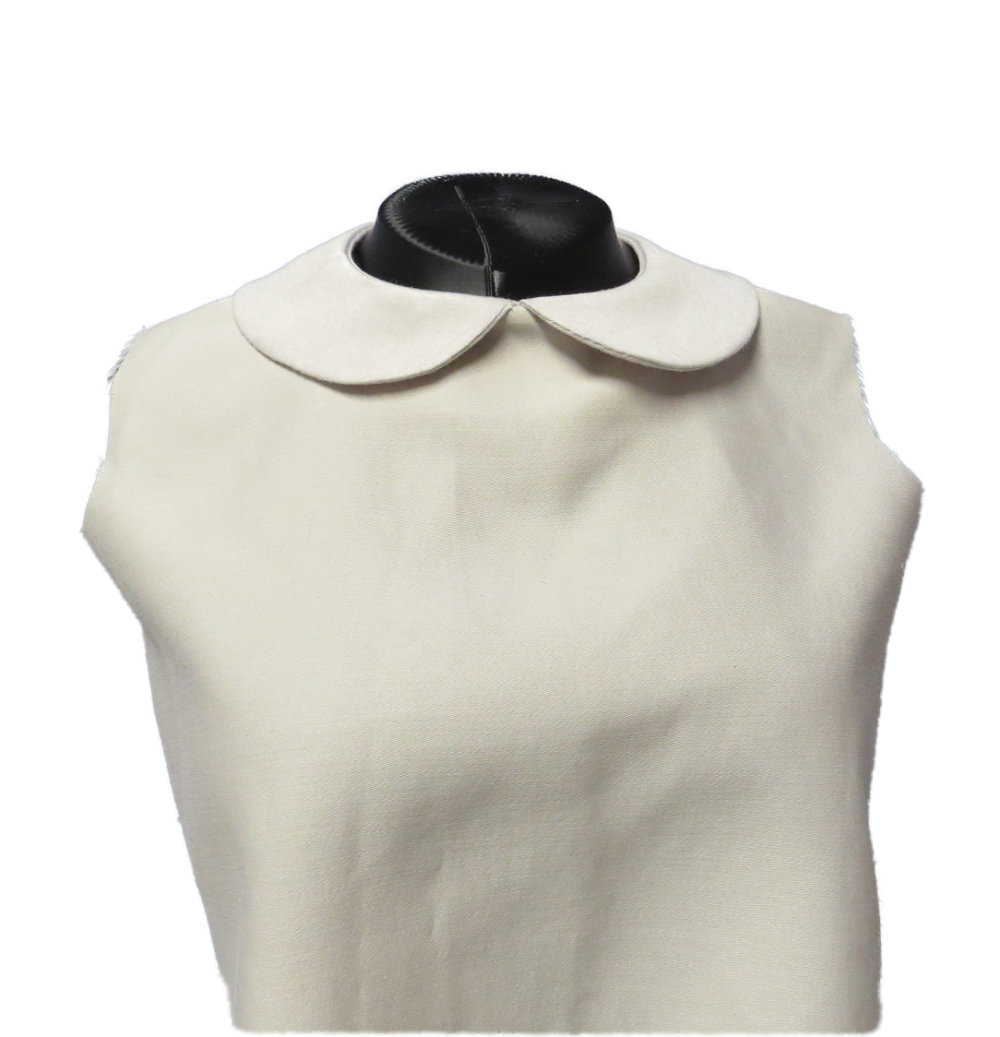
Peter Pan Collar Sample Garment (1/2 scale)
The Peter Pan Collar
The Peter Pan is the base for all round and pointed flat collars.
- Set Up: Put the front and back patterns together, touching at the side-neck point. Overlap the shoulder tips by the amount in the table. If the design has a button front, extend center front by the button width.
- Trace: Trace the neckline curve running from the back fold to the front edge. Overlapping the shoulders leaves a small angle at the shoulder, so blend it into a smooth curve.
- Add the Depth: Measure out from the neckline at right angles. A typical depth at center back is 2" to 3" (50 to 75 mm). Keep the same depth along the shoulder and toward the front.
- Shape the Front Edge: Curve it for a classic round collar, or draw a straight edge for a pointed one.
Sailor and Deep Open Collars
Draft these on a lowered neckline.
- Lower the front neckline to the V depth you want, such as 6" (150 mm) below the neck point, and connect it to the side-neck point.
- Touch the front and back at the side-neck point and overlap the shoulder tips 1/2" (13 mm) for a flat fall.
- Square a line from center back out to the shoulder, then down the back to the depth you want. A typical size is about 7" (180 mm) across and 8" (200 mm) deep.
- Connect the back corner, across the shoulder, to the V point at center front.
The Undercollar
If the two layers are identical, the style seam is pushed out to the edge and shows. So draft the undercollar from the upper collar, keep the neckline edge the same, and take a little off the outer edge.
- Trim from 1/8" to 1/16" (3 to 1.5 mm) and tapering to zero at center front.
- Cut the upper collar with the lengthwise grain at center back. A heavy undercollar can be cut on the bias with a center back seam.
Neckline Facings
A collar that is set into the neckline needs front and back facings to cover the raw seam allowances beneath it.
- Trace from the Adjusted Bodice: Use the modified neckline, not the raw sloper.
- Width: Facings are generally 1 1/2" to 2" (38 to 50 mm). Make the back facing reach lower than the front neckline does, so it hangs well.
- Trim the Edge: Take 1/16" (1.5 mm) off the facing's outer edge at the shoulder, tapering to zero at the shoulder tip. It stops the facing from looking loose.
- Layout: Front and back facings can sometimes share one pattern. If not, you need a shoulder seam. The fold goes on the side where the neckline opens.
The facing should finish narrower than the collar fall, so its edge stays hidden under the collar.