Shaped Necklines
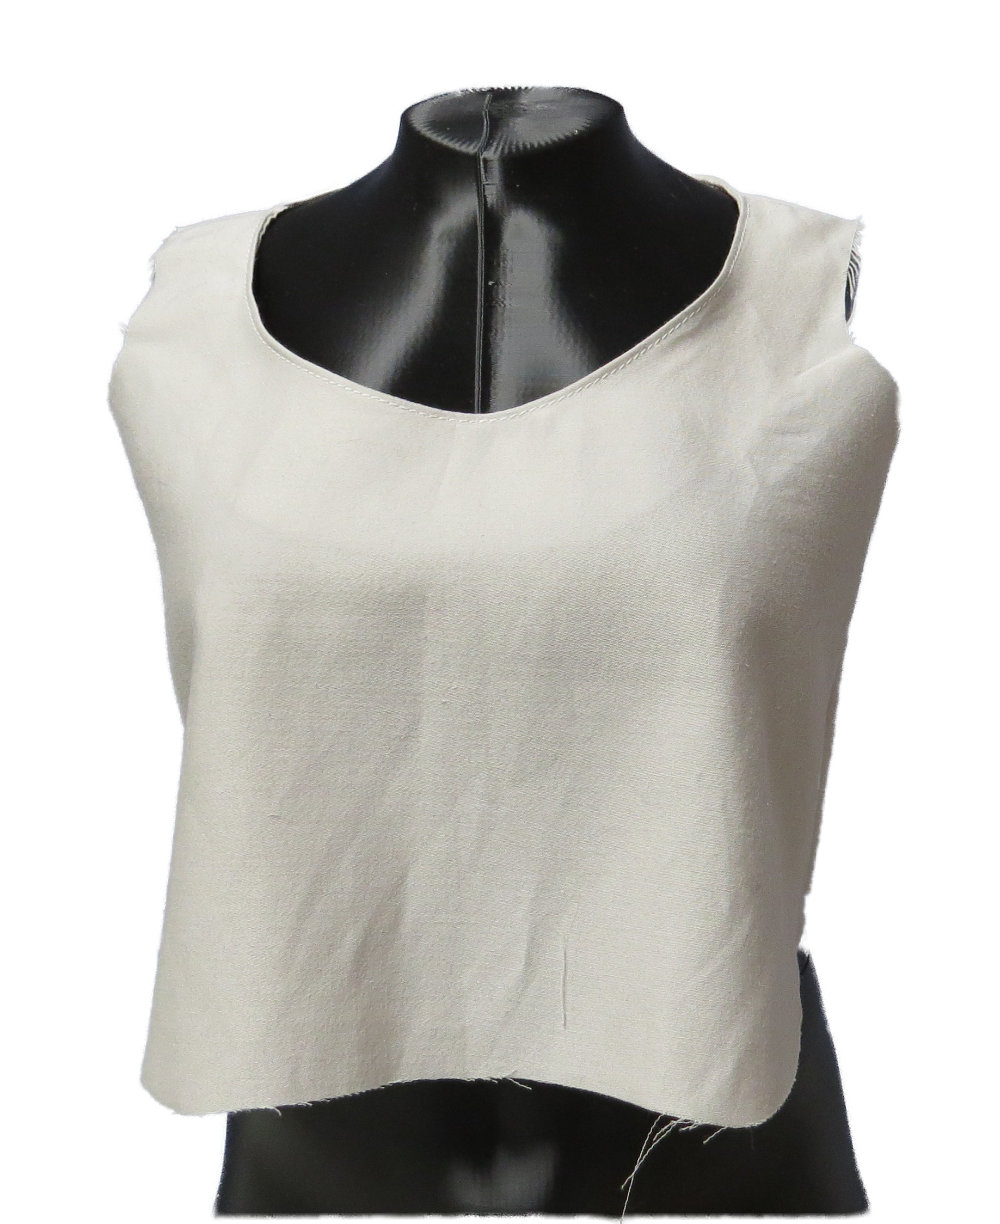
Scoop Neckline Sample Garment (1/2 scale)
A neckline frames the face, neck and shoulders, and it sets the upper balance of a garment. Once you move away from the basic jewel neck sloper, the pattern needs a few adjustments so the garment sits cleanly against the body without gaping, stretching or buckling.
The Mystery of Curve Shapes
Drafting instructions will tell you to draw a smooth curve from one point to another passing through other guide points in the process. They say to use a French Curve tool for this. I have a French Curve and it certainly doesn’t define the curve shape. The angles are different all along its shape. Where do you align it to make that the perfect shape that isn’t too deep or shallow?
It feels to me as though authors relieve themselves of liability by telling you to buy a tool and all will become clear. That is not the case. You can hand sketch your curves or better yet, just use PatternMaker Pro and save yourself the money. Here are the things to keep in mind for greater success.
The curve is often going around a body part, like the neck or the armhole. You want to find the shortest, smoothest path around. The most important consideration is the beginning and end of the curve. These will be sewn to some other pattern piece. You want the transition to be smooth.
The best way to guarantee this is to make the start and end lines of the curve perpendicular to the adjacent line. Sorry, that sounded all mathy, but it’s not hard to understand with a simple image.
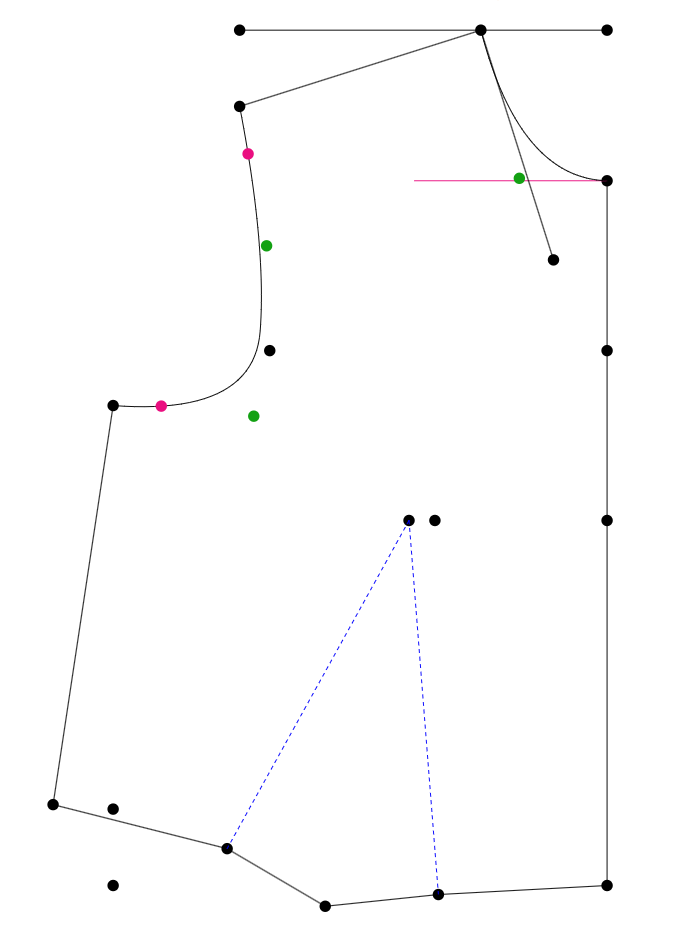
Front Bodice Armhole Curve
Here is an armhole on a front bodice. We want the top of the curve to run perpendicular to the shoulder line for a short distance, let’s say a minimum of 1” (25 mm). At the bottom of the curve in the armpit, let’s do the same. We’ll make it perpendicular to the side seam for an inch (25 mm). Here I've marked bright pink points at 1" (25 mm) for you to see. Mine are not perfectly perpendicular, which I'll explain in a moment.
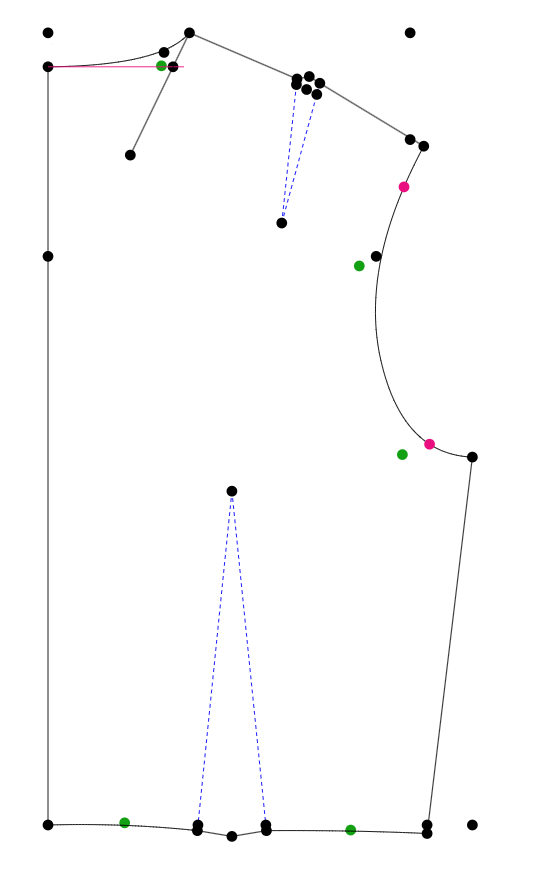
Back Bodice Armhole Curve
If we follow the same rule for the back, we can be assured that there will be a smooth transition from one to the other.
PatternMaker Pro has a tool called Curve Truing that allows you to see what your aligned curves will look like. Here I’ve used the tool for the armhole joining at the side seam. I can actively move the curve points on either curve and update the preview to get it just right. This is why mine are not perpendicular, I've adjusted them to make a very smooth overall curve where they join.
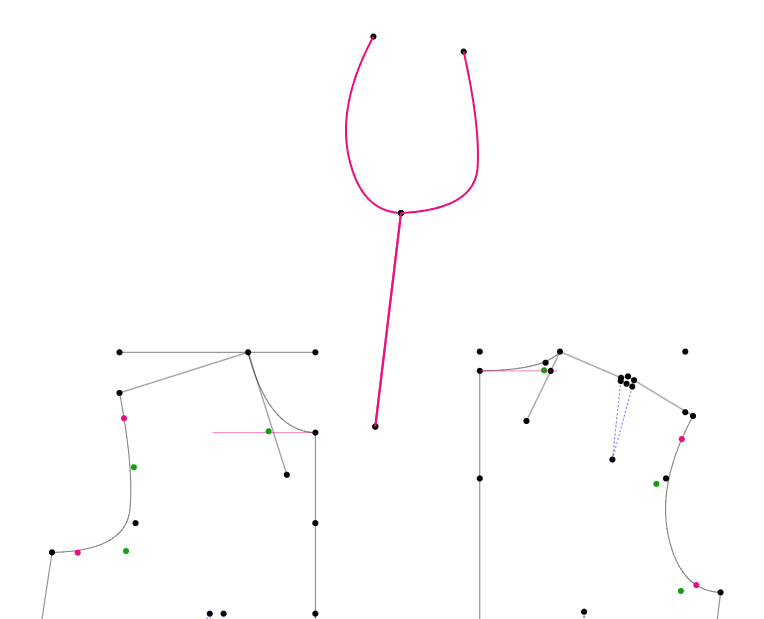
Curve Truing Joining Armhole at Side Seam
This tool allows you to quickly see consequences before you cut anything out. Here is the tool used on the armhole curve joining at the shoulder.
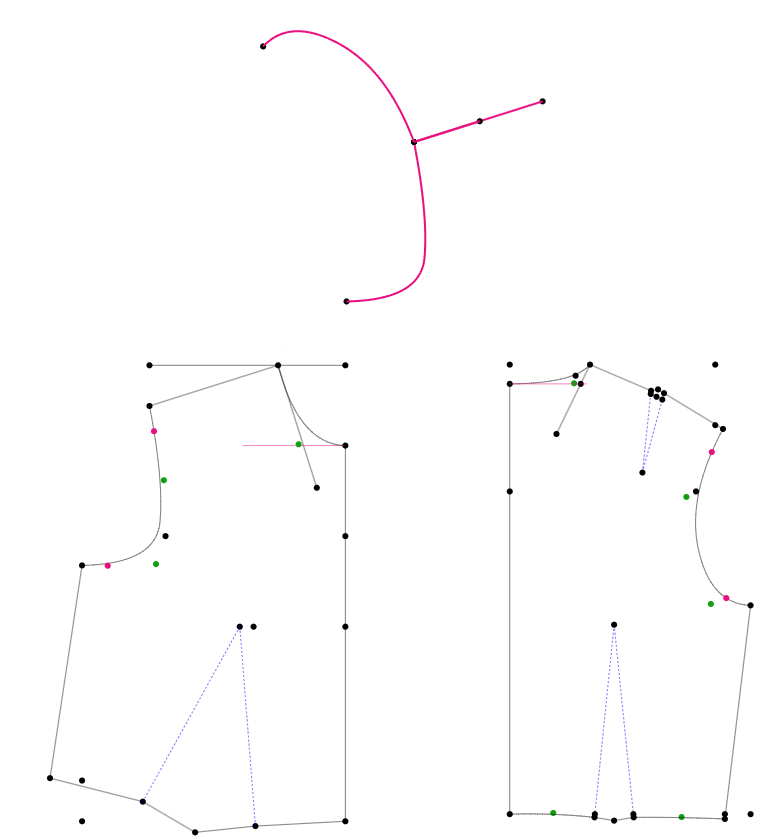
Curve Truing Joining Armhole at Shoulder
Learn more about the Curve Truing Tool in PatternMaker Pro.
Curved and Rounded Necklines
Curved necklines run from a gentle scoop to a deep oval. Depth and width change both the fit and the look.
- Proportion: A high, shallow curve can look flat and dull. Dropping the center front and narrowing the shoulder side a little makes a longer, oval shape.
- Drafting: After you lower or open a neckline, check that the front and back lines blend into one smooth curve across the shoulder seam.
When a neckline opens to about halfway along the shoulder seam, take 1/4" (6 mm) off the front and back shoulder at the neck edge, tapering to nothing at the armhole. You can skip this if the new neckline is within 2" (5 cm) of the original. If the neckline is lower in the back, or opens past halfway, move the shoulder dart to the back neck first.
Curved & Rounded Necklines
Keyhole Necklines
- The Look: A cutout (oval, teardrop or slit) below a high or jewel neckline, finished with a button and loop, a tie or a neckband.
- Drafting: Draft the high neckline first, to anchor the shoulder seams. Then draw the cutout centered on center front (or center back).
- Finishing: Interface the opening or use an all-in-one facing, so the edges stay crisp and do not spread or roll.
Angular and Geometric Necklines
Straight-line necklines need careful grain handling, because a straight edge on the bias stretches and pulls away from the hollow of the chest.
V-Necklines
- Moderate V: The standard shoulder reduction above is usually enough.
- Wide or Deep V: These gape over the upper chest. Take a small contour dart, about 1/2" (13 mm), out of the neckline edge and pivot it into the waist or bust dart.
- Grain and Facings: A V-neck edge falls on the bias and will stretch. If you can, cut the front with a center front seam so the V-edge lies on the straight grain. If you cut it on a fold, cut the facing on the straight grain.
Square Necklines
- Drafting: Square the neckline from center front and center back, then connect it to the shoulder seam.
- Optical Illusion: The body is rounded, so a mathematically straight line can look curved when worn, and a slightly curved line can look straight. Blend the corners smoothly toward the shoulder.
Sweetheart Necklines
- The Look: Twin curves over the bust, dropping to a point at center front. It combines the structure of a square or V with soft curves.
- Contour Darts: The upper edge crosses the hollow above each bust, so take a small dart, about 1/4" to 1/2" (6 to 13 mm), out of each curve and rotate it into the waist or bust dart to stop gaping.
- Staystitching: Staystitch the center point and the curves right after cutting, before you add facings or linings, so the bias edges do not stretch.
Angular & Geometric Necklines
Wide and Off-Shoulder Necklines
Wide necklines reach toward the shoulder tip and change the balance across the collarbone.
Bateau (Boat or Sabrina)
- The Look: Wide and horizontal, sitting high at the front and back. It looks straight, but draft a slight curve so it is comfortable to wear.
- Drafting: Shift the back shoulder dart to the neck edge. A small amount of leftover dart can be eased into the seam.
- Proportion: A boat neck makes the shoulders look broader and the neck shorter.
- Off-Shoulder and Very Wide Cutouts: When the opening reaches the armhole, the neck and upper shoulder are exposed. Give the armhole and chest edge firm support so the garment does not slip.
Wide Neckline
Built-Up Necklines
Built-up necklines rise above the base of the neck, or add a band that is part of the bodice. Because the neck leans forward, the top edge needs extra room to stand away from the neck and not strain against it.
Stovepipe (All-in-One)
- The Idea: Extend center front, center back and the neck-shoulder point upward, then add room along the top edge. You can do that by moving some of the dart into the neckline, or by slashing and spreading the upper edge.
- Fabric: An all-in-one built-up neckline needs a fabric with body. For a very high neckline, a separate stand collar is steadier.
Inset Neckbands
- Drafting: Trace the band across the joined front and back patterns, and move the shoulder darts into the neckline so they become part of the band.
- Contouring: Cut the band free, then slash its outer edge and spread it a little so the band stands slightly away from the neck. About 1/4" (6 mm) at each slash is a common starting point.
- Plackets and Tabs: A slashed or inset placket makes an opening at center front, and it is built like a tailored sleeve placket so the neckline clears your head.
Contoured & Shaped Necklines
You can draft one continuous facing, cut on the fold, by lining up the front and back shoulders. If the neckline curve is deep, the pieces overlap too much at the outer edge. In that case, cut separate front and back facings and join them with a shoulder seam.
Neckline Styling
A plain collarless neckline is a bare frame for the throat and jaw, so the look depends on proportion. Without a collar, lapel or trim to draw the eye, you'll want to add some character to the shape.
Square Neckline Styling
- Static Square (Fig. 1): Simply swapping in a square neckline makes a stiff, abrupt frame that does not lengthen the neck.
- Elongated Rectangle (Fig. 2): Making the square deeper adds a strong vertical line. It slims the neck and balances a broader jaw.
- Wide Horizontal Square (Fig. 3): Reaching toward the shoulder tips adds width and makes the shoulders look broader.
- Tapered Base (Fig. 4): Angling the sides inward, or softening the lower corners with a slight curve, takes the harshness out of right angles.