Tailored Lapels
A tailored collar is two parts: a lapel (also called a rever), which is part of the front bodice, and a separate collar sewn to it at the gorge line. These drafts are more of a challenge than most collars, and well worth the investment.
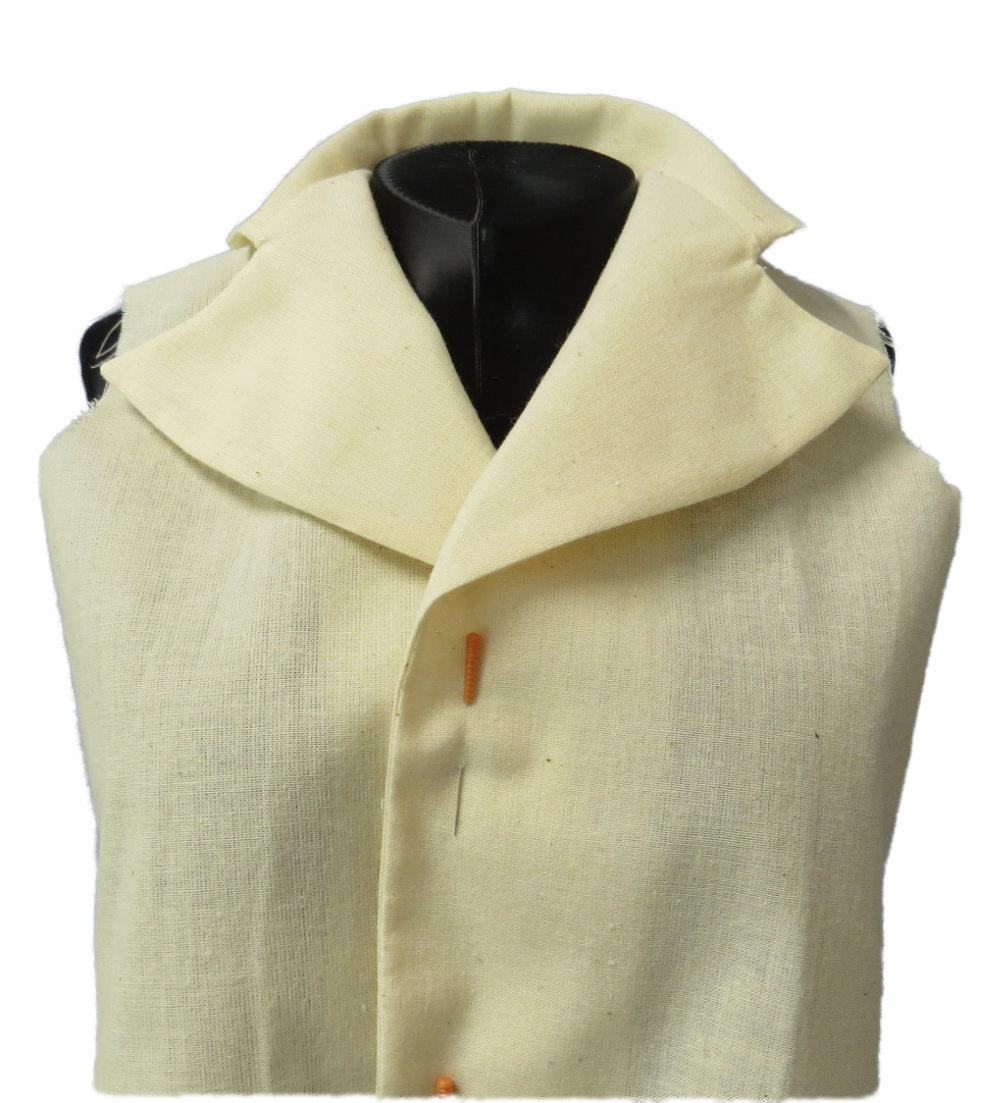
Notched Lapel Sample Garment (1/2 scale)
| Term | What It Is |
|---|---|
| Break Point | Where the lapel starts to roll back, on the front extension. |
| Roll Line | The fold line of the lapel and collar. |
| Stand | How tall the collar stands before it folds over. |
| Gorge Line | The seam where the collar meets the lapel. |
| Notch | The gap between the collar and the lapel. |
Step 1: Add Length to the Roll Line
A lapel that rolls back needs a longer roll line than the plain bodice gives you. Shift some of the dart to center front to add that length, so the front does not pull up when the jacket is buttoned. The amount depends on where the jacket closes.
Basic Sloper Waist Control Moved to Center Front
| Closing | Break Point | Shift to Center Front |
|---|---|---|
| High | 1" to 3" (25 to 75 mm) above the bust | 1/4" (6 mm) |
| Medium | At the bust | 3/4" (19 mm) |
| Low Single-Breasted | 2" (50 mm) below the bust | 1" (25 mm) |
| Waistline | At the waist | 1 1/4" (32 mm) |
| Double-Breasted | Any level | Half the single-breasted amount |
| Tuxedo (Straight Open) | Any level | None |
Make the roll line a little too long, not too short. It is hard to fix once you have sewn a muslin.
Step 2: Draw the Roll Line and Lapel
- Add the front extension for the buttons. Make it about the width of the button, 3/4" to 1" (19 to 25 mm), for single-breasted. For double-breasted, use about three times the button width, 2" to 3" (50 to 75 mm).
- Mark the break point on the extension, level with the top button.
- Extend the shoulder line at the neck by 3/4" to 1" (19 to 25 mm) for the stand.
- Draw the roll line straight from the break point through the extended shoulder point.
- Fold along the roll line, trace the neckline through the fold, then sketch the lapel and notch, trace them through, and unfold.
For a basic notch, extend the traced neckline curve 1 3/4" (45 mm) into the front and mark the notch there. Measure 2" (50 mm) from that point toward center front, and join it to the break point with a line curved slightly outward.
Step 3: The Facing and Roll Ease
- Rever Facing: The whole lapel turns back to the outside, so the facing is the layer that shows. Cut a separate front facing that runs from the hem, up along the lapel, and across the front neckline to the shoulder.
- Roll Ease: The facing rolls to the outside above the break point. Make it 1/16" to 1/8" (1.5 to 3 mm) wider along the lapel edge than the front bodice. The extra pulls the seam slightly underneath, out of sight.
- Back Neck Facing: Draft about 2" to 2 1/2" (50 to 65 mm) to match the back neckline. It joins the front facings at the shoulder to hold the back collar seam and finish the inside neck, or to anchor the lining.
Step 4: Final Pattern Details
| Piece | Grainline | Cut | Interfacing |
|---|---|---|---|
| Upper Collar | Straight, parallel to CB | Cut 1 on fold, Self | 1 fusible |
| Under Collar | Straight, cut 1 on fold, or 45° bias, cut 2 with a CB seam | Cut 1 or 2, Self | 1 or 2 fusible |
| Bodice Front | Straight, parallel to CF | Cut 2, Self | Lapel area |
| Front Facing | Straight, parallel to CF | Cut 2, Self | 2 fusible |
| Back Neck Facing | Straight, parallel to CB | Cut 1 on fold, Self | 1 fusible |
A bias under collar hugs the neck better, but then you cannot cut it on a fold. Add a center back seam allowance and cut two, so you can shape the seam to the neck with steam.
- Seam Allowances: Use your usual 1/2" or 5/8" (13 or 16 mm) at the shoulder, side and neck seams, and 1/4" (6 mm) on the collar and lapel outer edges to avoid trimming bulk later. See Seam Allowances.
- Under Collar Trim: Trim about 1/8" (3 mm) from the outer edge of the under collar, widest at center back and tapering to nothing at the collar points. Use a little more for bulky fabric. The upper collar then rolls over the edge and the seam stays underneath.
- Fold Lines: No seam allowance on any edge marked Cut on Fold.