Draft Cowls

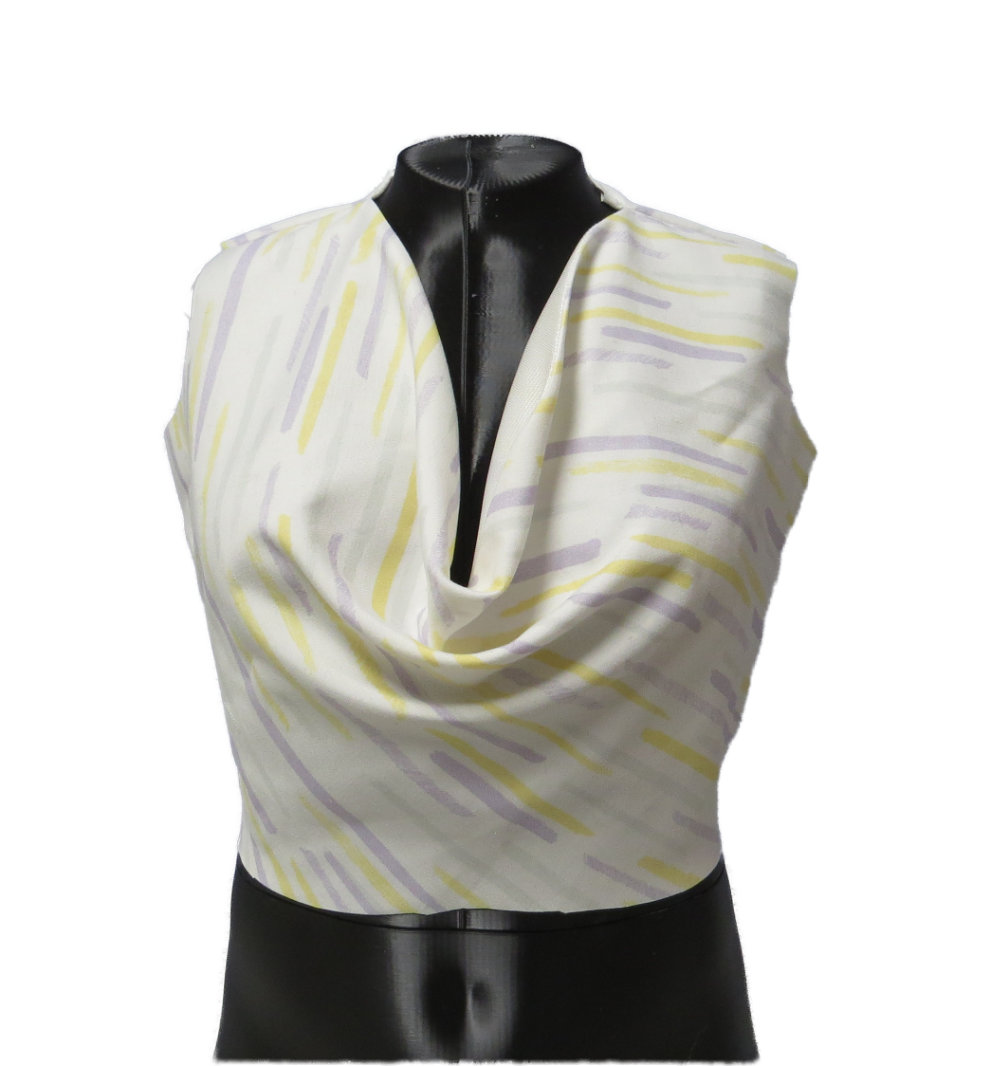
Cowl Neckline Sample

Cowl Neckline Sample Garment (1/2 scale)

Base Pattern​

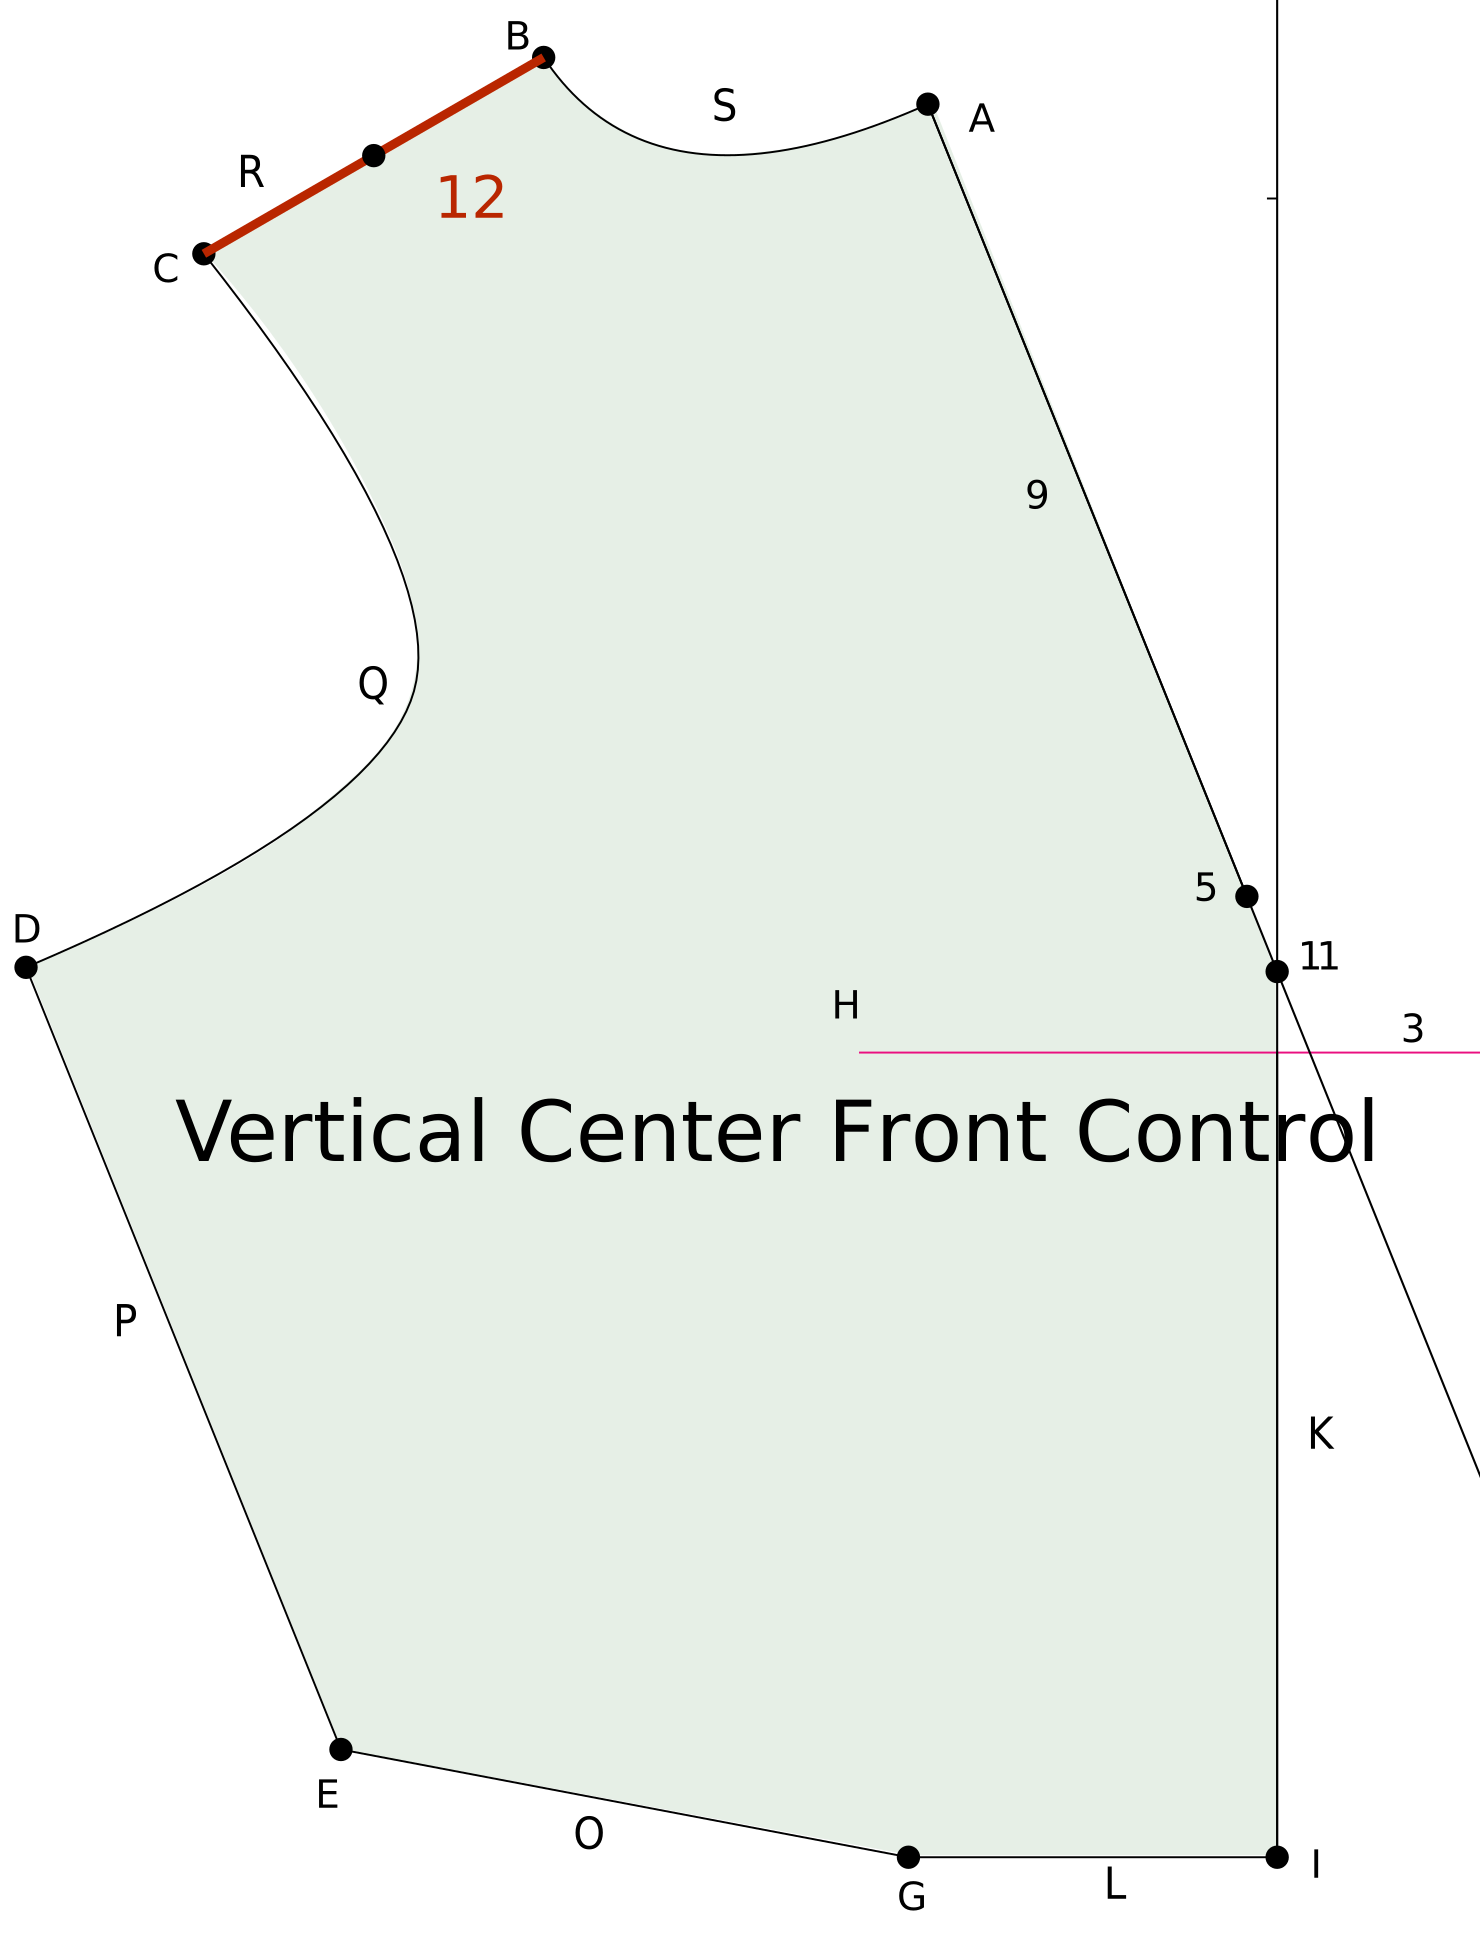
Initially you will create what is referred to as a Vertical Center Front Control. The resulting pattern is not something that you would use "as is". It creates a pattern that is merely a starting point for more complex designs. In this case, we'll use it to create different cowls.

Cowl Patterns​

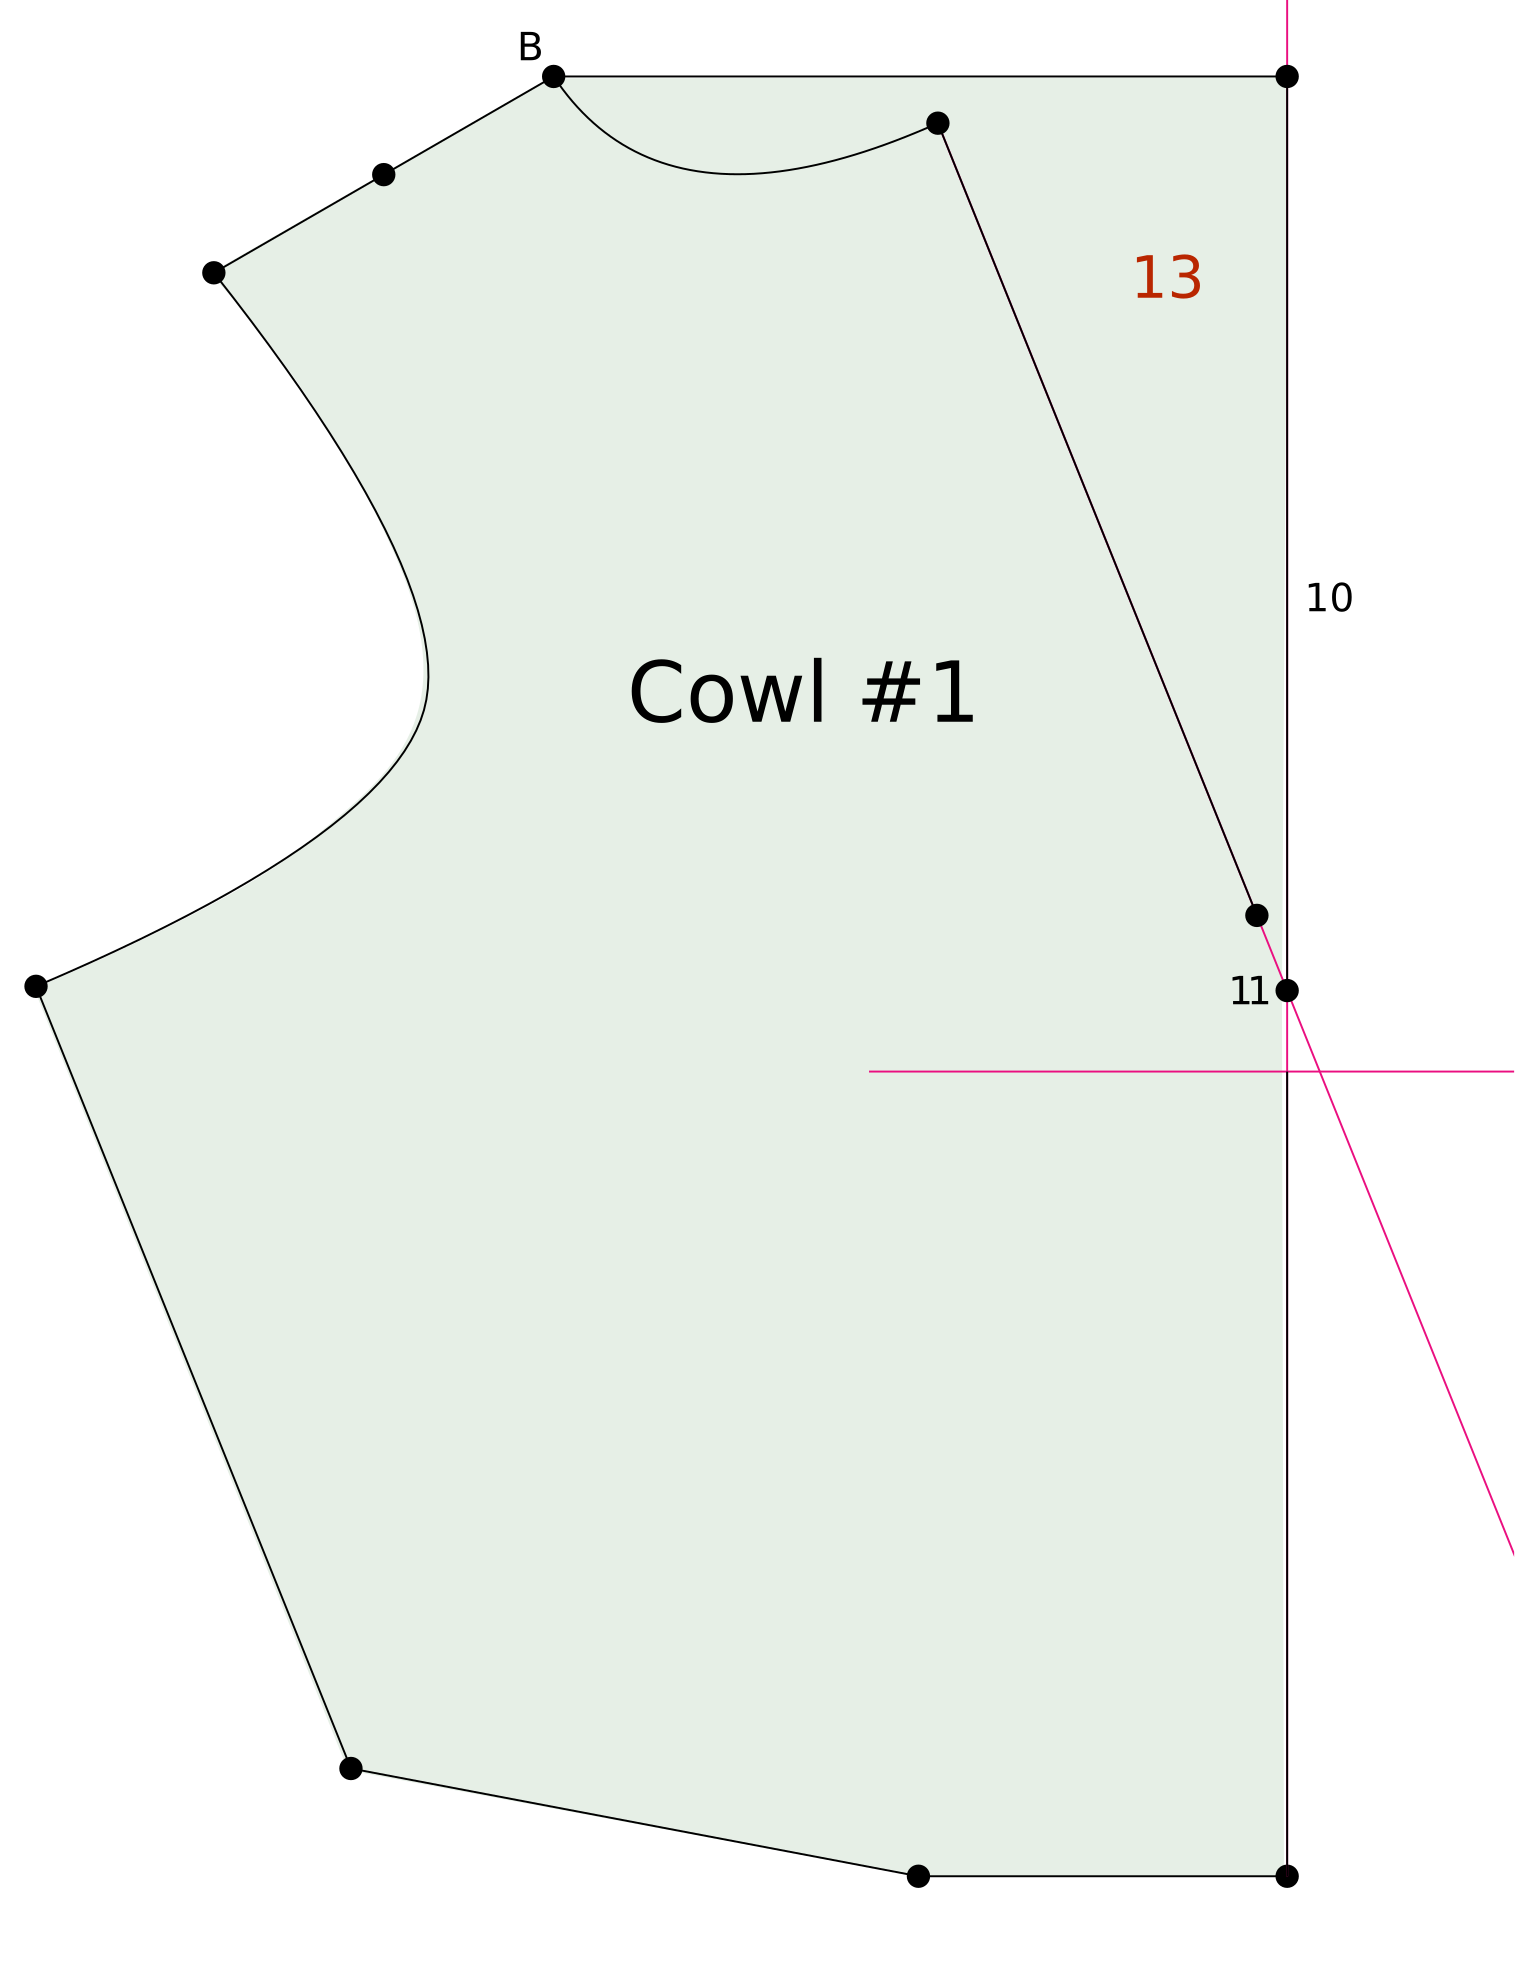
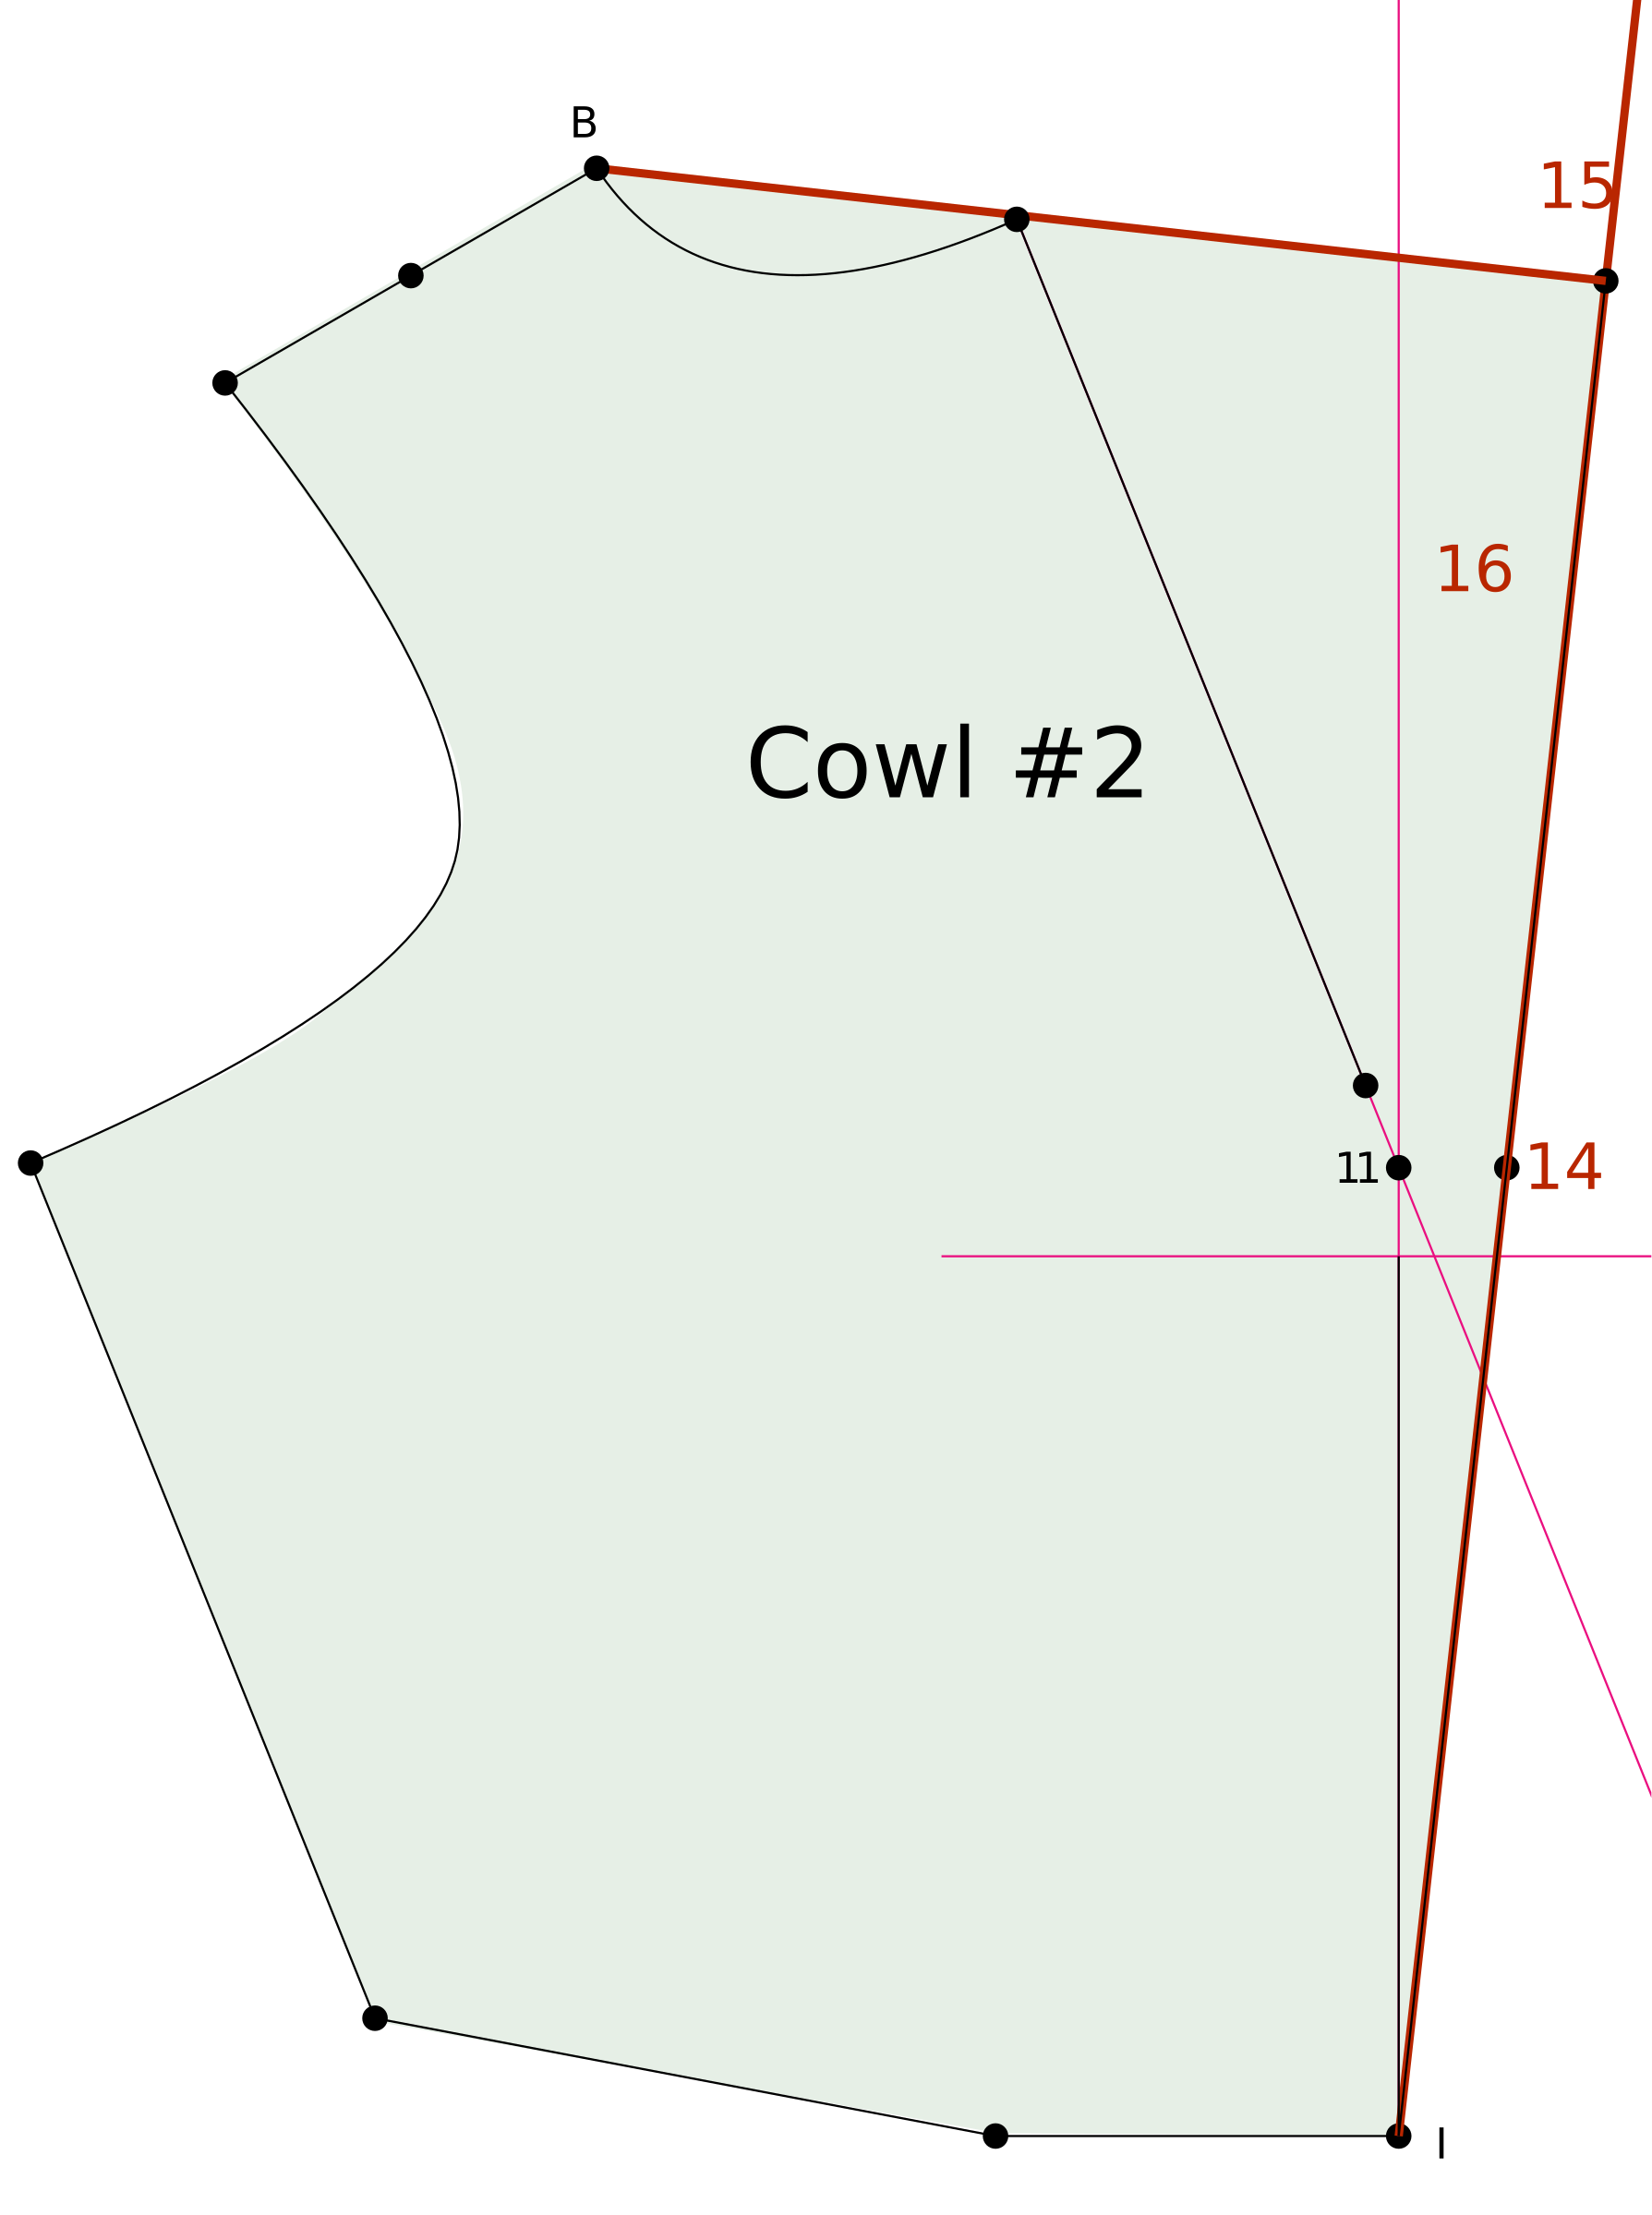
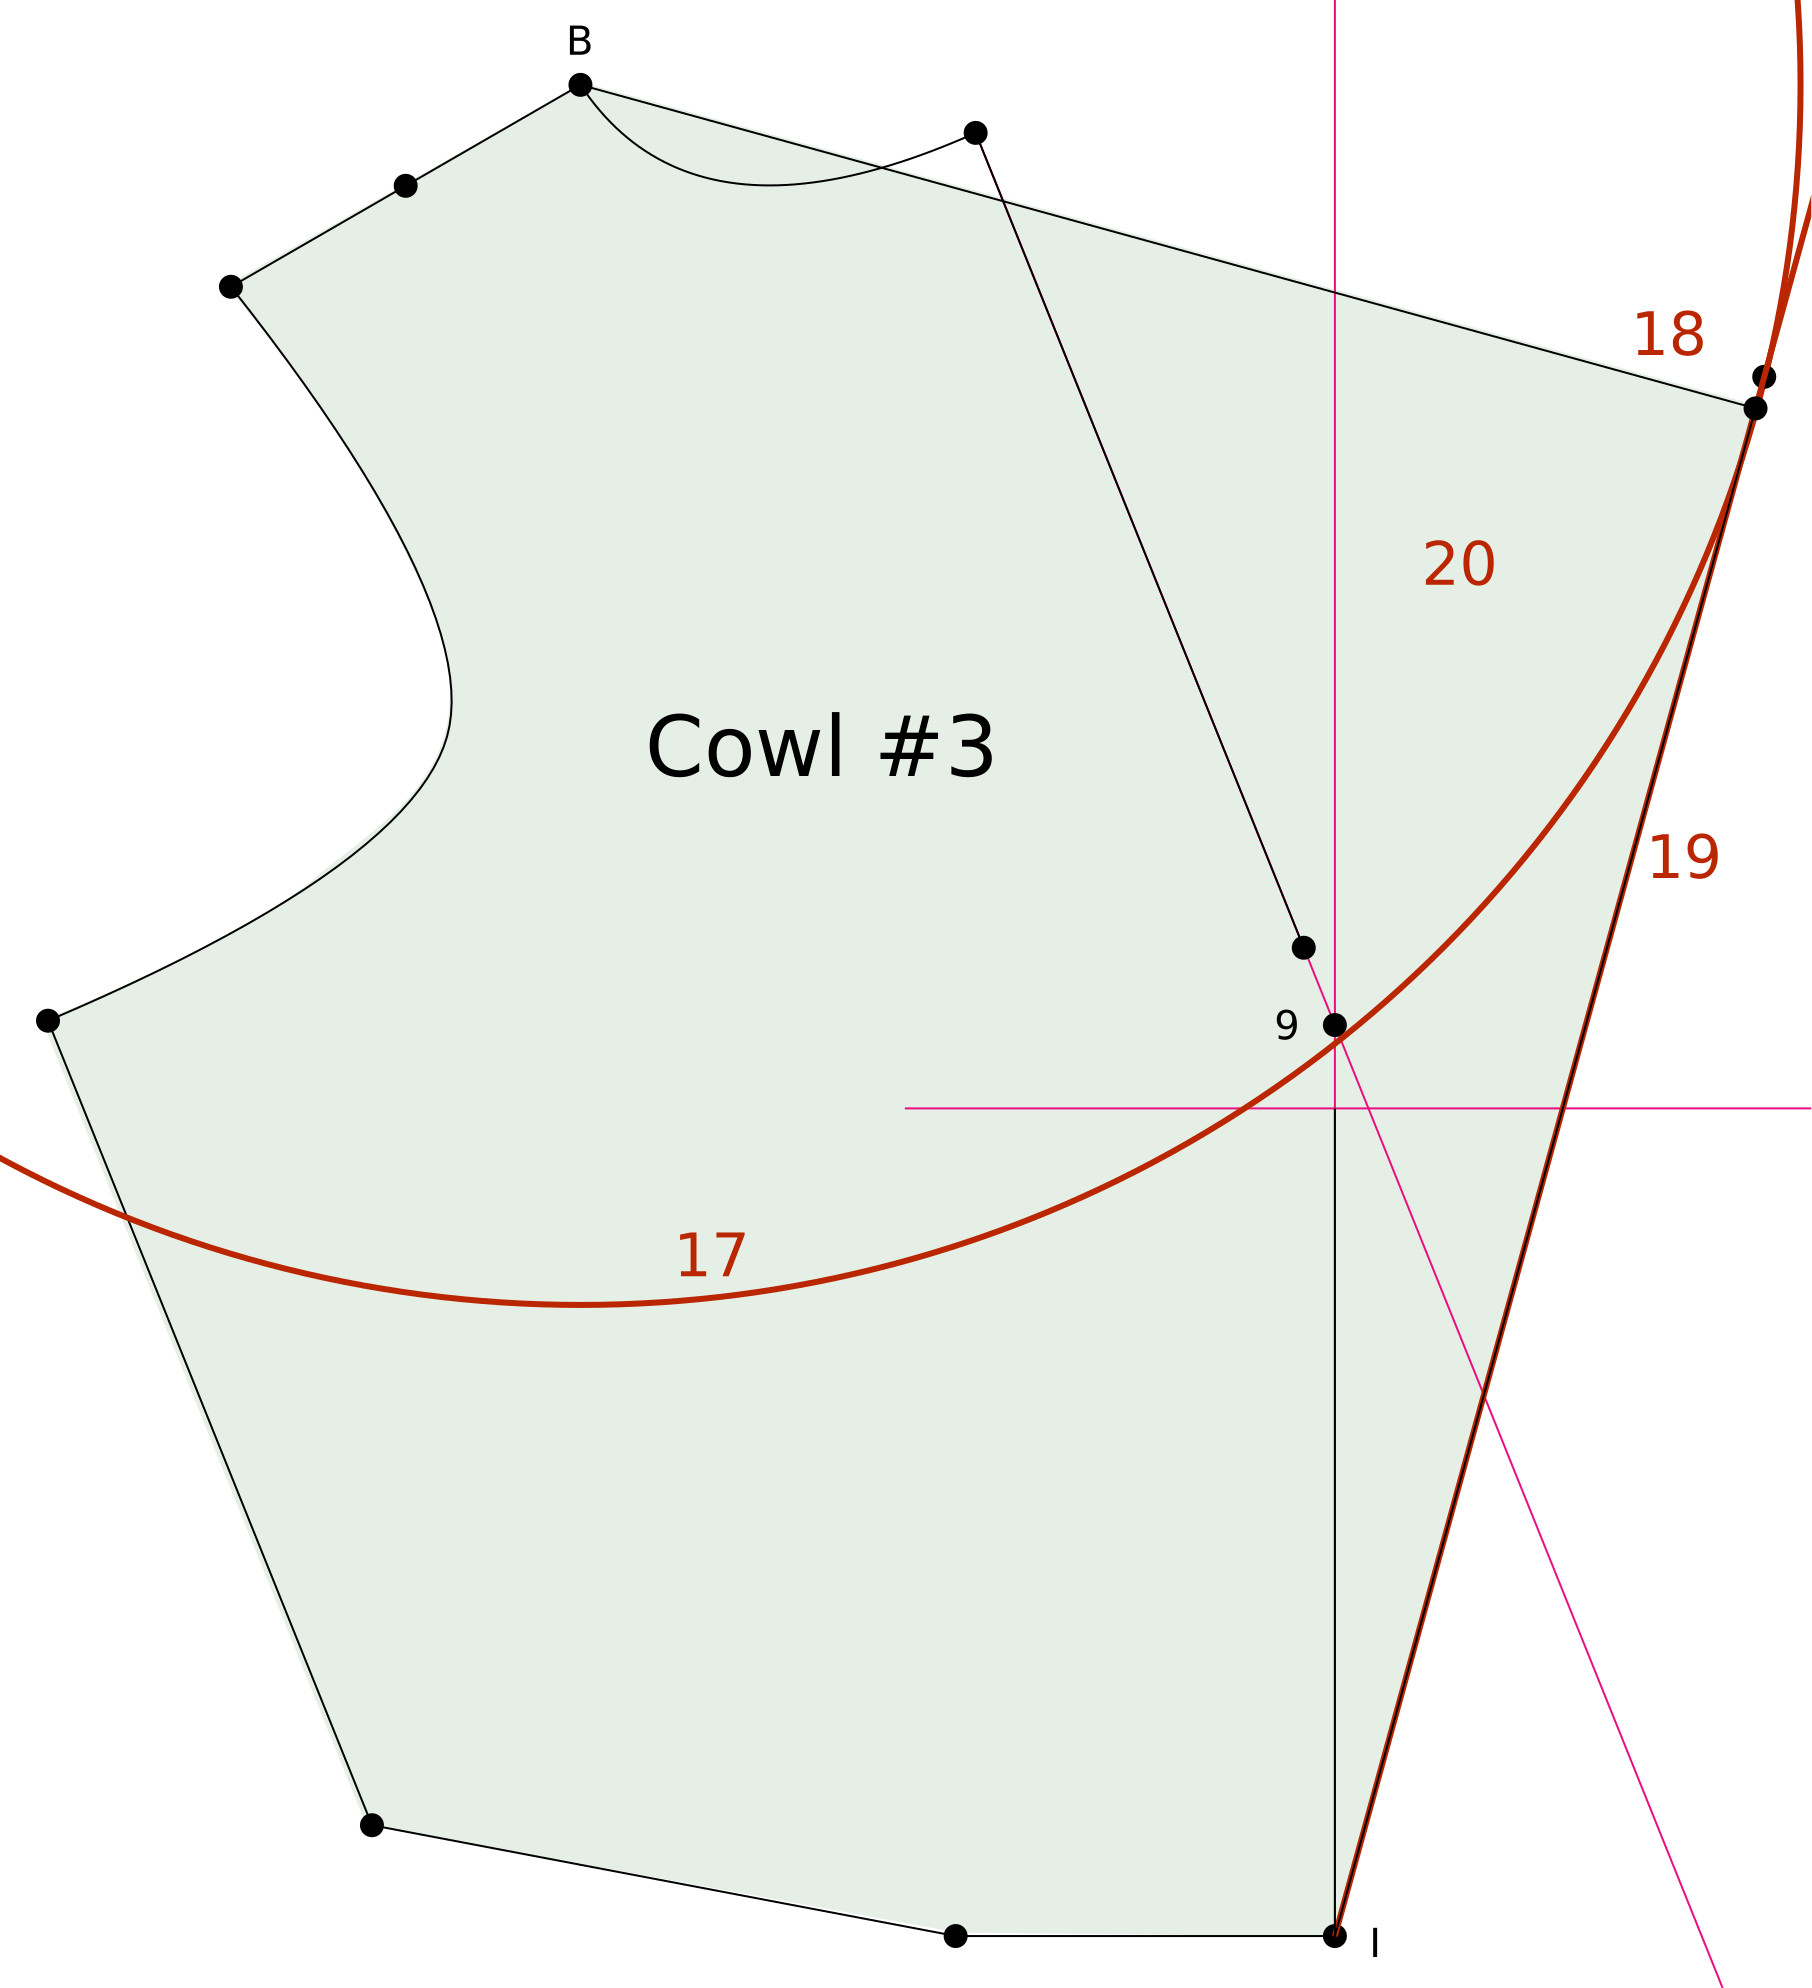
There are three different sets of instructions for cowls. Cowl #1 incorporates the dart intake into the cowl with no additional fullness. Cowl #2 has the dart intake plus a bit more fullness. Cowl #3 is the deepest cowl with lots of drape. This is the one in the image above.

If you don't have a draft to start from, download the 101 front bodice SVG as a starting point. Learn how to use the Import PMP SVG tool.

New to these instructions? Practice Basics explains point movement, how to read each step and contains other helpful tips.

Facing​

The center depth of the facing depends on the depth of the cowl, Deeper cowls require a longer facing inside to ensure a clean finish. You can draft the facing as a separate pattern piece; just remember to add seam allowances to both the facing and cowl edges. Using a contrasting or lighter fabric for the facing is also an option, as shown in the sample garment. Facing instructions apply to any of the cowl designs.

1Starting Bodice
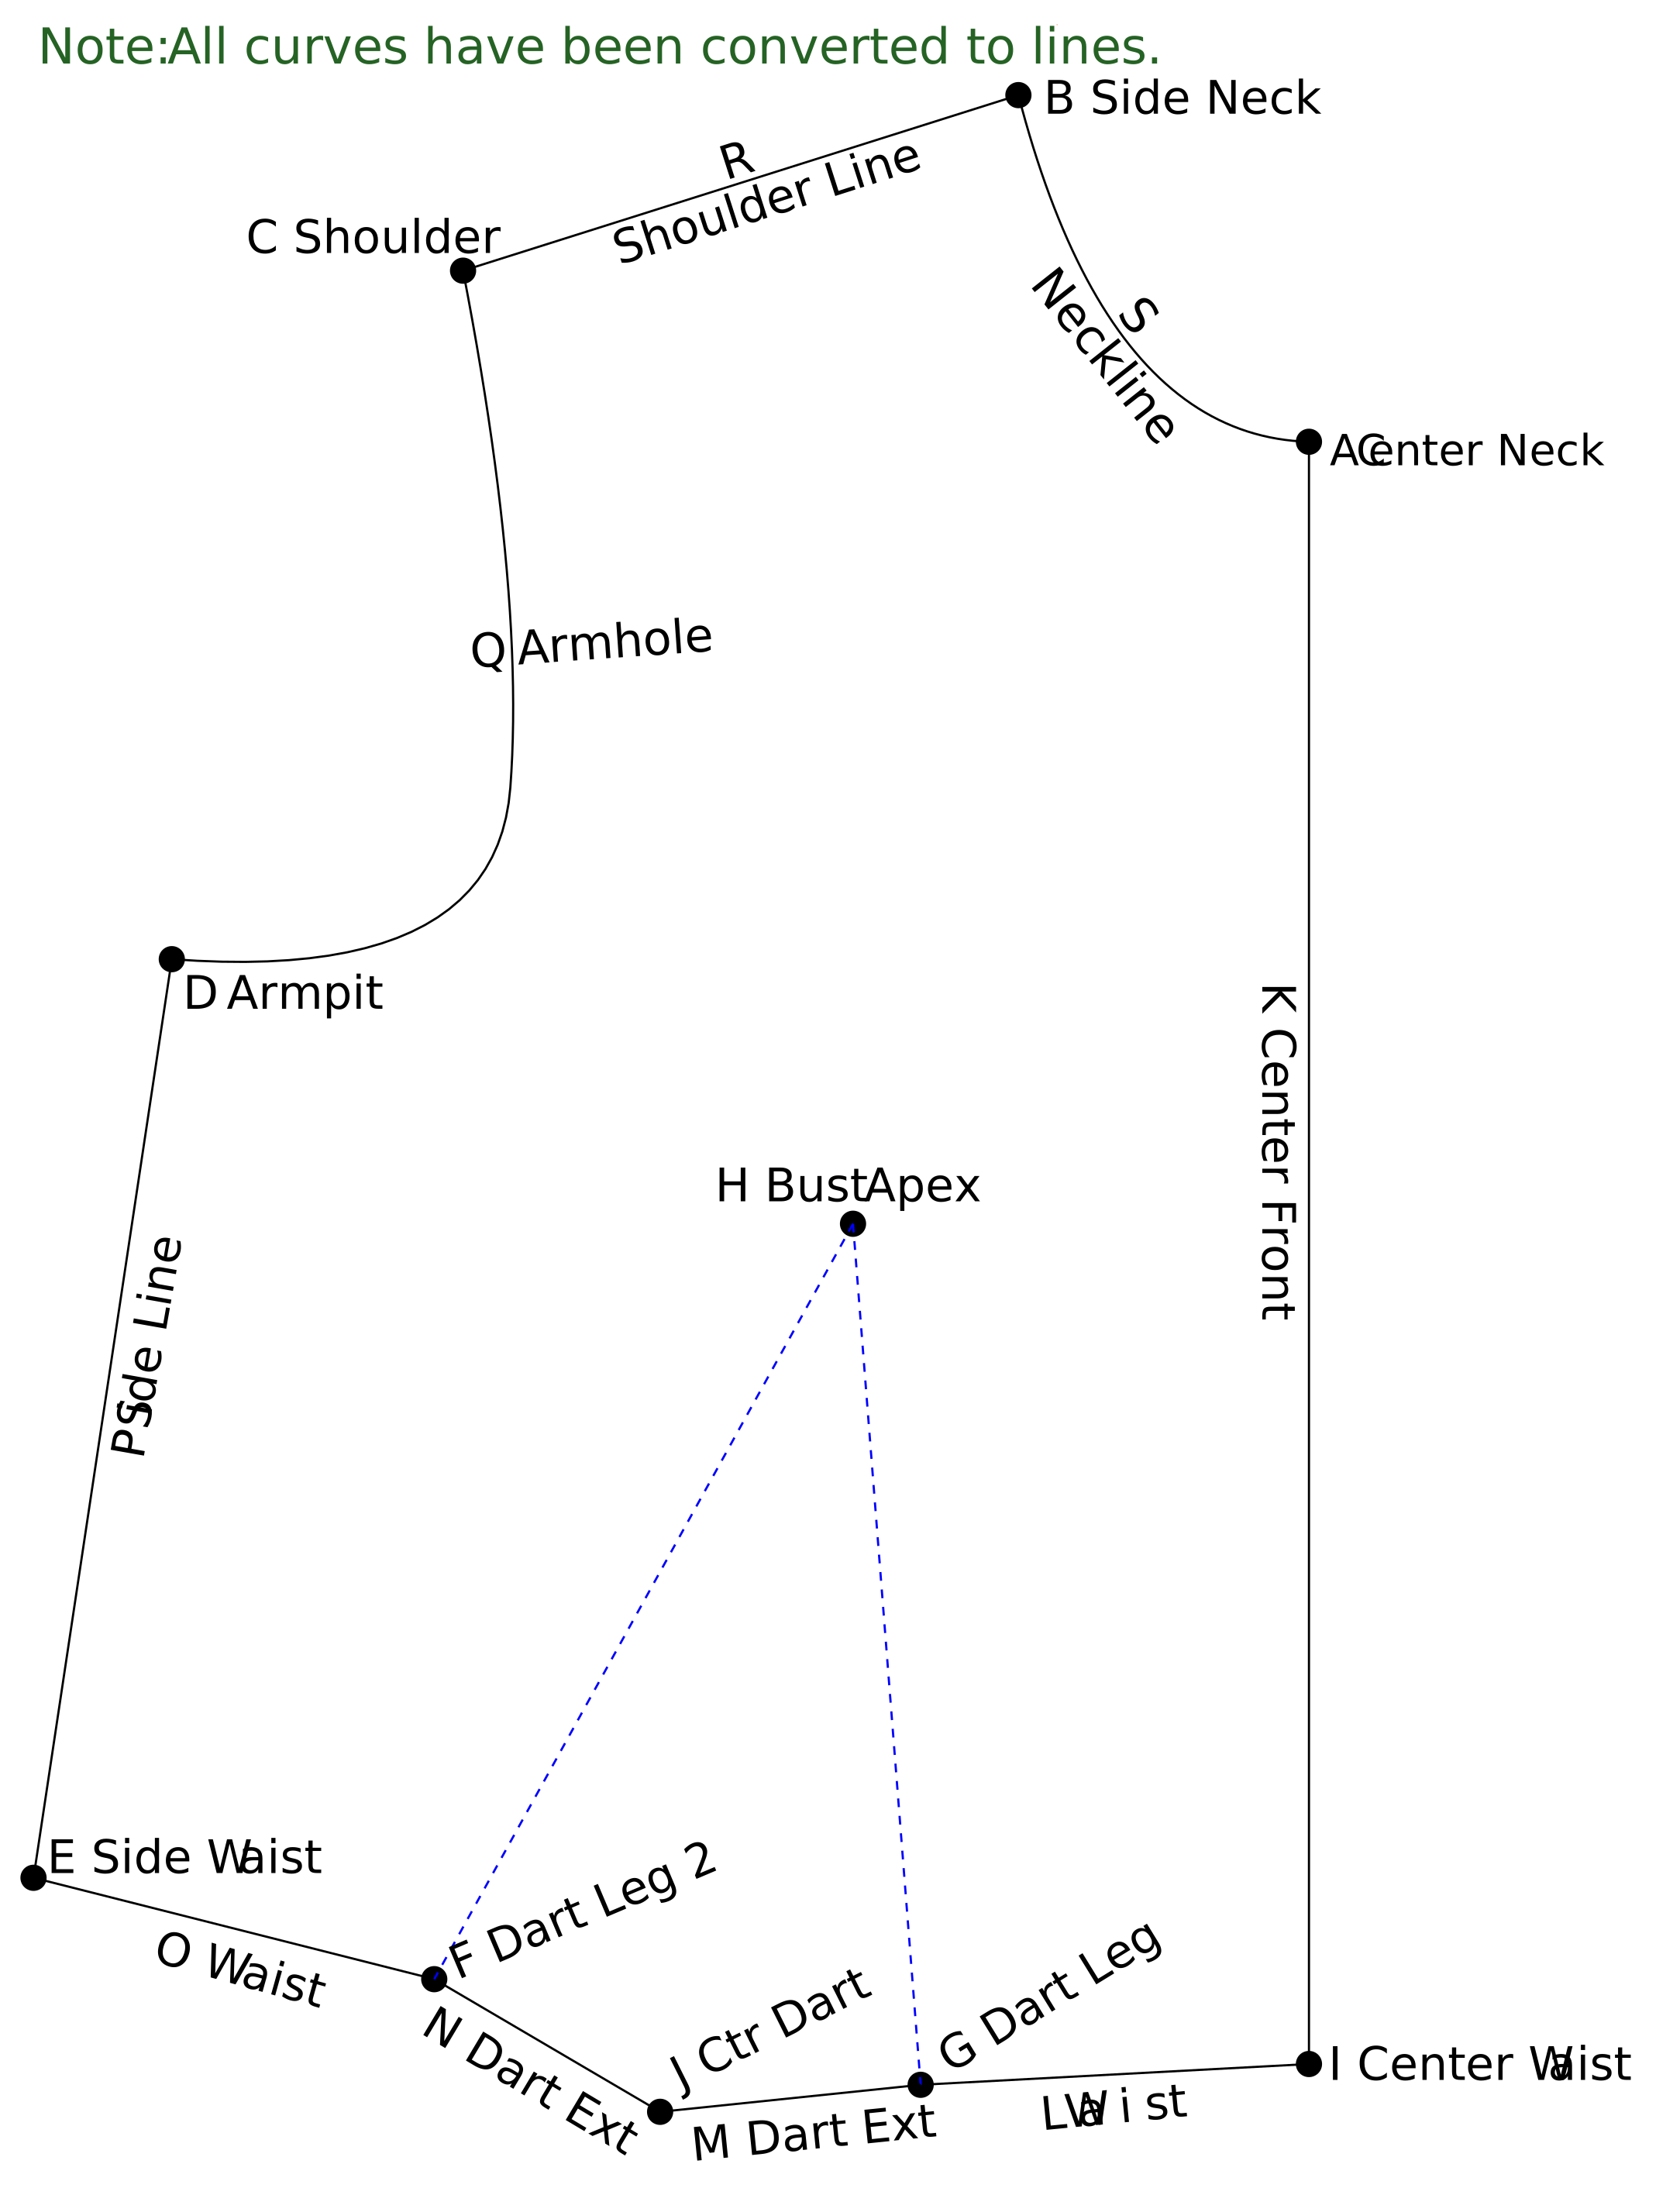
Note the point names for the starting bodice referenced later.
Points > Add Point on Line/Curve
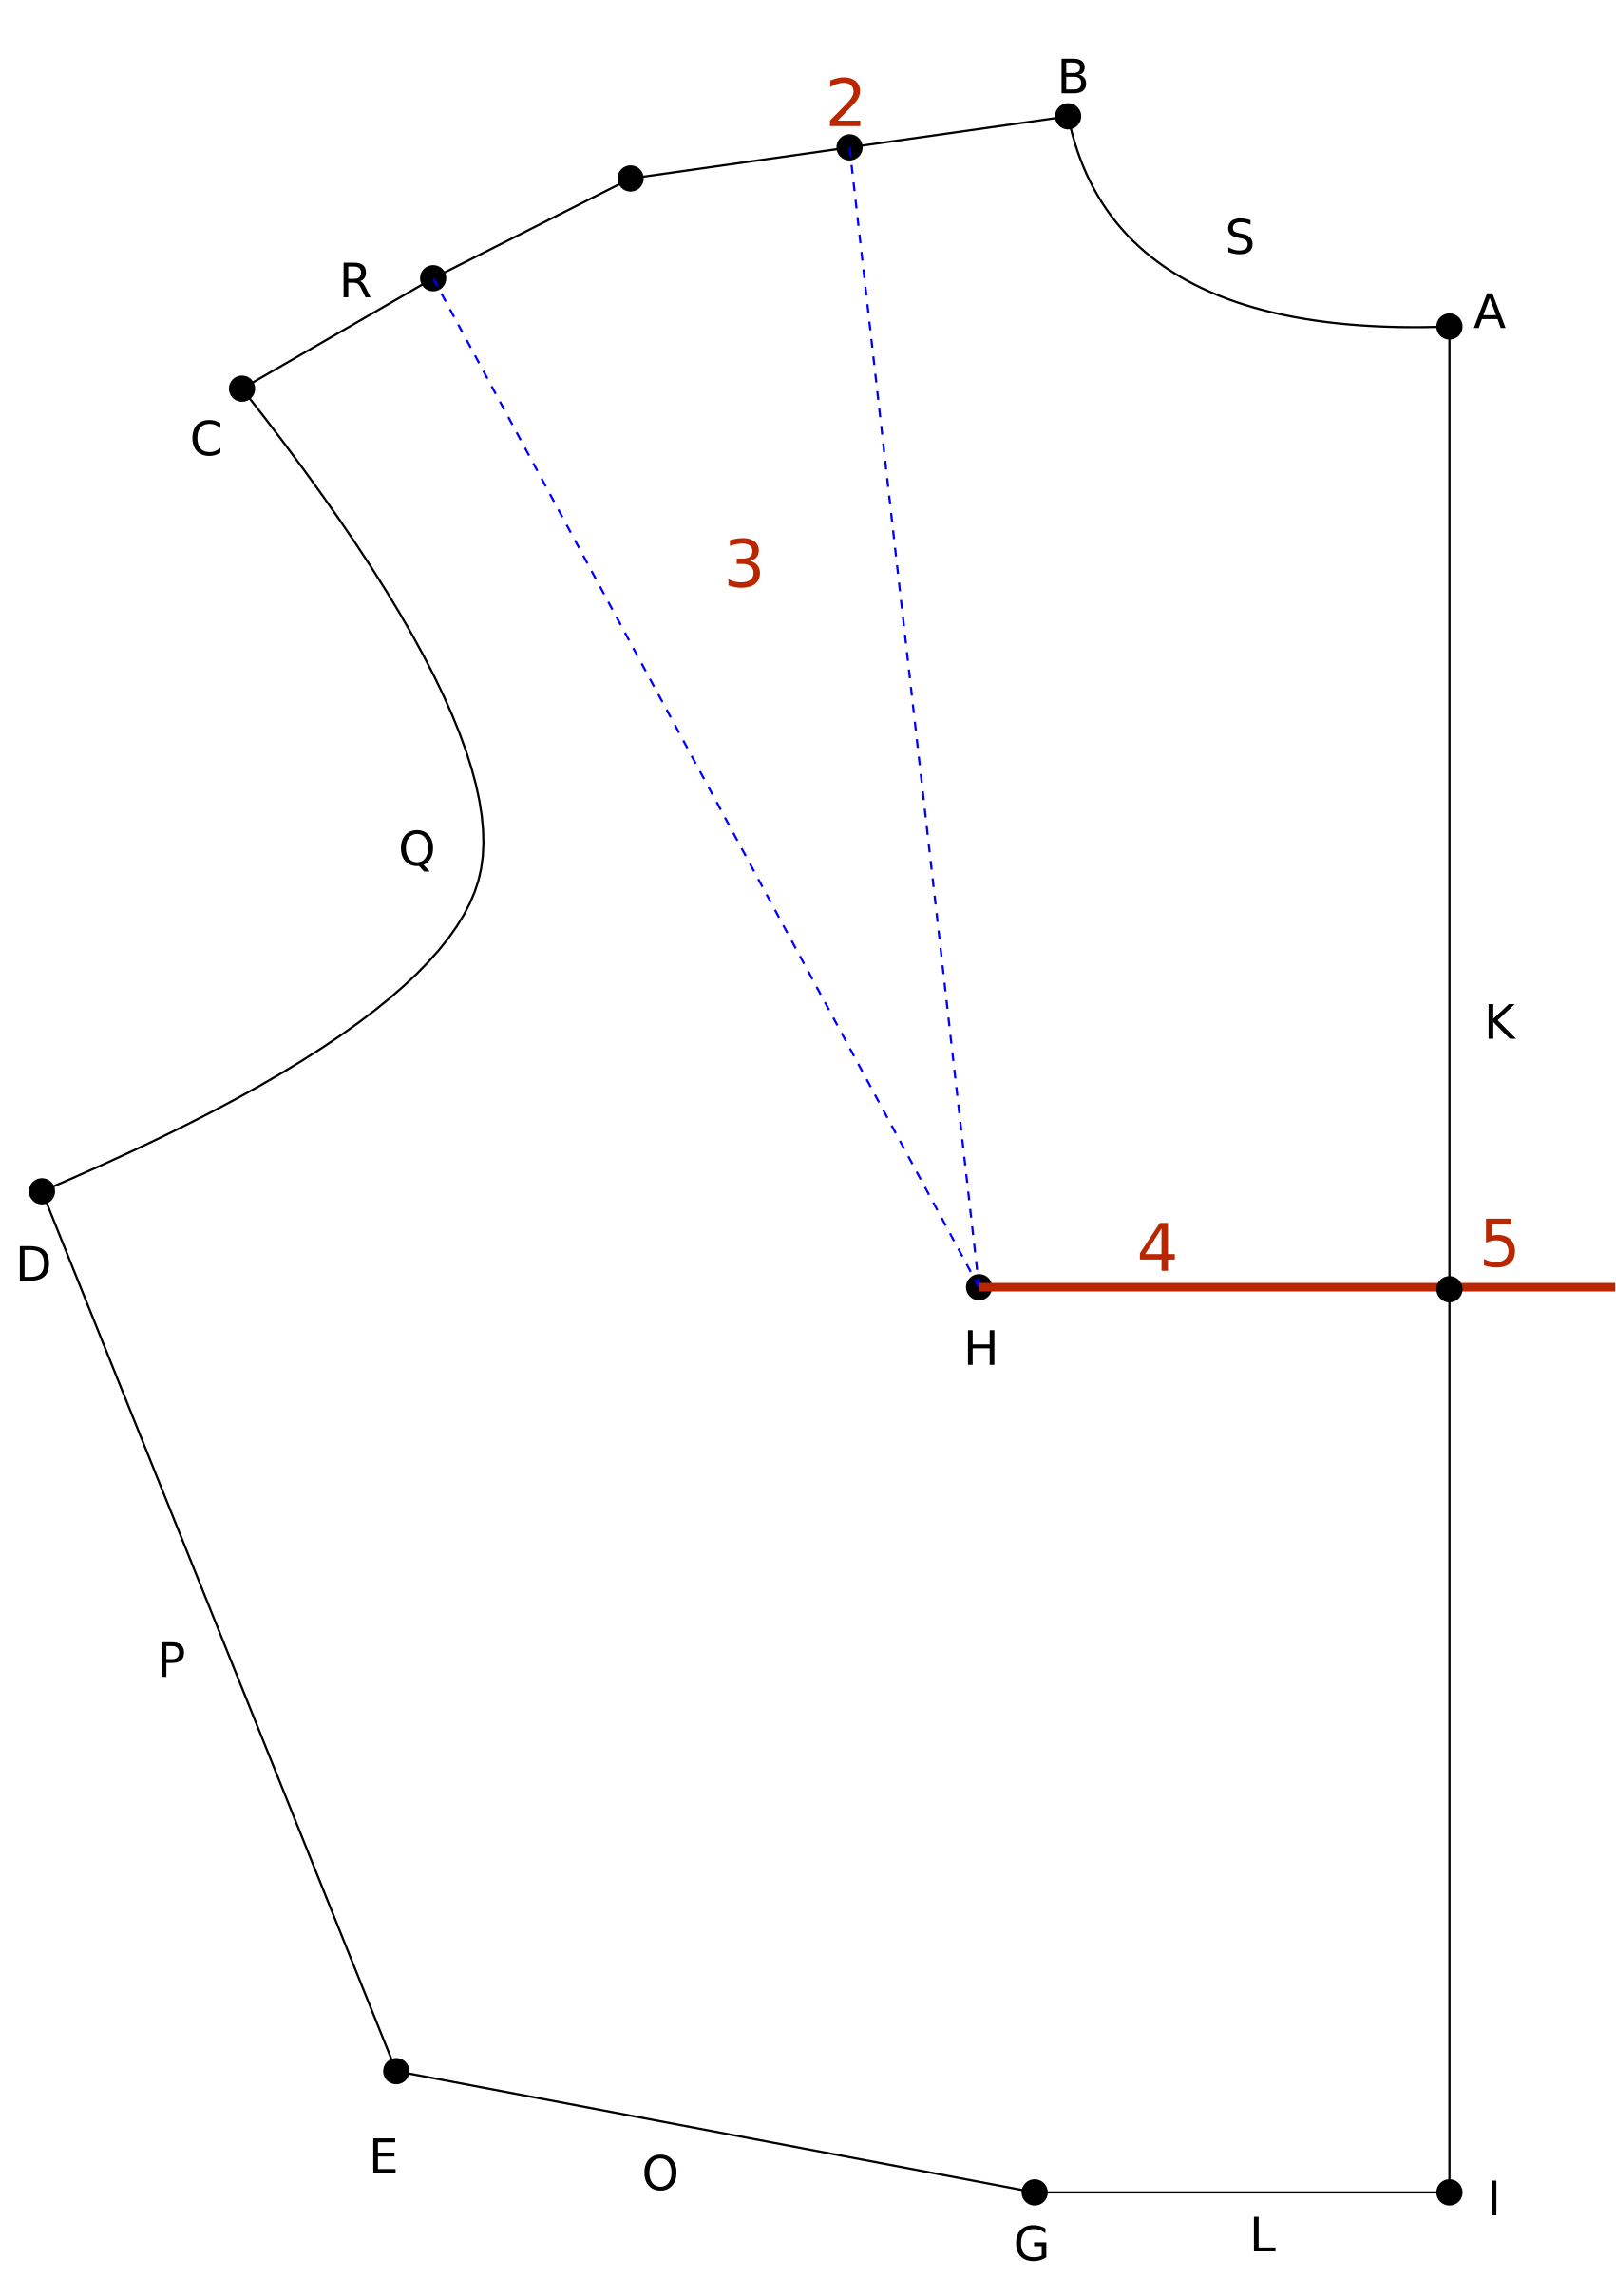
2Shoulder Slash
Select: RShoulder Line
Distance: Default Center
Save & Split
Darts > Move Dart
3Shoulder Dart
Dart: BustDart
Transfer: 100%
Select: 2Shoulder Slash, CShoulder, DArmpit, ESide Waist, FDart Leg 2
Name: ShldrDart
Lines > Add Reference Line
4Apex Ref Line
Start: HBust Apex
Direction: Horizontal
Length: One direction (right)
Points > Add Point at Intersection
5Center Apex
KCenter Front, 4Apex Ref Line
Save & Split KCenter Front
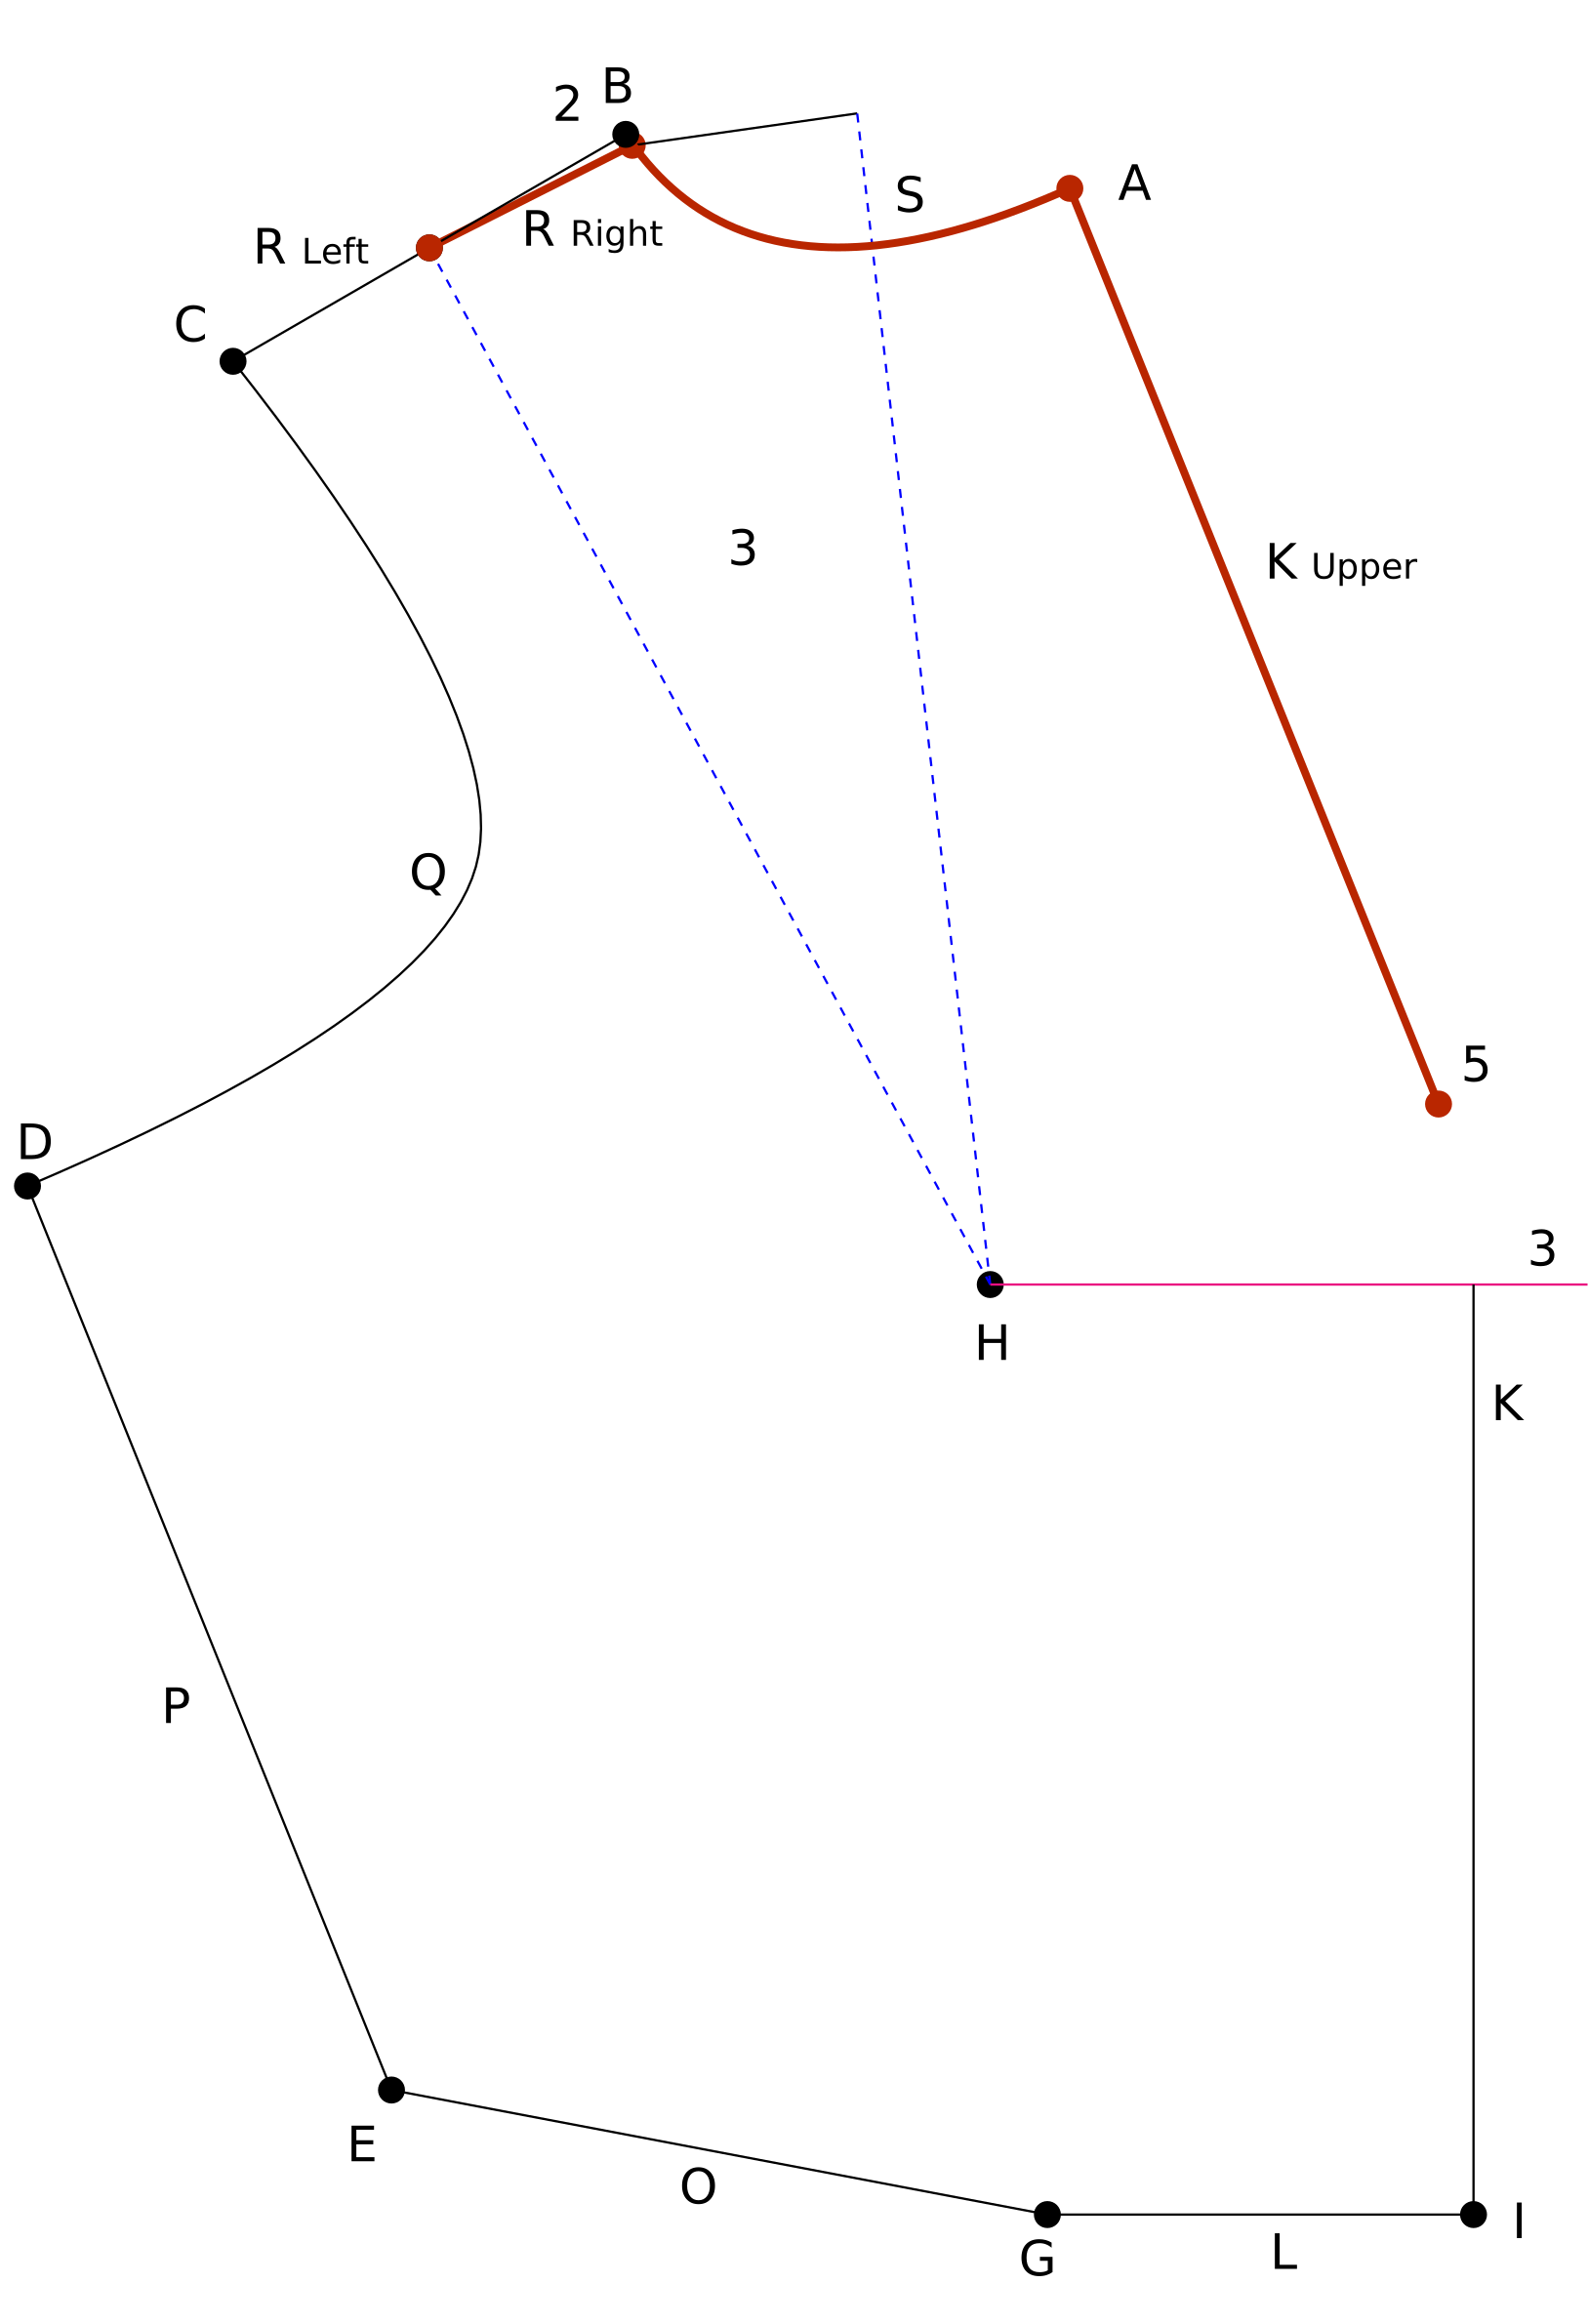
Layers > Move Items to Layer
6Rotation Layer
Select: 5Center Apex, Upper KCenter Front, ACenter Neck, SNeckline, BSide Neck, RShoulder Line right, 2Shoulder Slash
Type: New Layer
Name: Rotation Layer
Parent: PMP
Save
Layers > Rotate Layer To
7Rotate
Layer: Rotation Layer
Moving/Target: 2Shoulder Slash, Left Dart Leg Point
Pivot: HApex Point
Darts > Remove Dart
8Remove Dart
Dart: ShldrDart
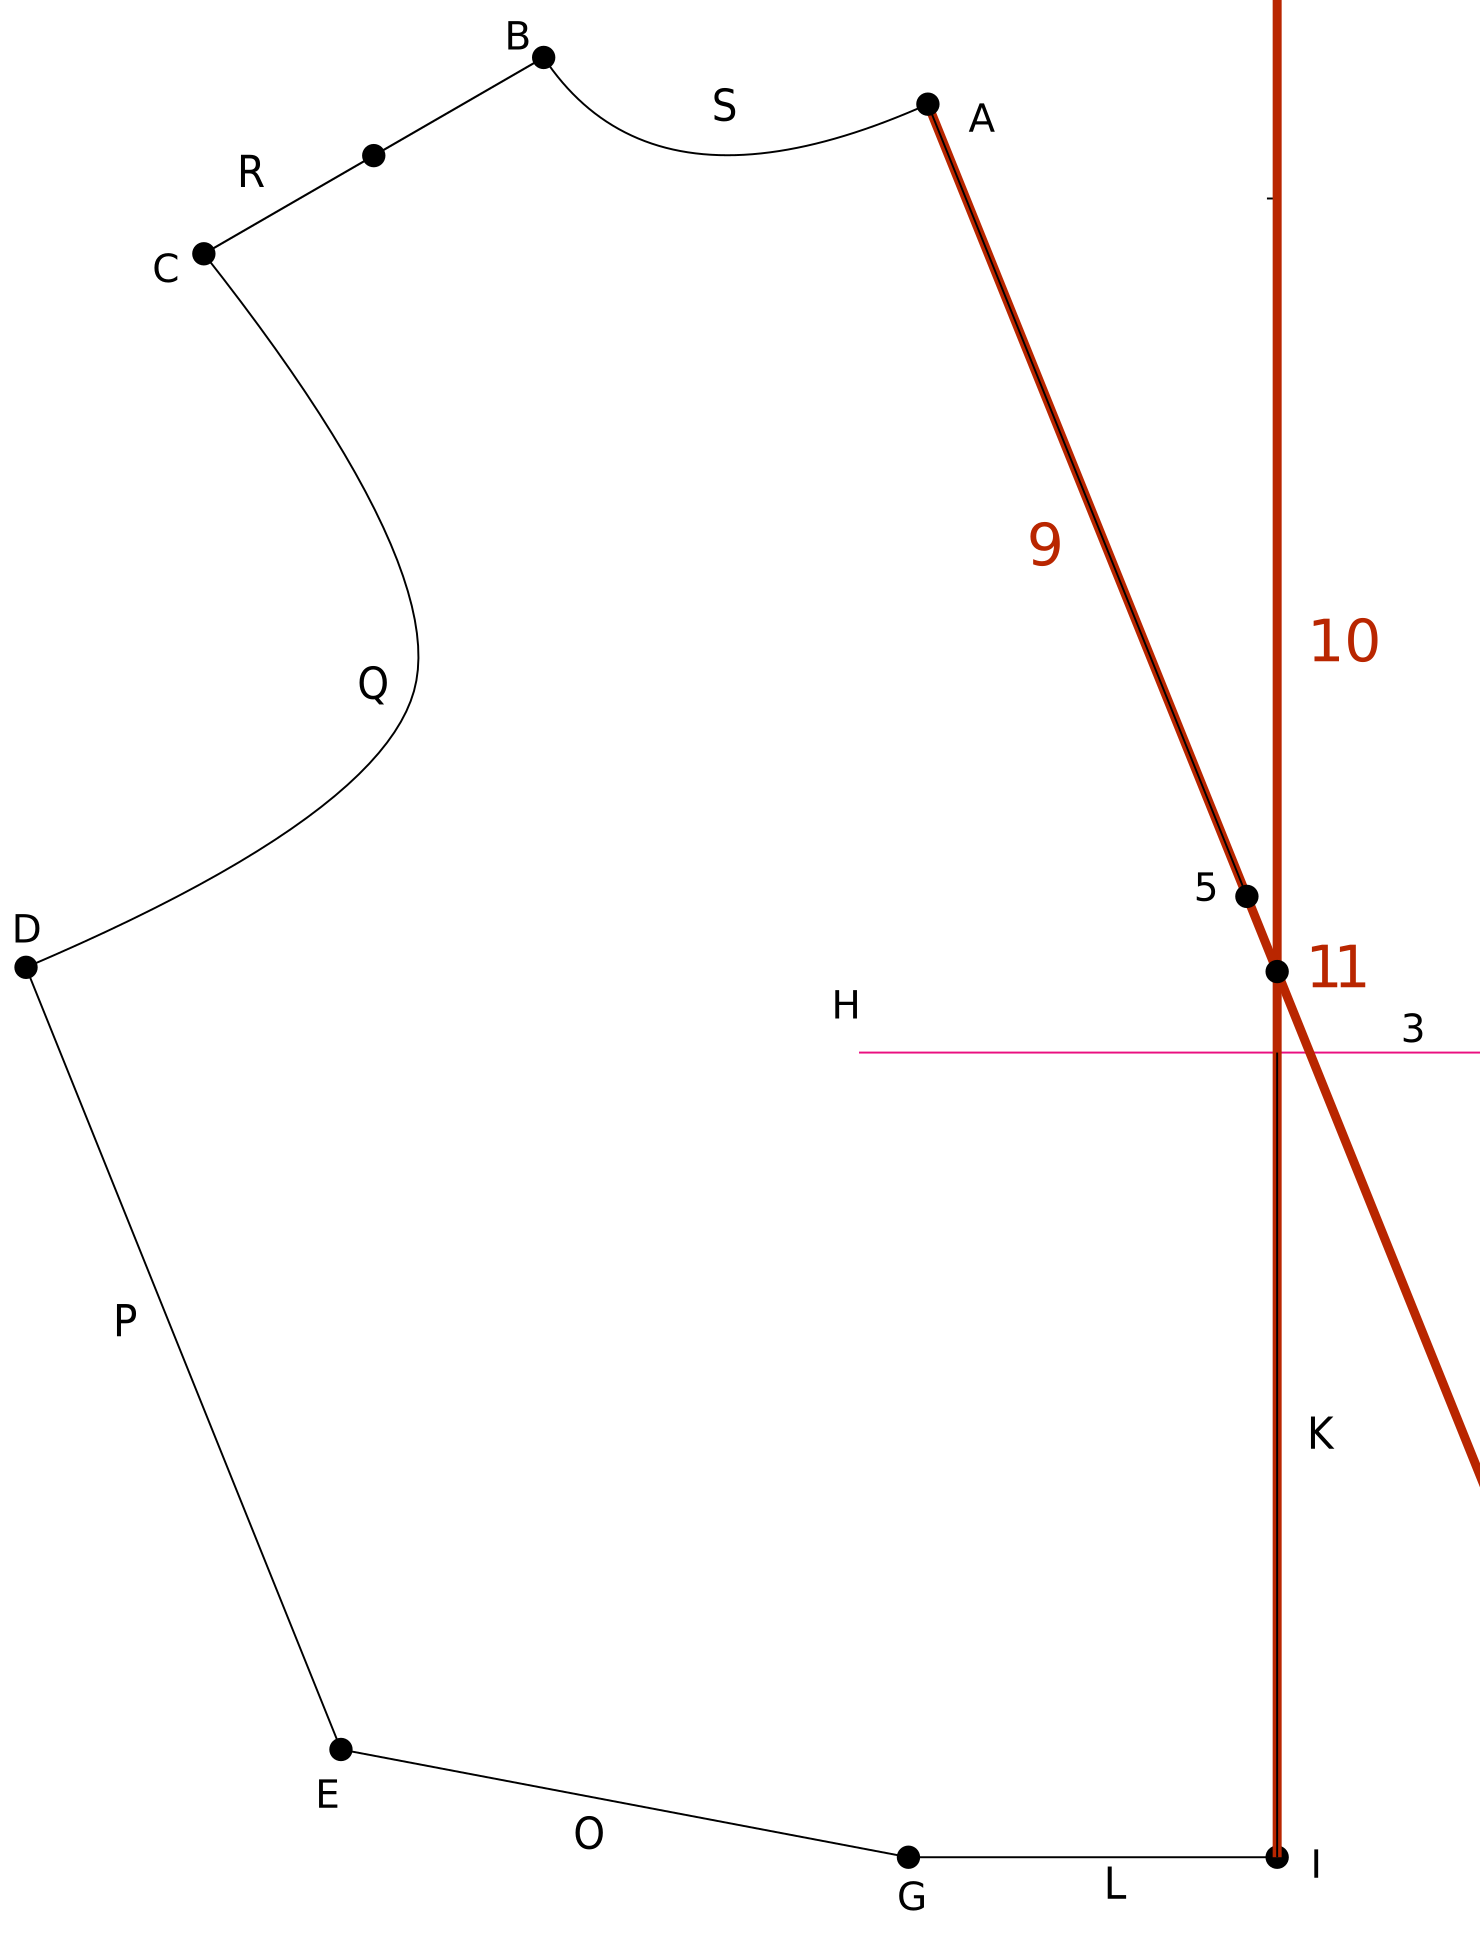
Lines > Add Reference Line
9Center Ref Line 1
Start: ACenter Neck
Direction: On Vector 5Center Apex
Length: One direction (down)
Lines > Add Reference Line
10Center Ref Line 2
Start: ICenter Waist
Direction: Vertical
Length: One direction (up)
Points > Add Point at Intersection
11Center Front Pt
9Center Ref Line 1, 10Center Ref Line 2
Save
Save & Split
Lines > Add Line
12Shoulder Line
From: CShoulder to BSide Neck
Process > Add Cowl
13Cowl #1
Select Center: 11Center Front Pt,
Select Side: BSide Neck
Select Line/Curve: 10Center Ref Line 2
Points > Add Point from Point
14Extension Pt
Base: 11Center Front Pt
X: 1" or 25 mm
Lines > Add Reference Line
15Ext Ref Line
Start: ICenter Waist
Direction: On Vector 14Extension Pt
Length: One direction (up)
Process > Add Cowl
16Cowl #2
Select Center: ICenter Waist
Select Side: BSide Neck
Select Line/Curve: 15Ext Ref Line
Shapes > Add Circle at Point
17Depth Circle
Select: BSide Neck
Radius: Enter the depth you want the cowl to be. 12" or 300 mm was used in this example.
Points > Add Free Point
18Vector Pt
Place the point on the circle where it extends the furthest away from BSide Neck and ICenter Waist
Lines > Add Reference Line
19Ext Ref Line
Start: ICenter Waist
Direction: On Vector 18Vector Pt
Length: One direction (up)
Process > Add Cowl
20Cowl #3
Select Center: ICenter Waist
Select Side: BSide Neck
Select Line/Curve: 19Ext Ref Line
Layers > Move Items to Layer
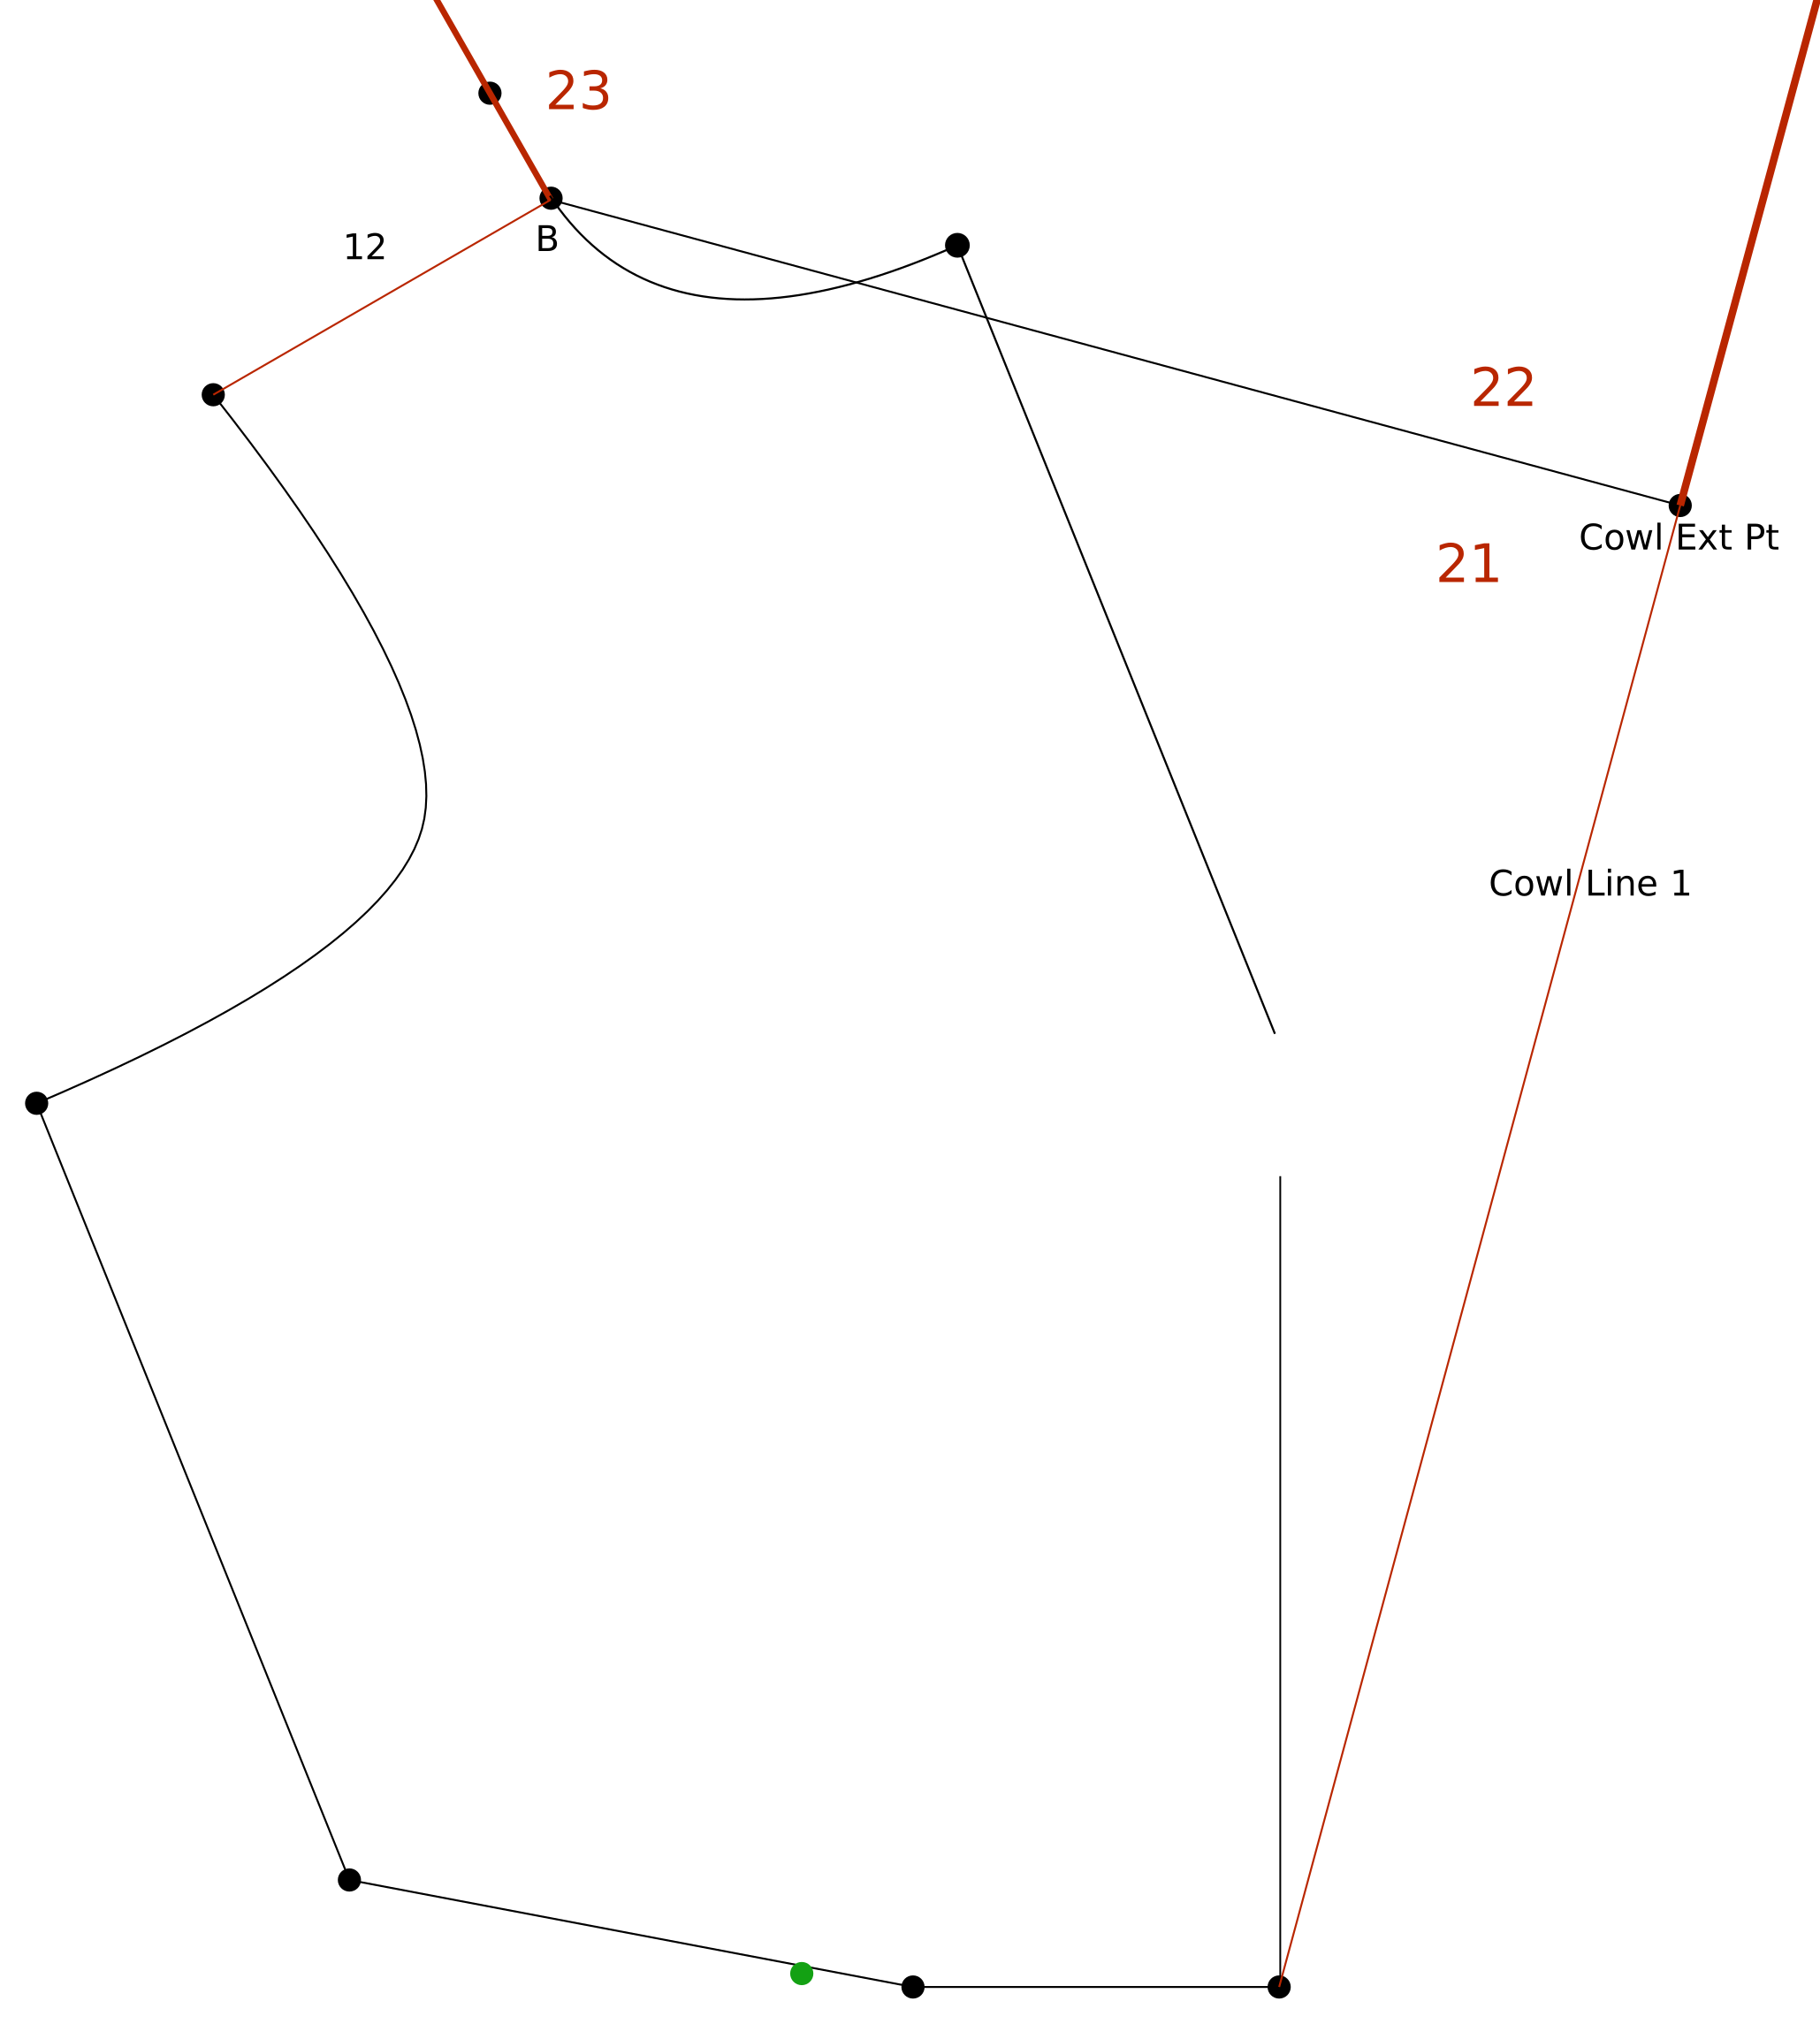
21Facing Prelim
Select: 12Shoulder Line, Cowl Line 1
Type: New Layer
Name: Facing Prelim
Parent: PMP
Save
Layers > Mirror Layer
22Facing Ext
Select: Facing Prelim
Parent: PMP
Name: Facing Ext
Points: BSide Neck, Cowl Ext Pt
Offset: 0
Points > Add Point on Line/Curve
23Shoulder End
Select: Shoulder Mirror Line
Distance: 1.25" or 32 mm
Make sure it is measured from BSide Neck
Save & Split
Points > Add Point on Line/Curve
24Center End
Select: Center Mirror Line
Distance: 4" or 100 mm
Make sure it is measured from Cowl Ext Pt
Save & Split
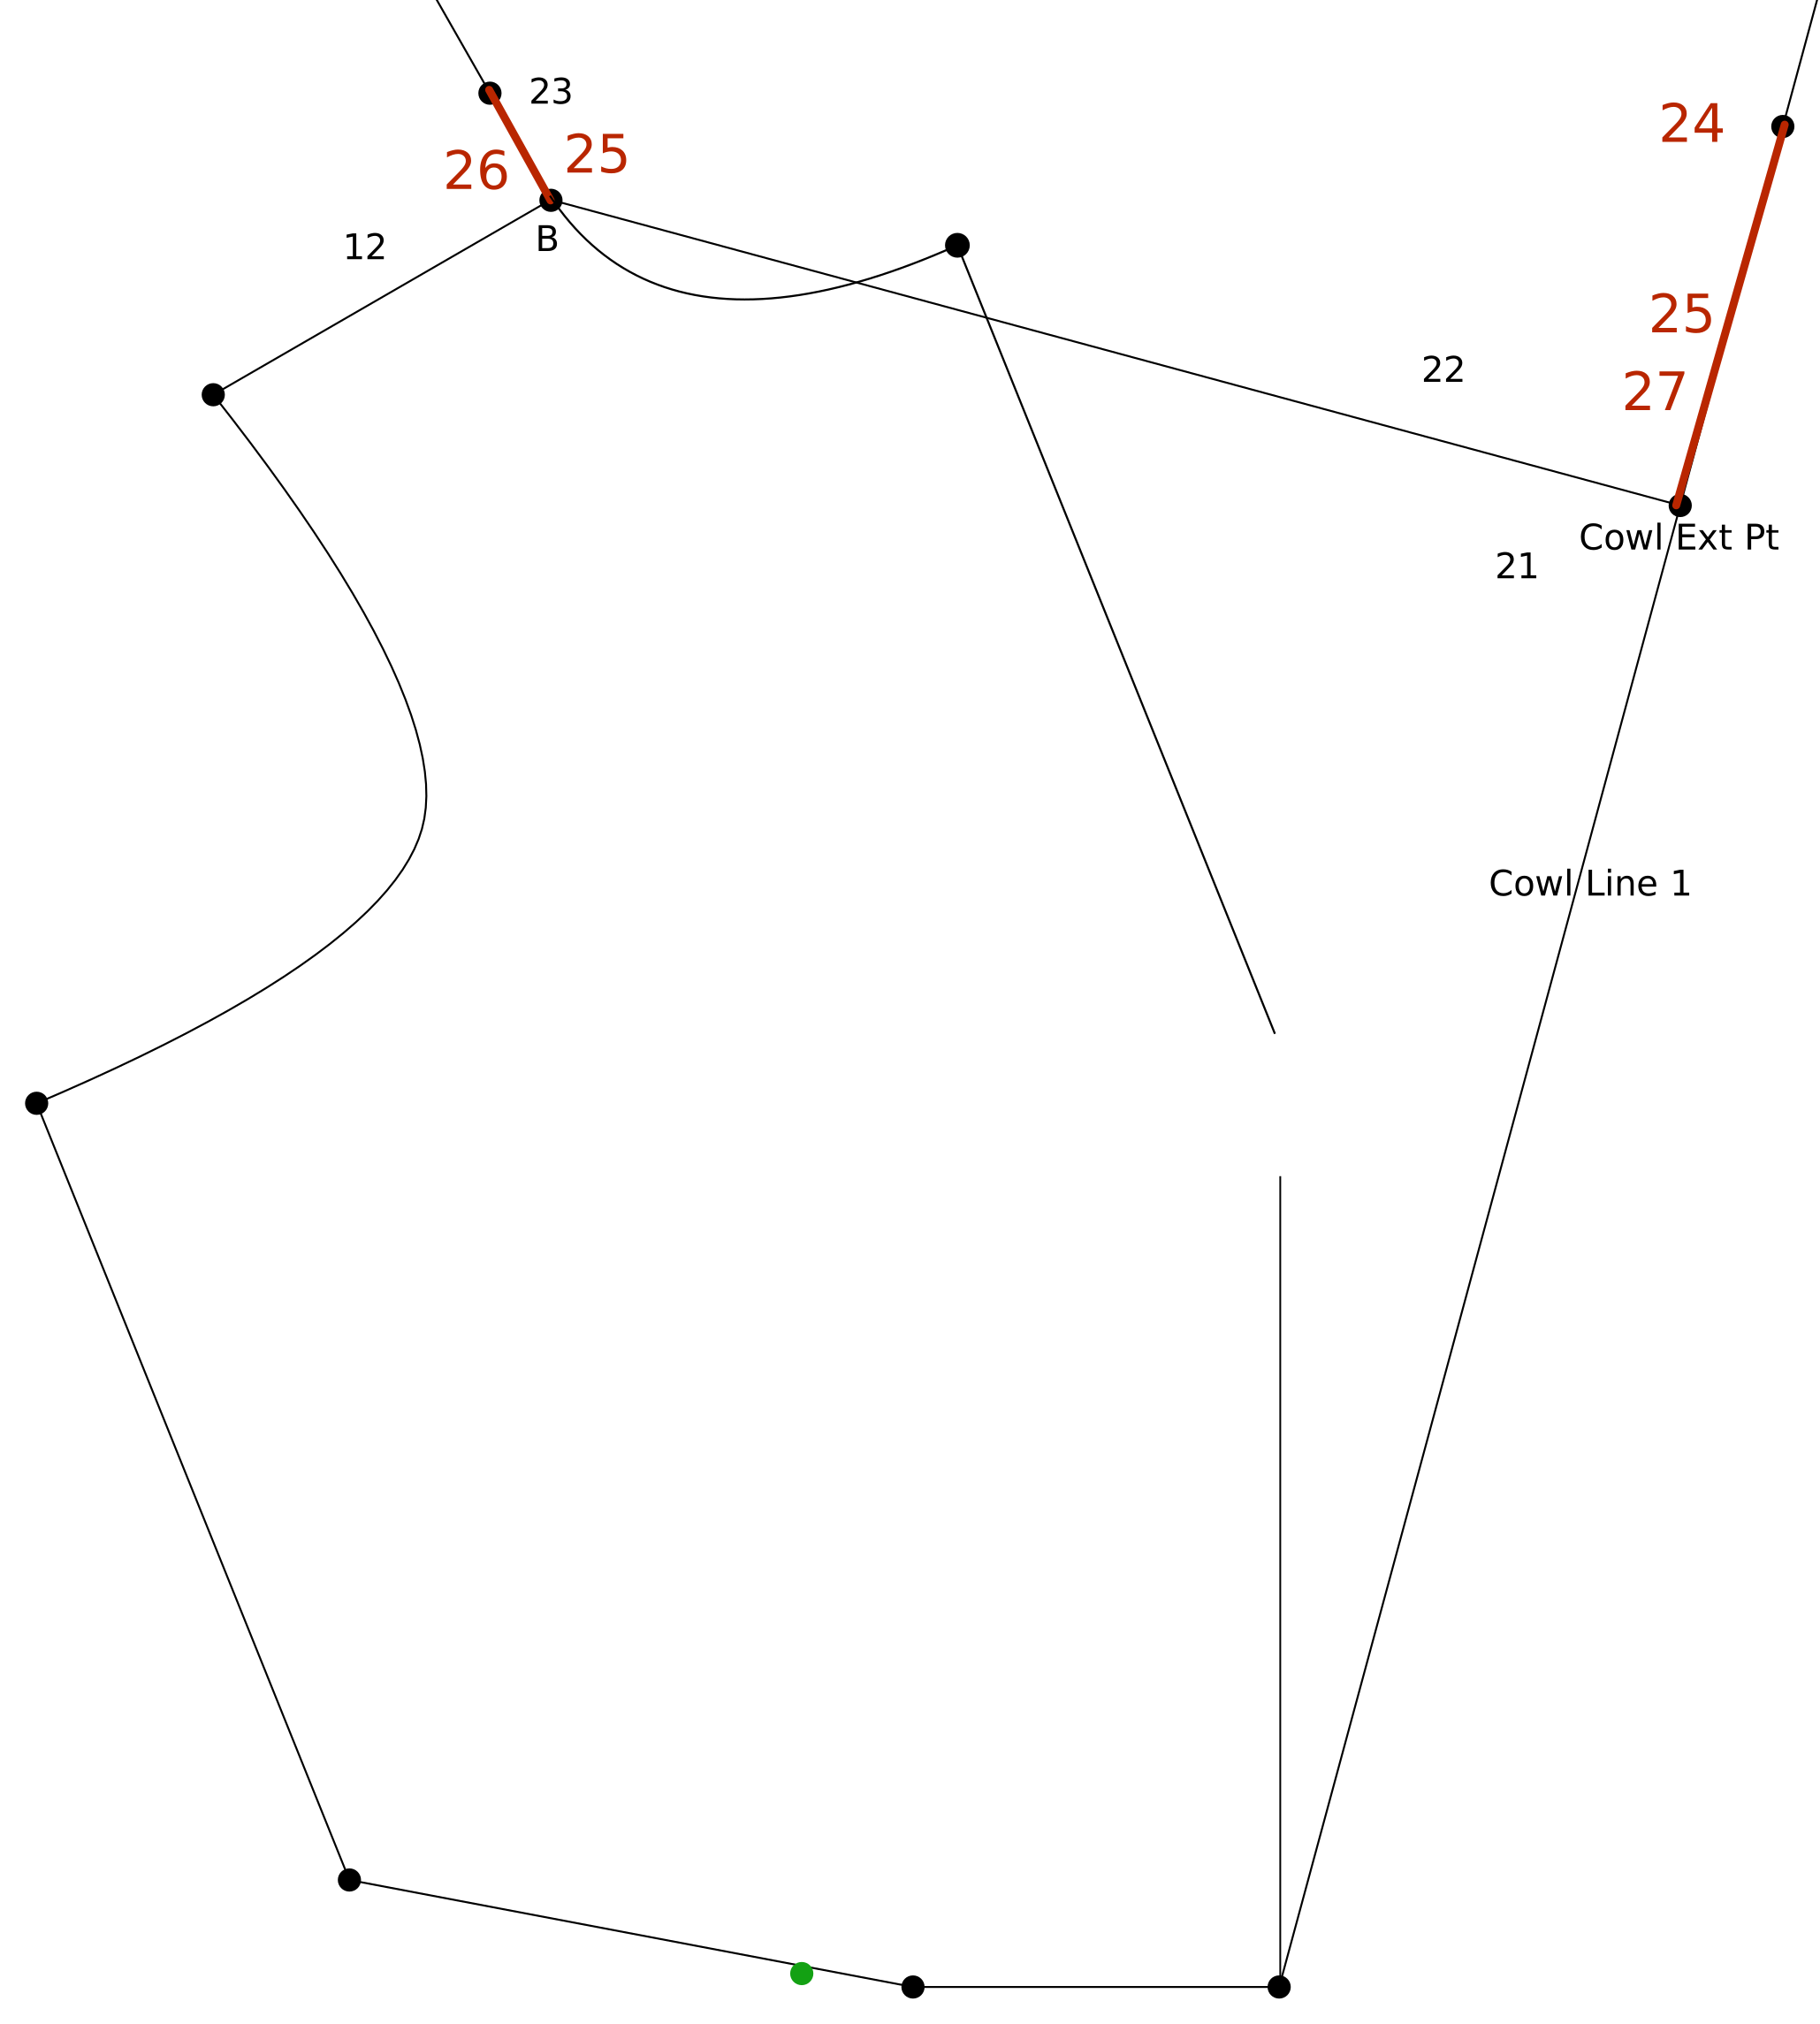
Lines > Delete Lines/Curves & Points
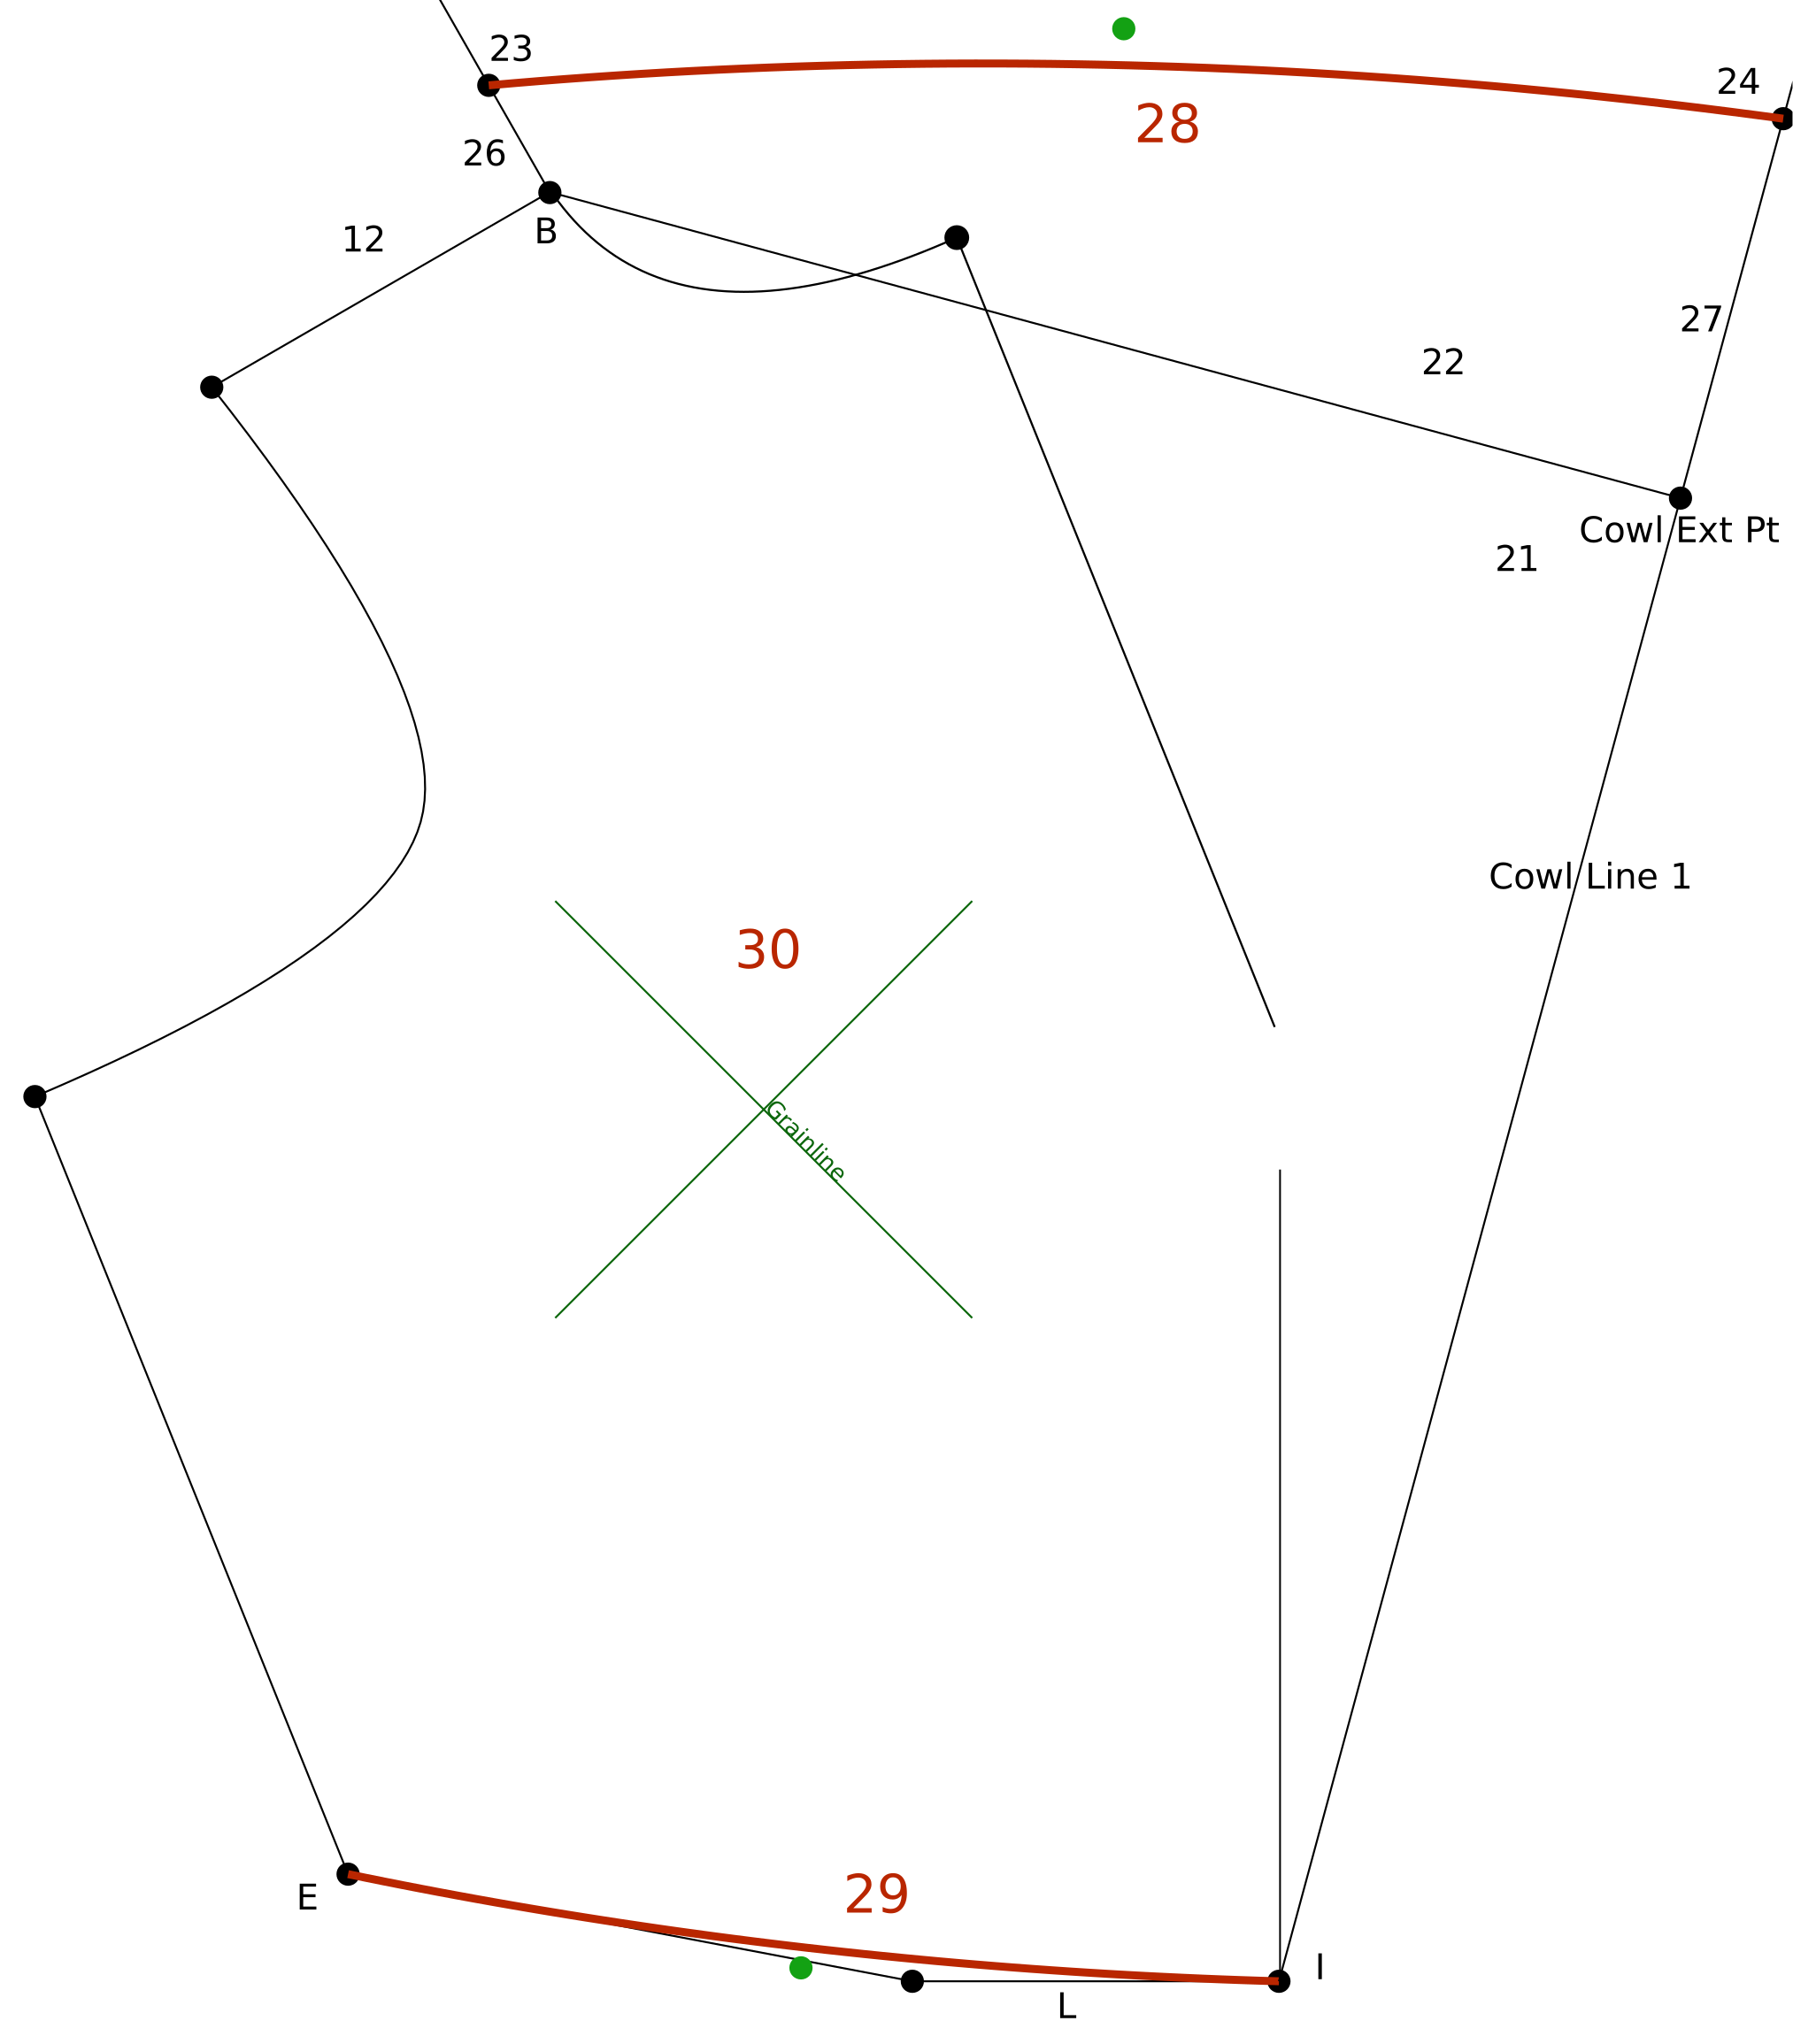
25Delete Lines
Select: 23Shoulder End at BSide Neck, 24Center End at Cowl Ext Pt
These lines are not connected to the main pattern and the seam allowance process will fail unless they are redrawn.
Lines > Add Line
26Side Neck Facing
From: BSide Neck to 23Shoulder End point.
Lines > Add Line
27Ctr Neck Facing
From: Cowl Ext Pt to 24Center End point.
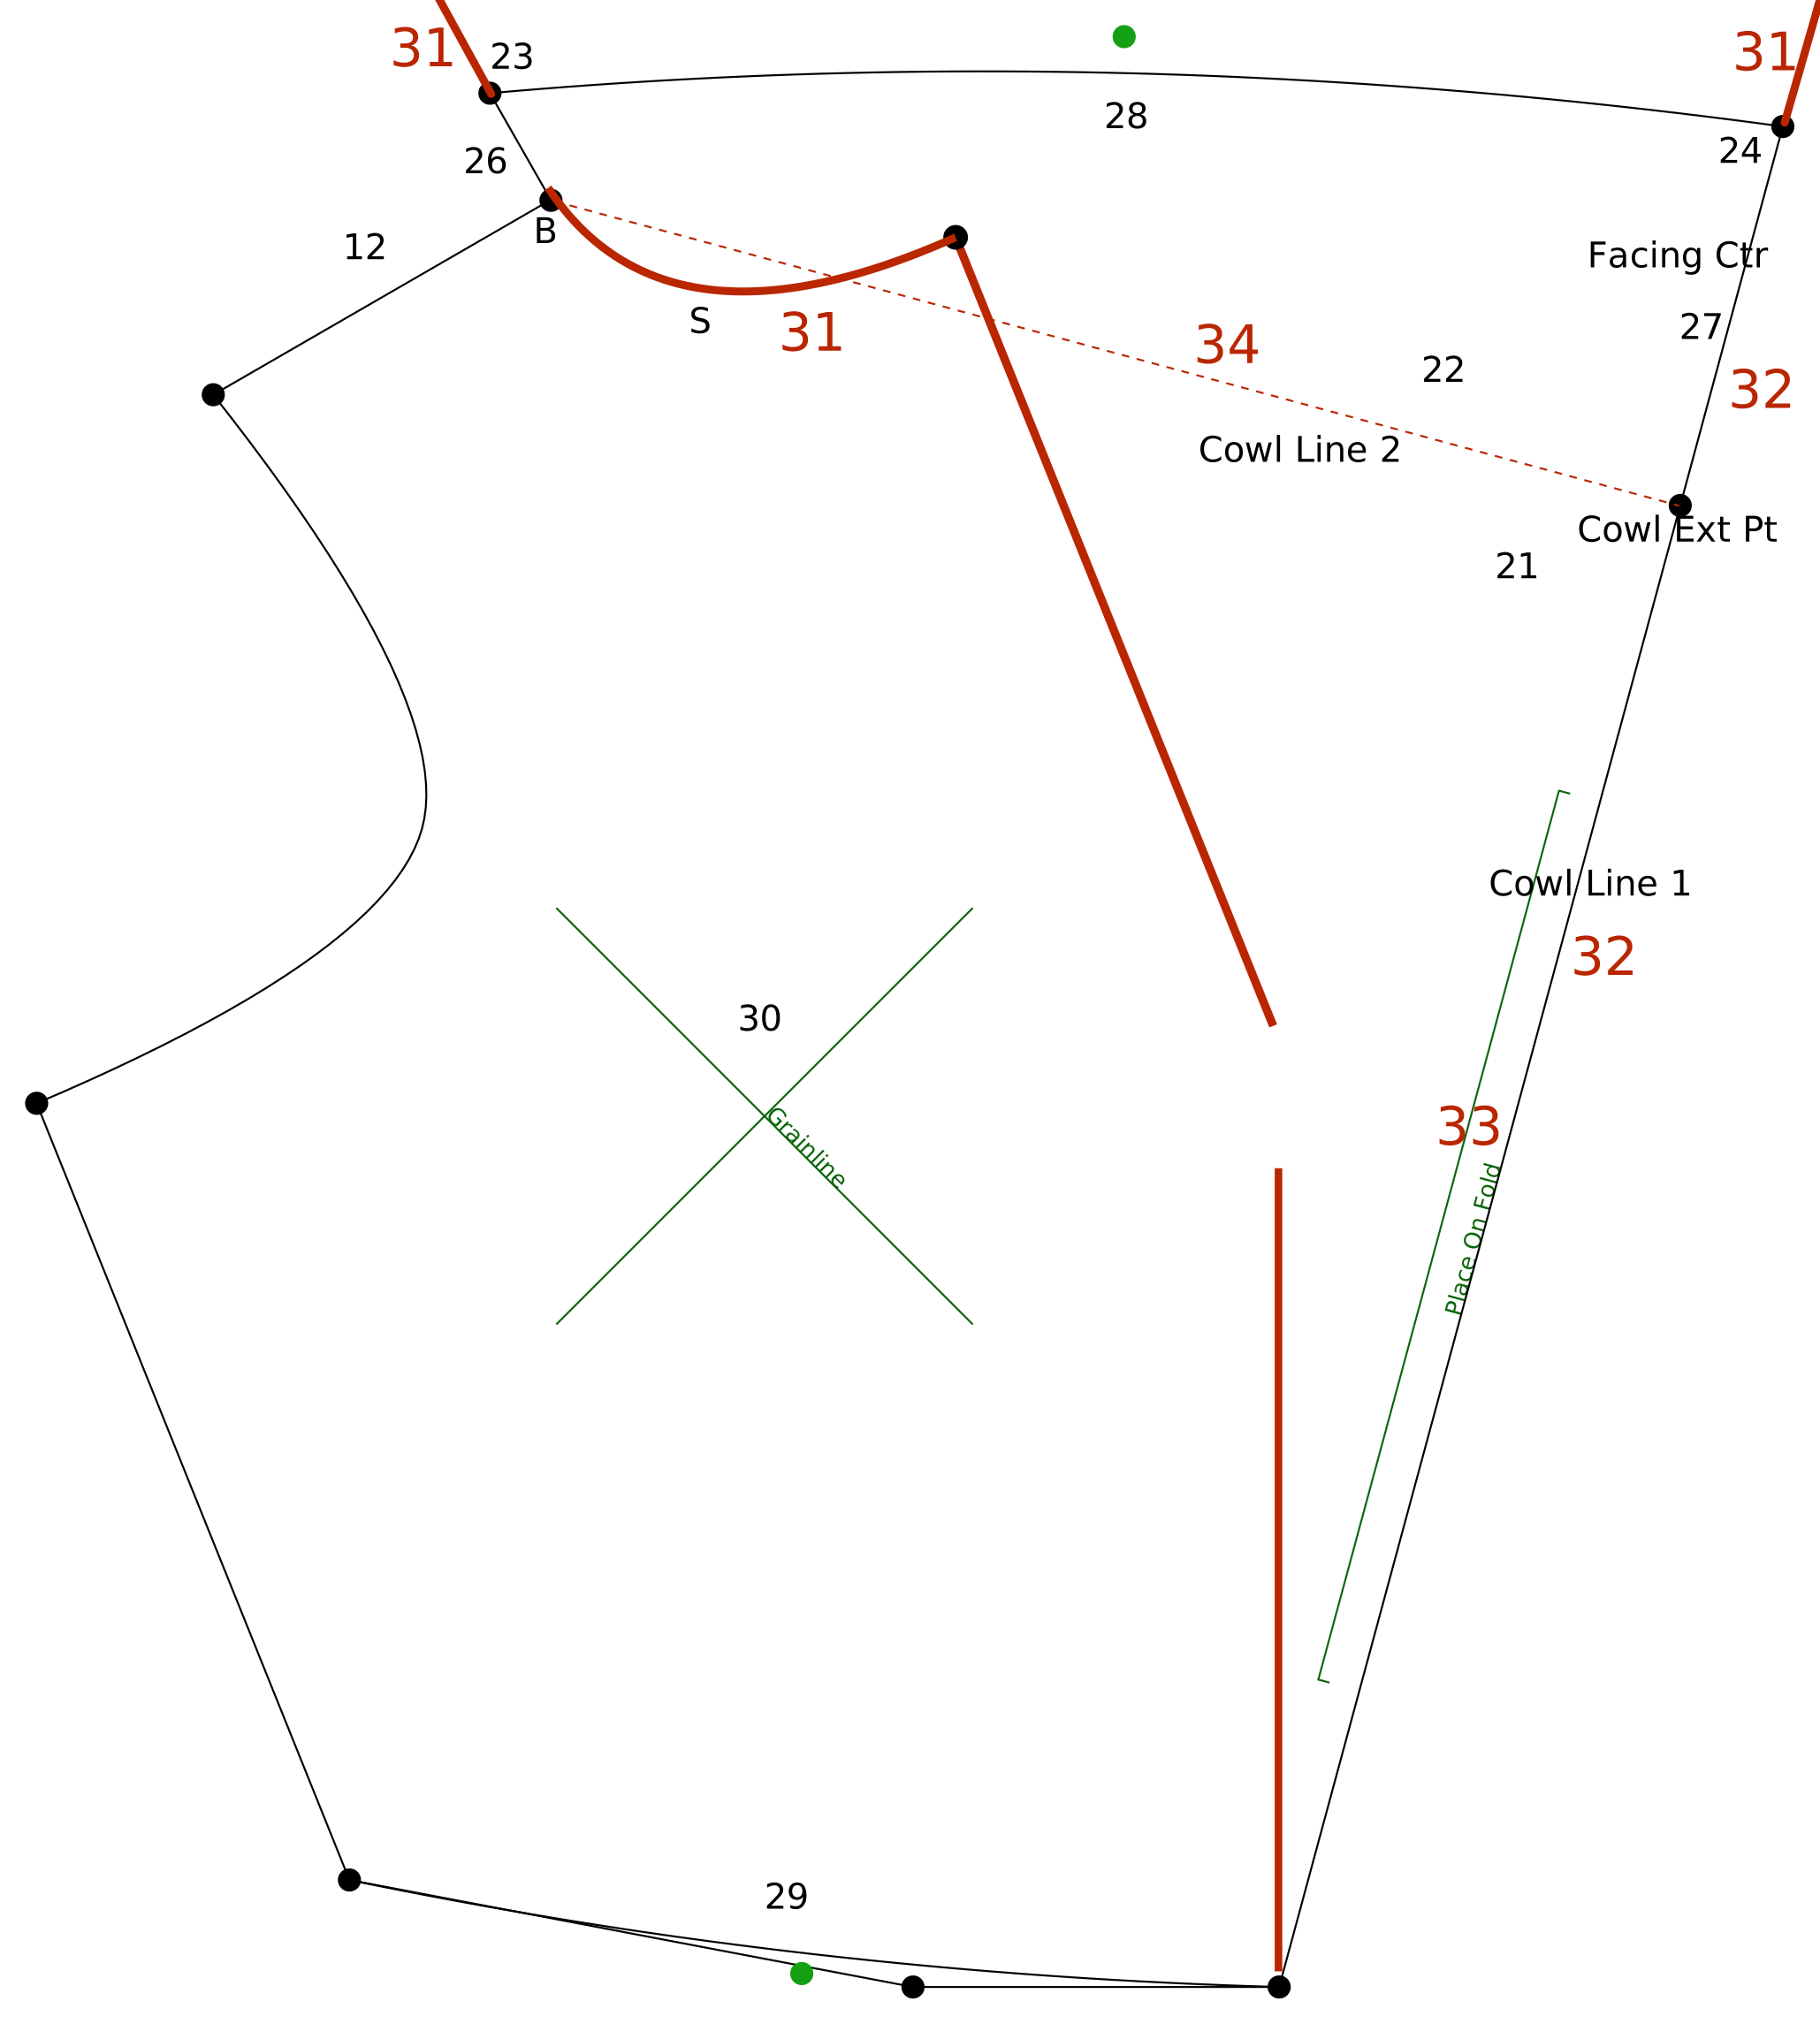
Curves > Add Curve
28Facing Curve
From: 23Shoulder End to 24Center End
Curve Points: 1
Make a gentle curve for the facing edge.
Curves > Add Curve
29Waist Curve
From: ESide Waist to ICenter Waist
Curve Points: 1
Create a very slight curve. Don't drop below the LWaist line.
Finish > Add Grainline
30Bias Grainline
On Bias
Center of the crossed lines
Length: 6" or 150 mm
Lines > Delete Lines/Curves & Points
31Delete Lines
Select: Excess 22Facing Ext past 23Shoulder End, Excess 22Facing Ext past24Center End, SNeckline, Old Center Front lines
Finish > Change Line/Curve Seam Allowance
32Center SA
Select: Both center lines (Cowl Line 1, Facing Ctr)
Value: Custom
Width: 0
Finish > Add Cut on Fold
33Cut Fold
Select: Cowl Line 1
Other Side if outside pattern.
Utilities > Change Style/Color
34Facing Fold
Select: Cowl Line 2
Style: Red Dashed
Finish > Add Seam Allowance to Pattern
35Seam Allowance
Select: Select the entire outline of the pattern.
Other Side if inside pattern.
36Finish
Finish up with labeling the pattern, hiding points and hiding or deleting unwanted geometry.