Draft a Peter Pan Collar
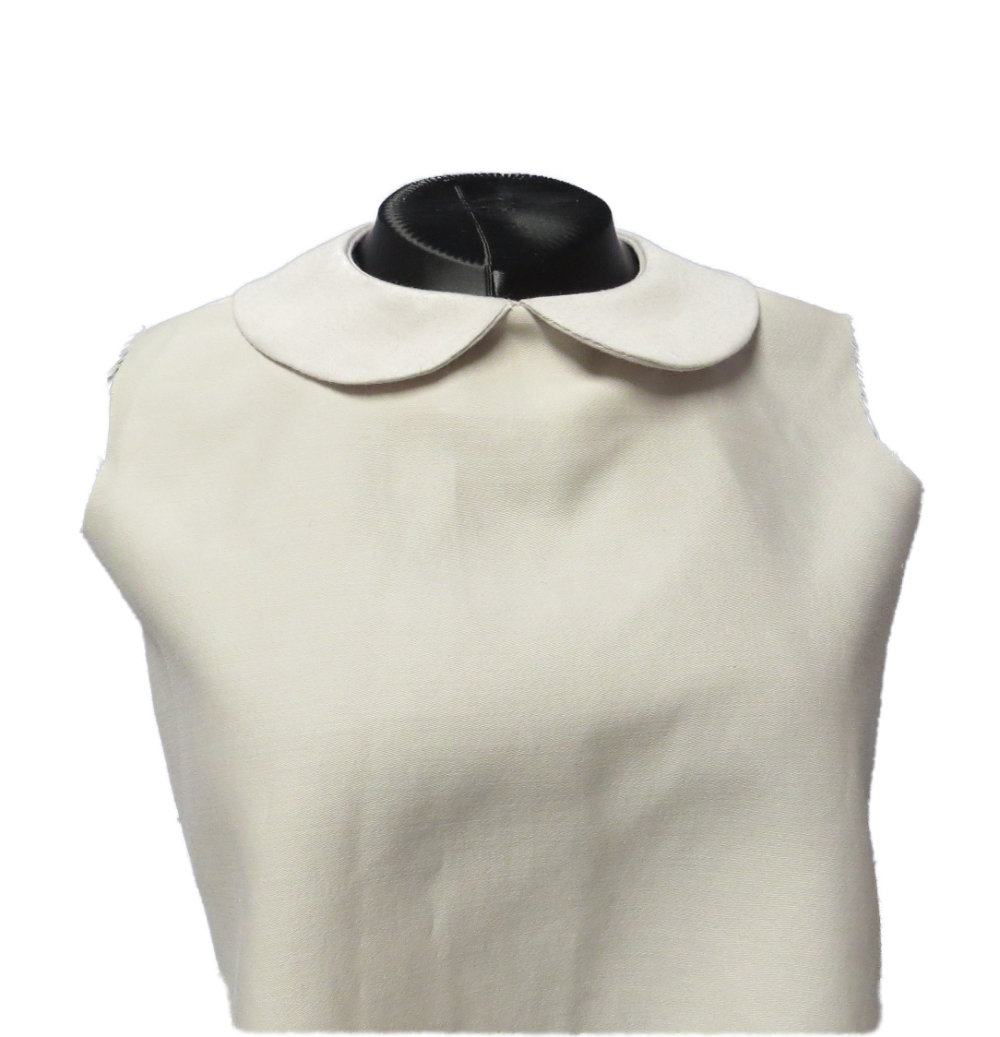
Peter Pan Sample Garment (1/2 scale)
This lesson guides you through drafting a Peter Pan type collar.
Pattern Requirements & Design Specifications
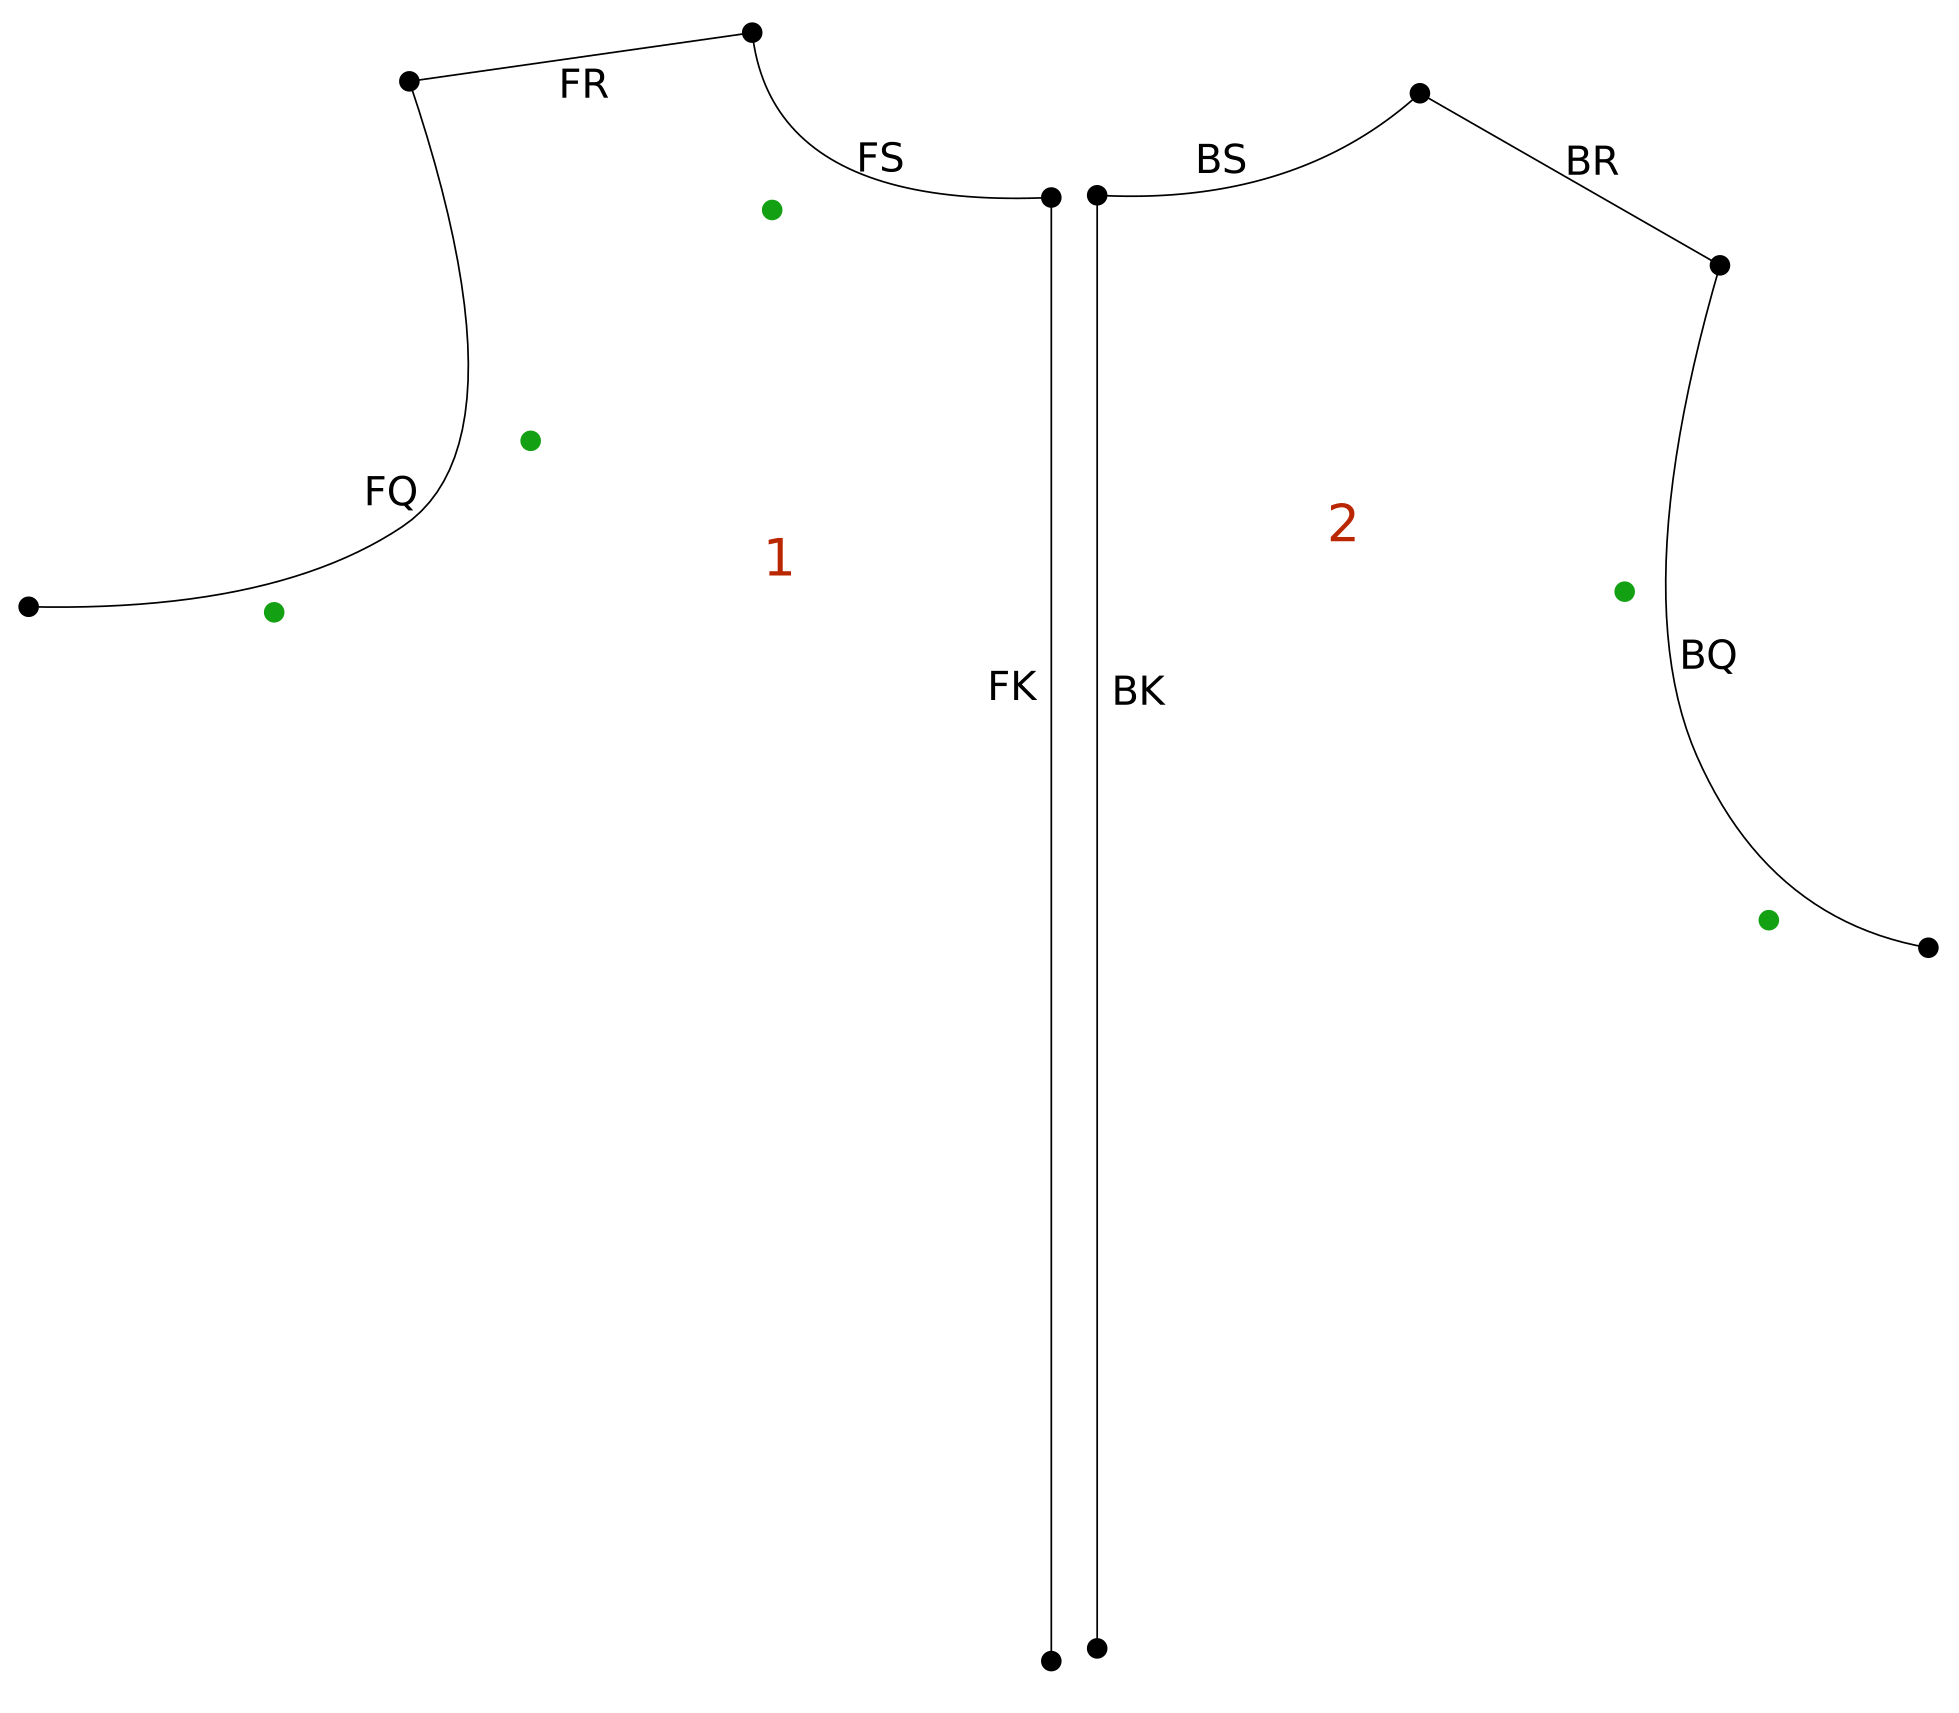
- Base Patterns: Front and back bodice slopers/blocks. If you don't have them, download the 103 front and back bodice SVG as a starting point. Learn how to use the Import PMP SVG tool.
- Collar Width: 2.5″ (64 mm) demonstrated; fully customizable.
- Collar Points: Rounded front corners (curves replace traditional collar points).
- Shoulder Overlap: 2″ (50 mm) at the armhole edge, pivoting from the side neck point (creates approx. 1/2″ / 13 mm stand for neck clearance).
- Undercollar & Interfacing: Drafting instructions for both pieces are nested within the upper collar pattern to minimize printing and paper waste.
- Facing: Instructions for a separate facing are also included.
- Closure & Orientation: Drafted with a center-back seam allowance for back closures. For front-opening garments, place center back on the fold and separate the collar at center front.

New to these instructions? Practice Basics explains point movement, how to read each step and contains other helpful tips.
 Layers > Copy Items to Layer
1Collar Trace Front
Select: FQArmhole Front, FRShoulder Line Front, FSNeckline Front, FKCenter Front
New Layer: Collar Trace Front
Parent: PMP
Find: (leave blank)
Replace: _Collar
Save
Layers > Copy Items to Layer2Collar Trace Back
Select:BKCenter Back, BSNeckline Back, BRShoulder Line Back, BQArmhole Back
New Layer: Collar Trace Back
Parent: PMP
Find: (leave blank)
Replace: _Collar
Save & Switch
 Layers > Layer Visibility
3Hide Layers
Hide all layers except the Collar Trace Front and Back.
 Layers > Align Layers
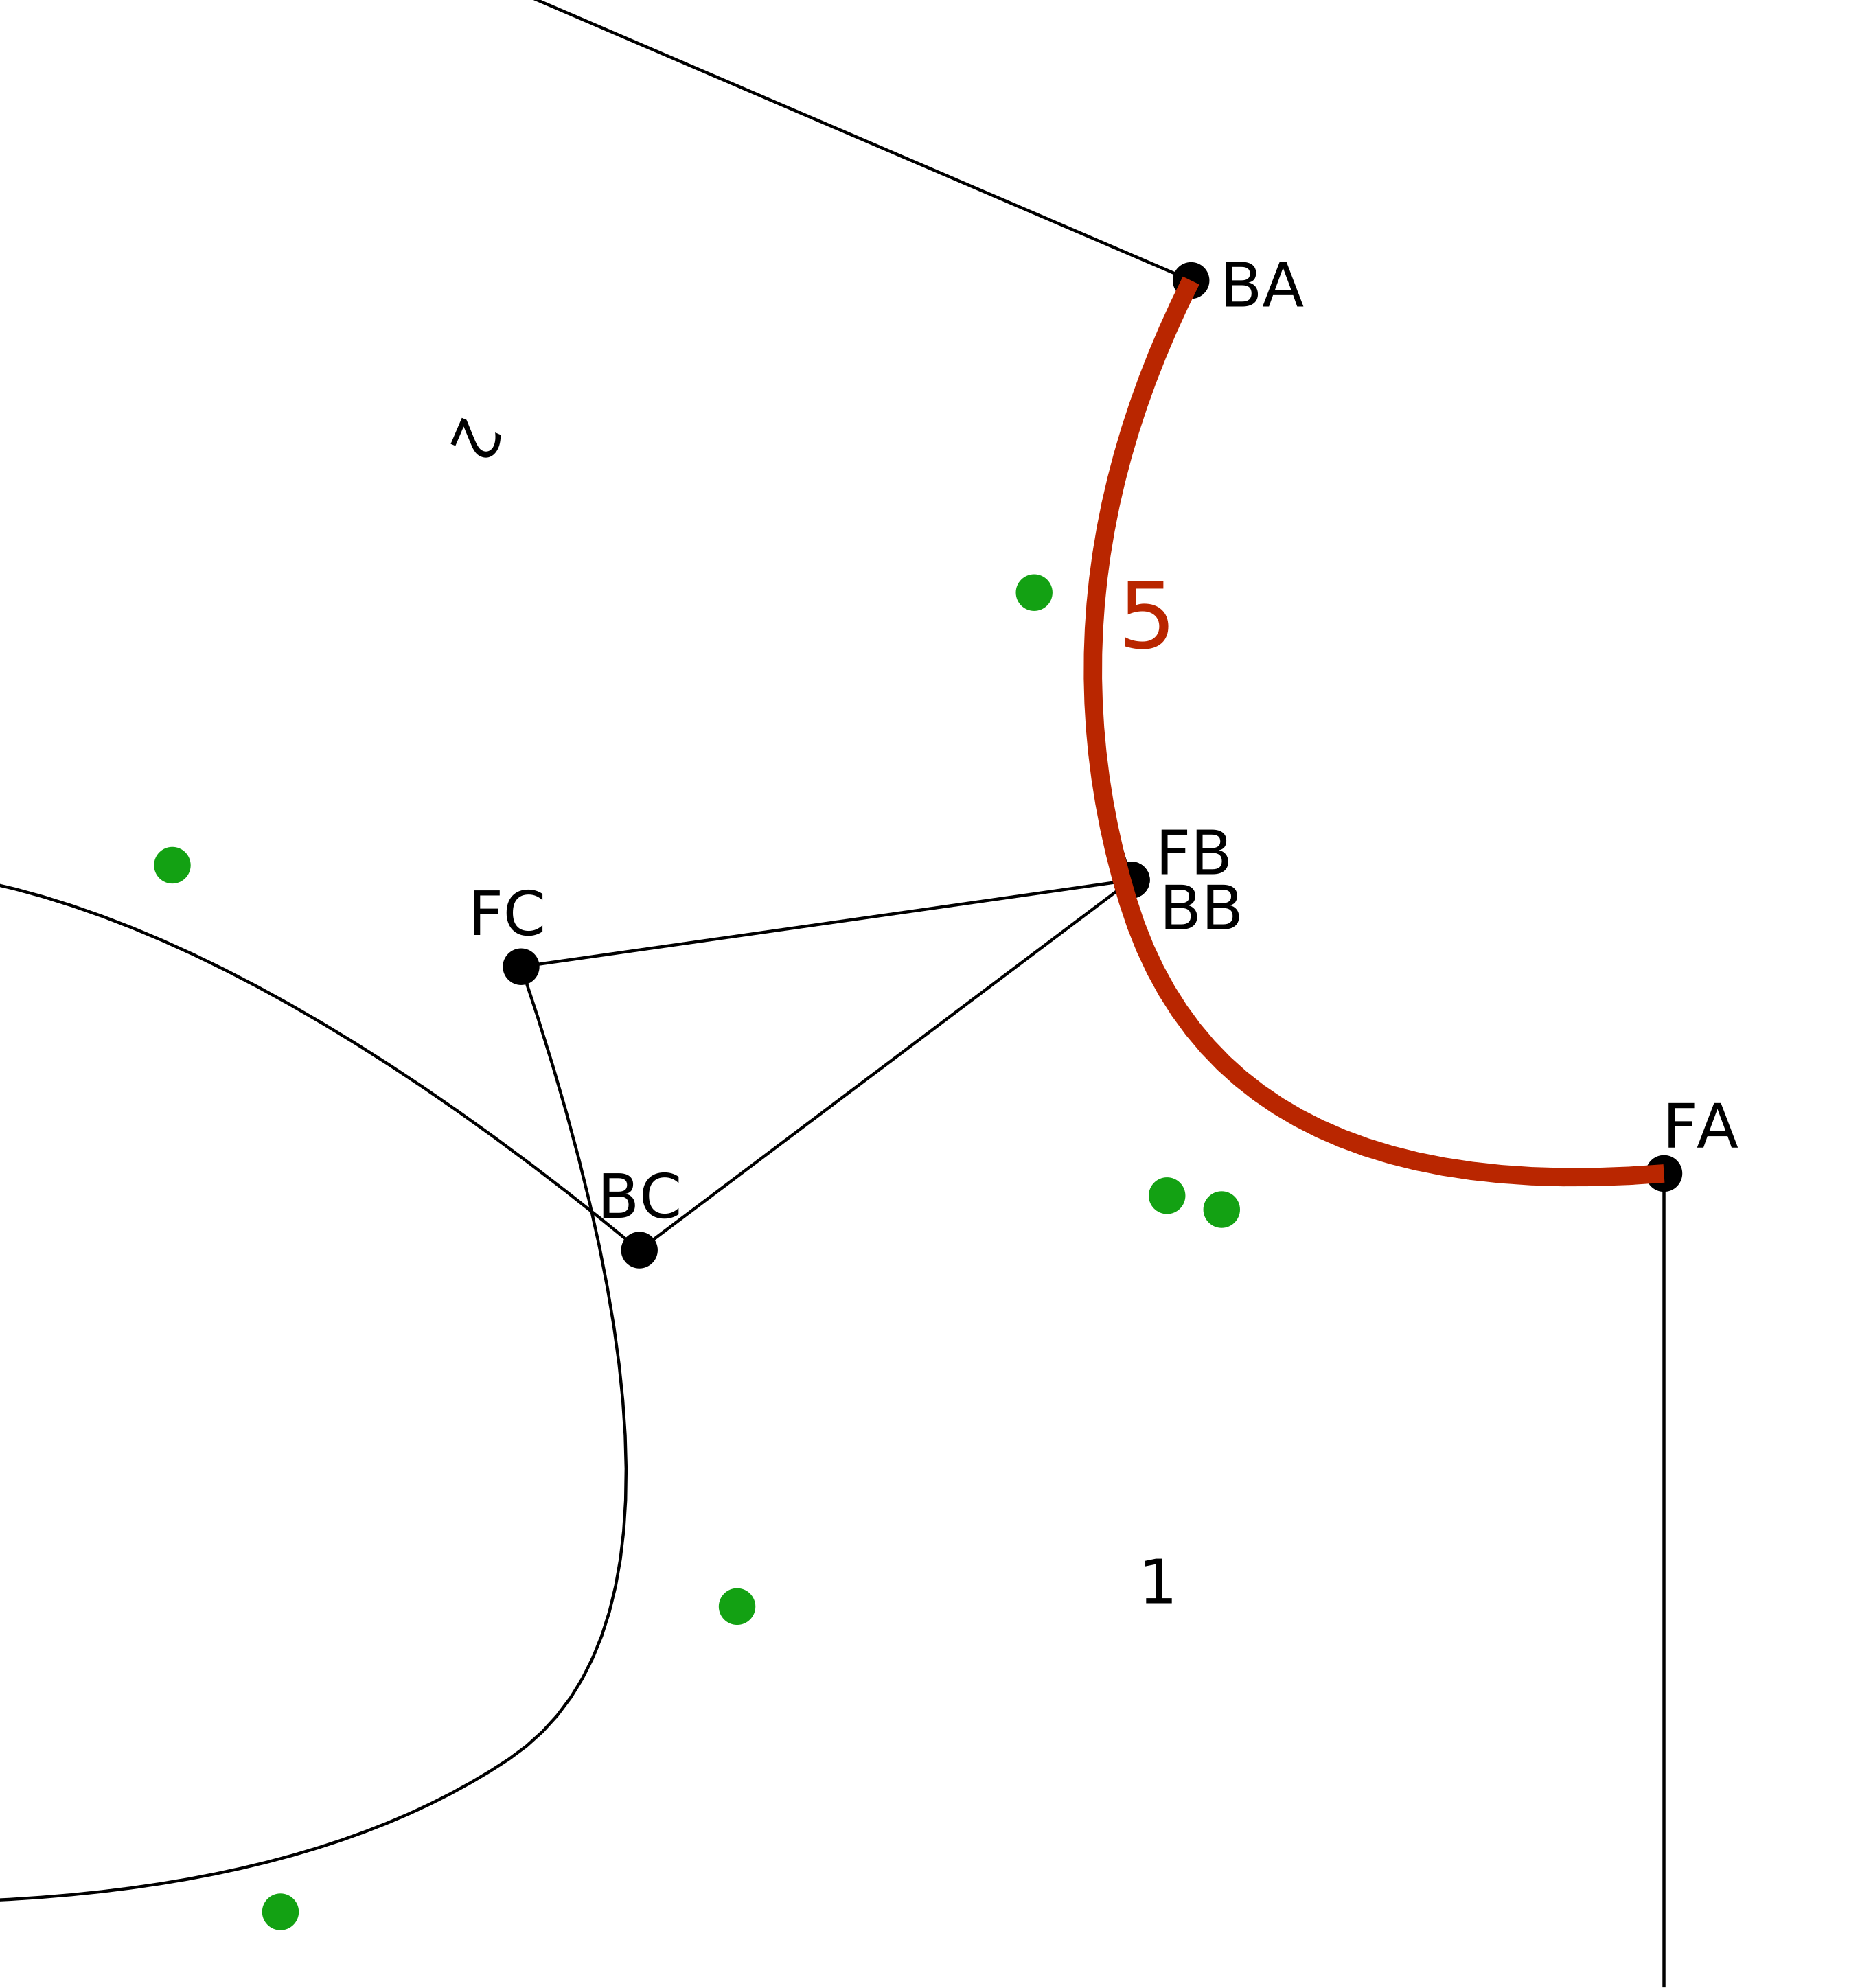
4Align Shoulders
Stay Layer: 1Collar Trace Front
Move Layer: 2Collar Trace Back
Stay Target: FBSide Neck Front
Move Target: BBSide Neck Back
Stay End: FCShoulder Front
Move End: BCShoulder Back
Overlap: 2" or 50 mm
Make sure the patterns overlap not spread, Other Side if necessary.
 Curves > Add Curve
5Collar Neckline
From: FACenter Neck Front to BACenter Neck Back
Curve Points: 2
Follow the front and back neckline traces smoothing out the connection at the shoulder. Don't vary more than .0625 to 0.125 (1.5-3 mm) away from the shoulder point.
 Points > Add Point on Line/Curve
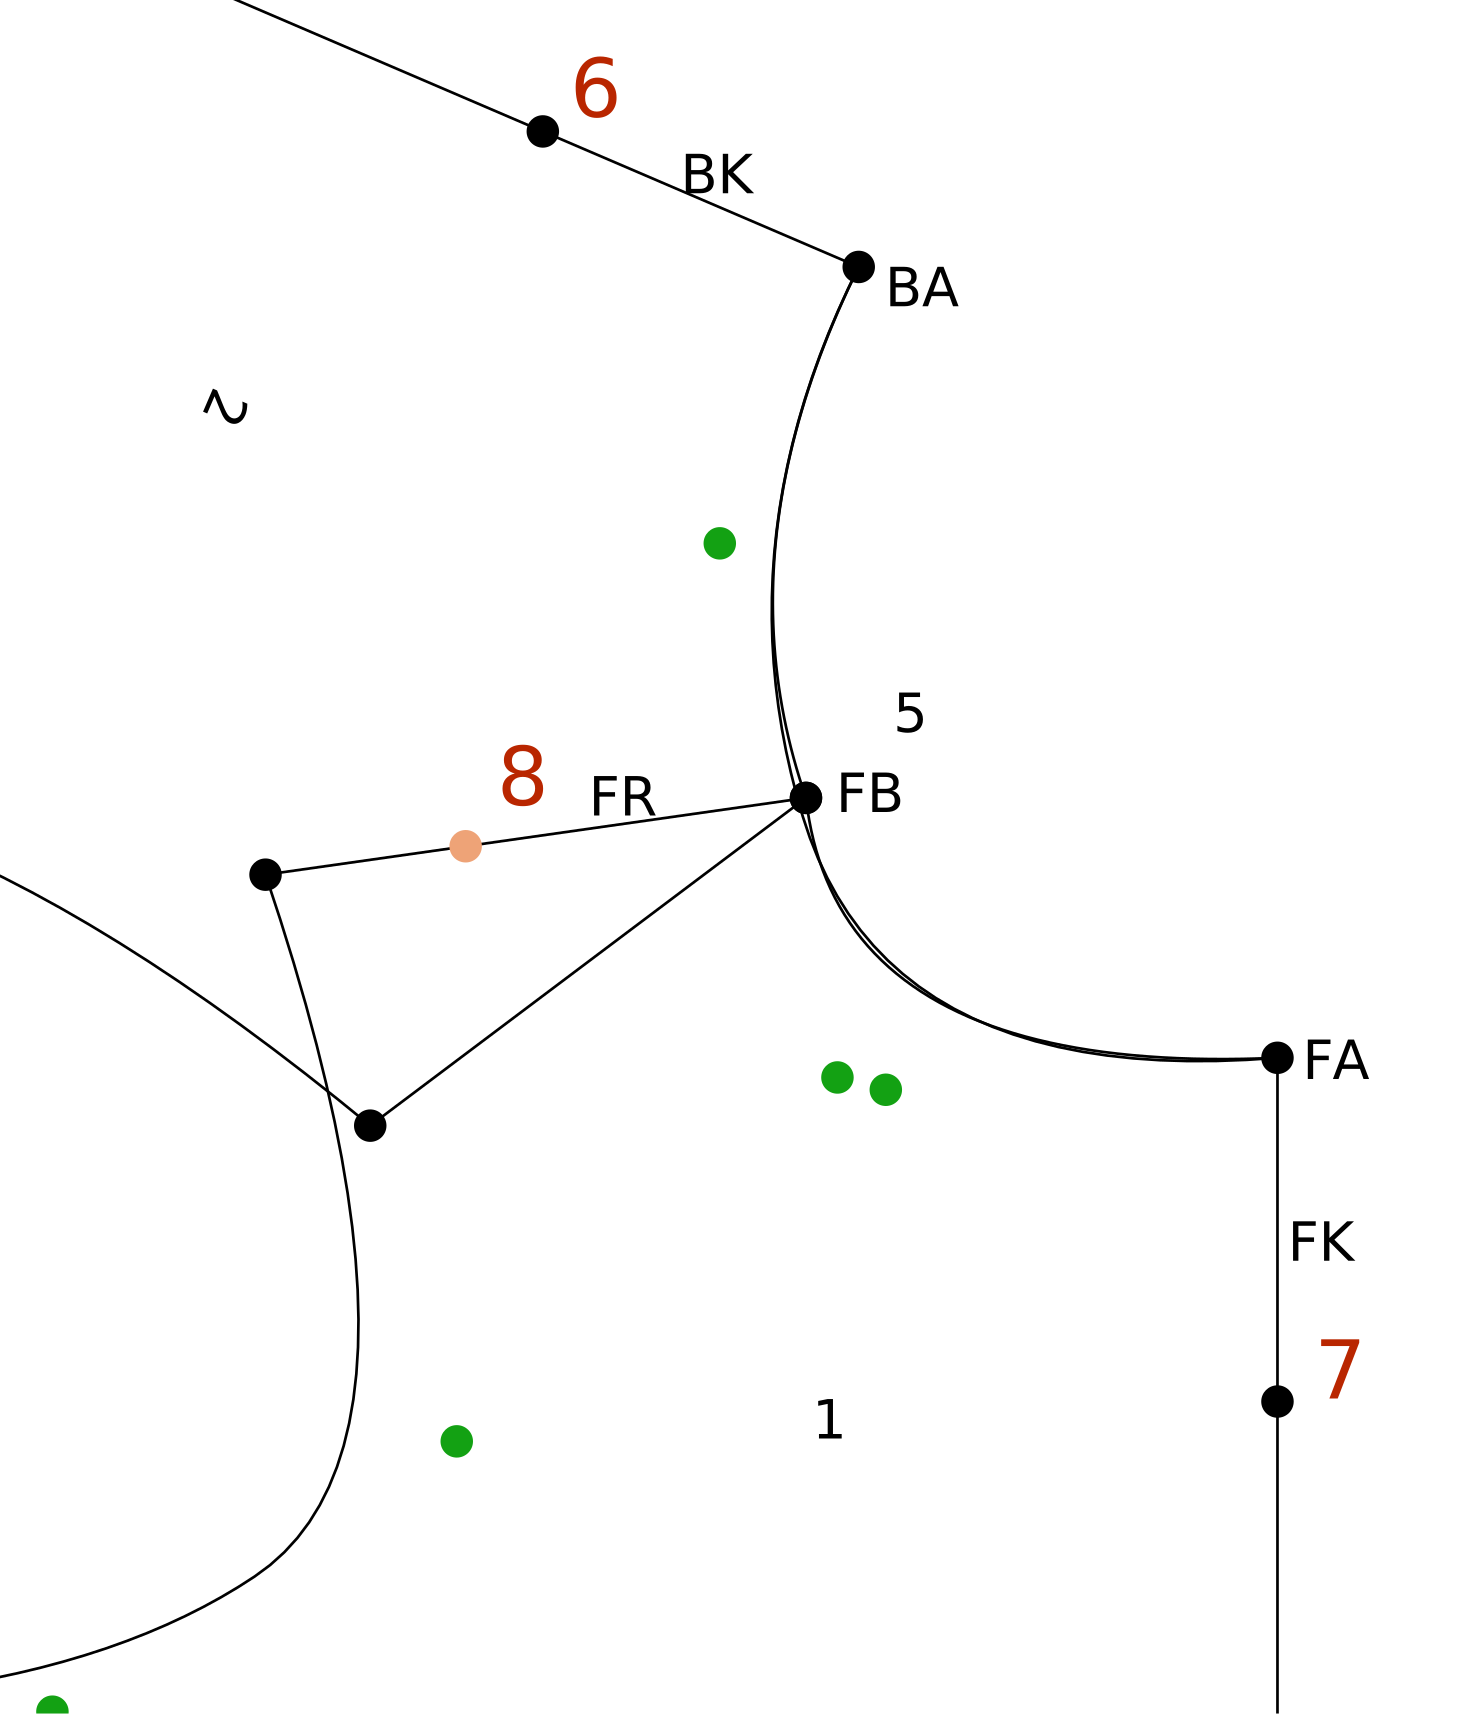
6Collar CB
Select: BKCenter Back
End: BACenter Neck Back
Distance: 2.5" or 64 mm
Save & Split
Points > Add Point on Line/Curve7Collar CF
Select: FKCenter Front
End: FACenter Neck Front
Distance: 2.5" or 64 mm
Save & Split
Points > Add Point on Line/Curve8Collar Shldr RP
Select: FRShoulder Line Front
End: FBSide Neck Front
Distance: 2.5" or 64 mm
Style: Orange Solid
Save
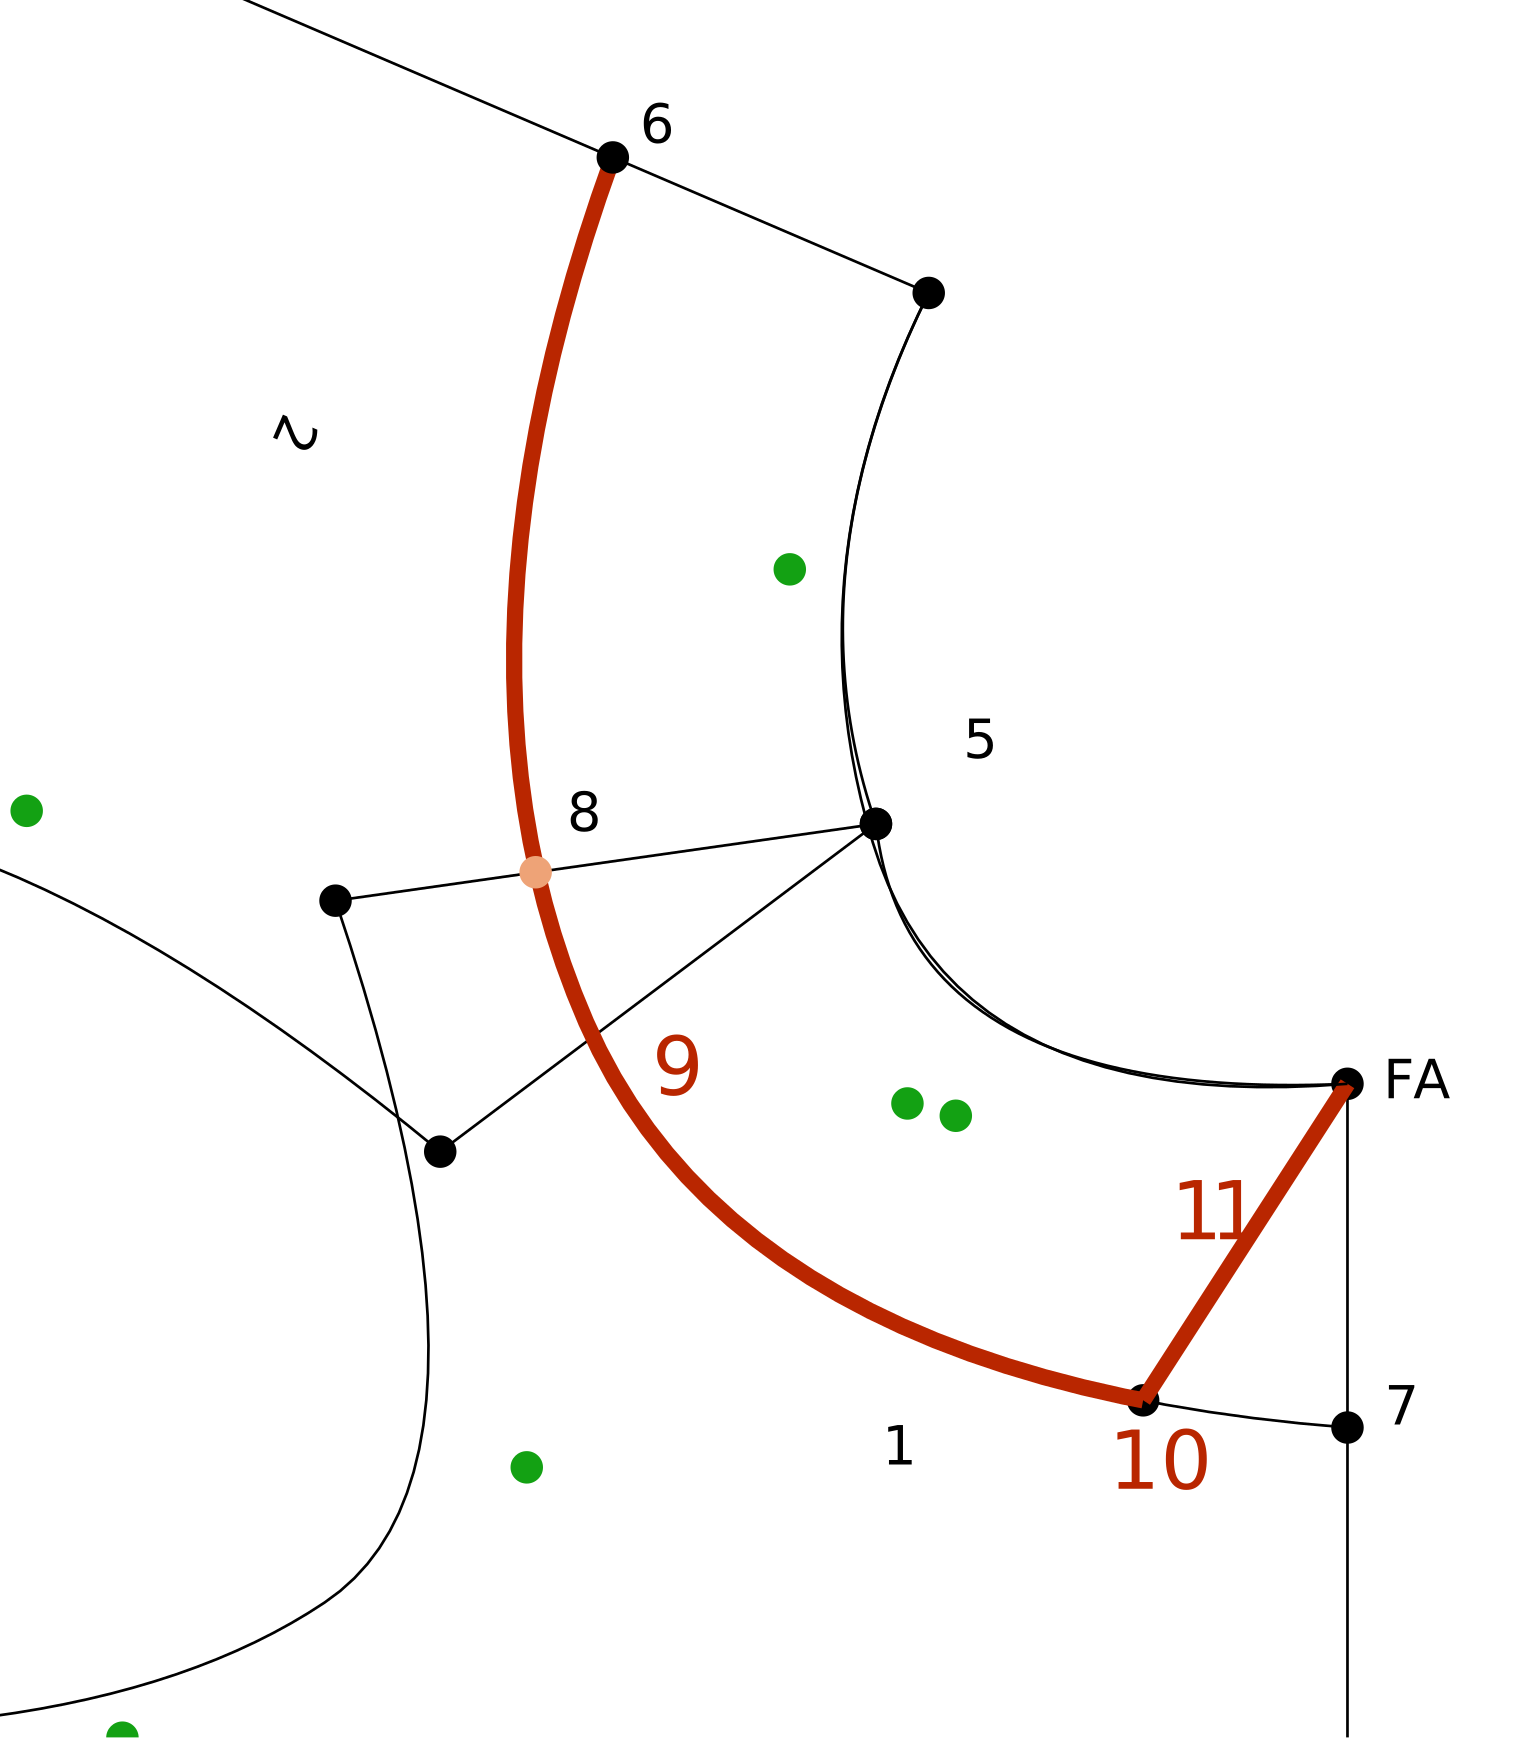 Curves > Add Curve
9Collar Edge
From: 6Collar CB to 7Collar CF
Curve Points: 2
Create a smooth curve running through the 8Collar Shldr RP an equal distance away from the 5Collar Neckline
Points > Add Point on Line/Curve10Collar Point
Select: 9Collar Edge
End: 7Collar CF
Distance: 1.5" or 38 mm
Save & Split
This defines the collar point spread.
 Lines > Add Line
11Collar CF Line
From: FACenter Neck Front to 10Collar Point
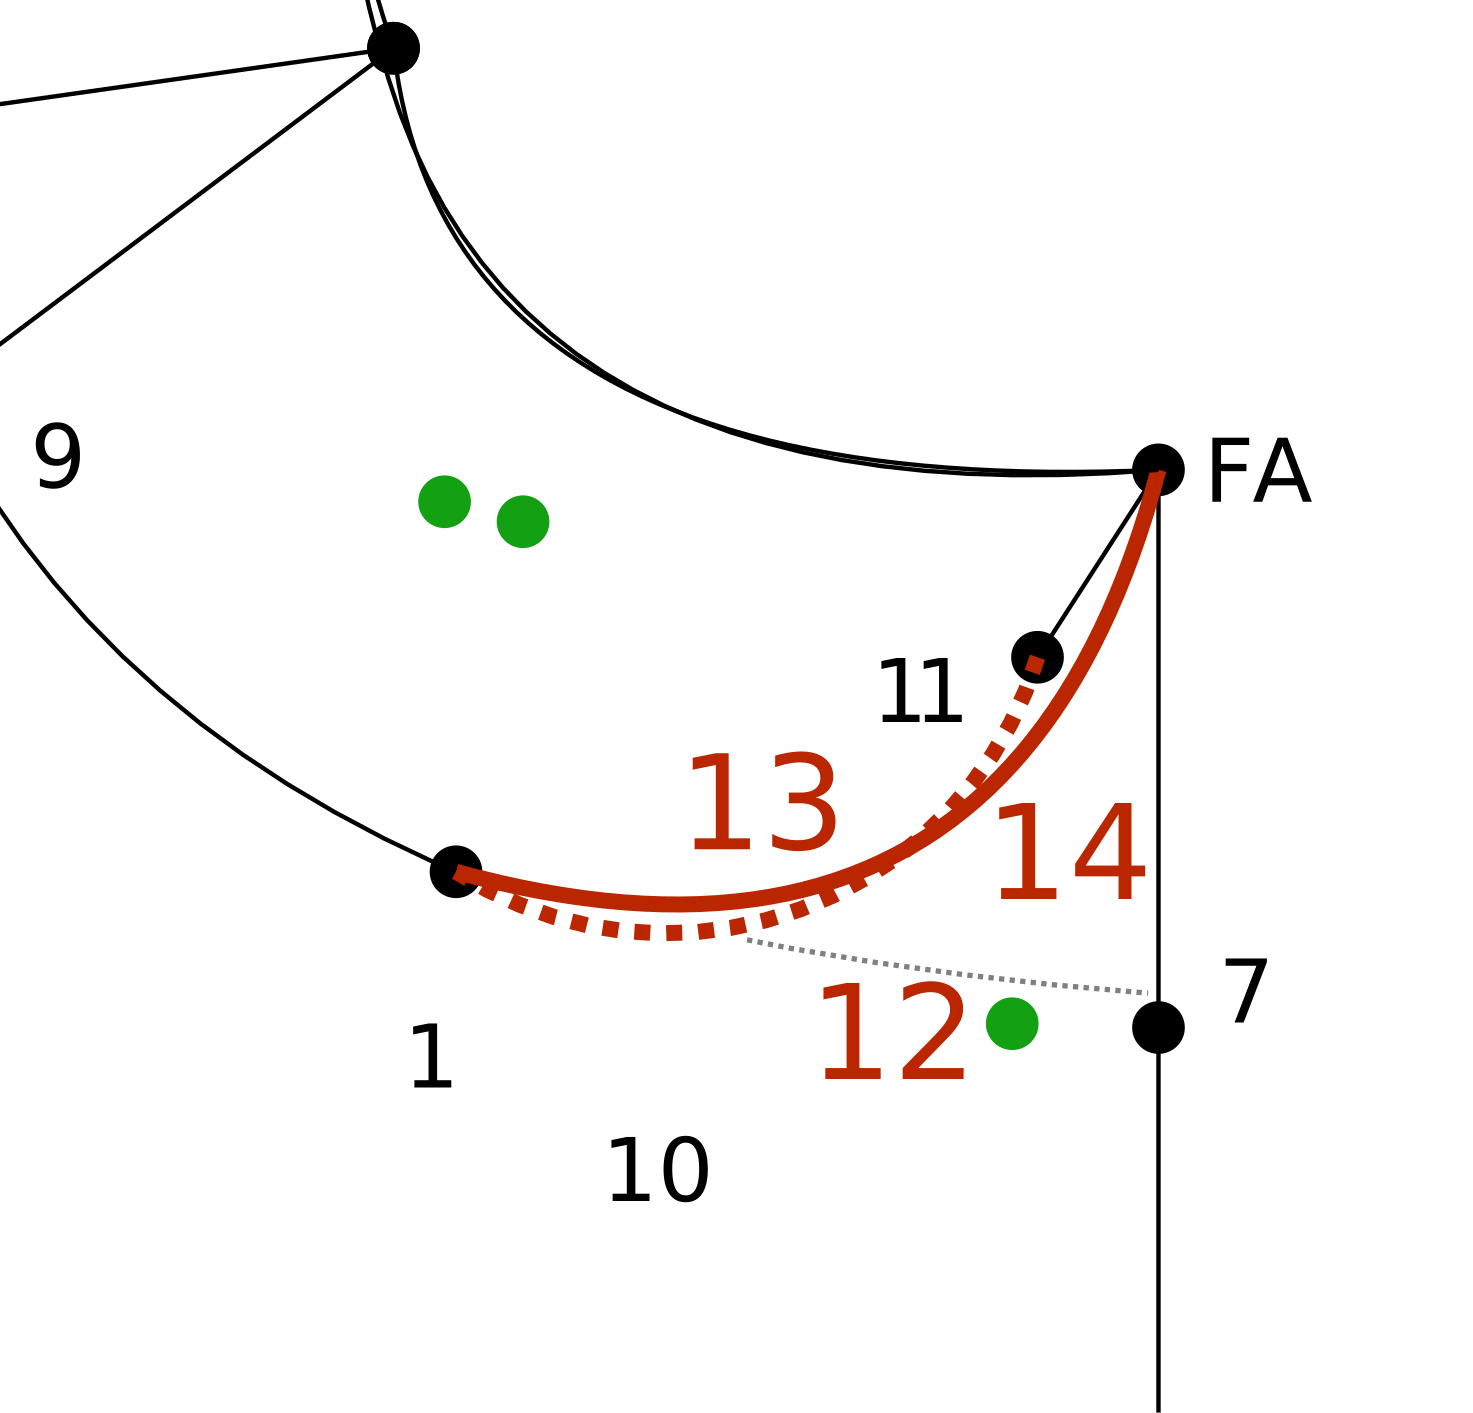
 Lines > Delete Lines/Curves
12Remove Line
Select: 9Collar Edge closest to center front
 Utilities > Round Corner
13Rounding Point
If you want a more rounded collar point.
Corner: 10Collar Point
Use the sliders to create the shape you want. It may not be a smooth transition to the connected lines, but you can always redraw the Collar Edge using this rounded corner as a guide.
Curves > Add Curve14Collar Edge
From: Lower rounded corner point to FACenter Neck Front
Curve Points: 1
Follow the rounded corner and create a smooth transition.
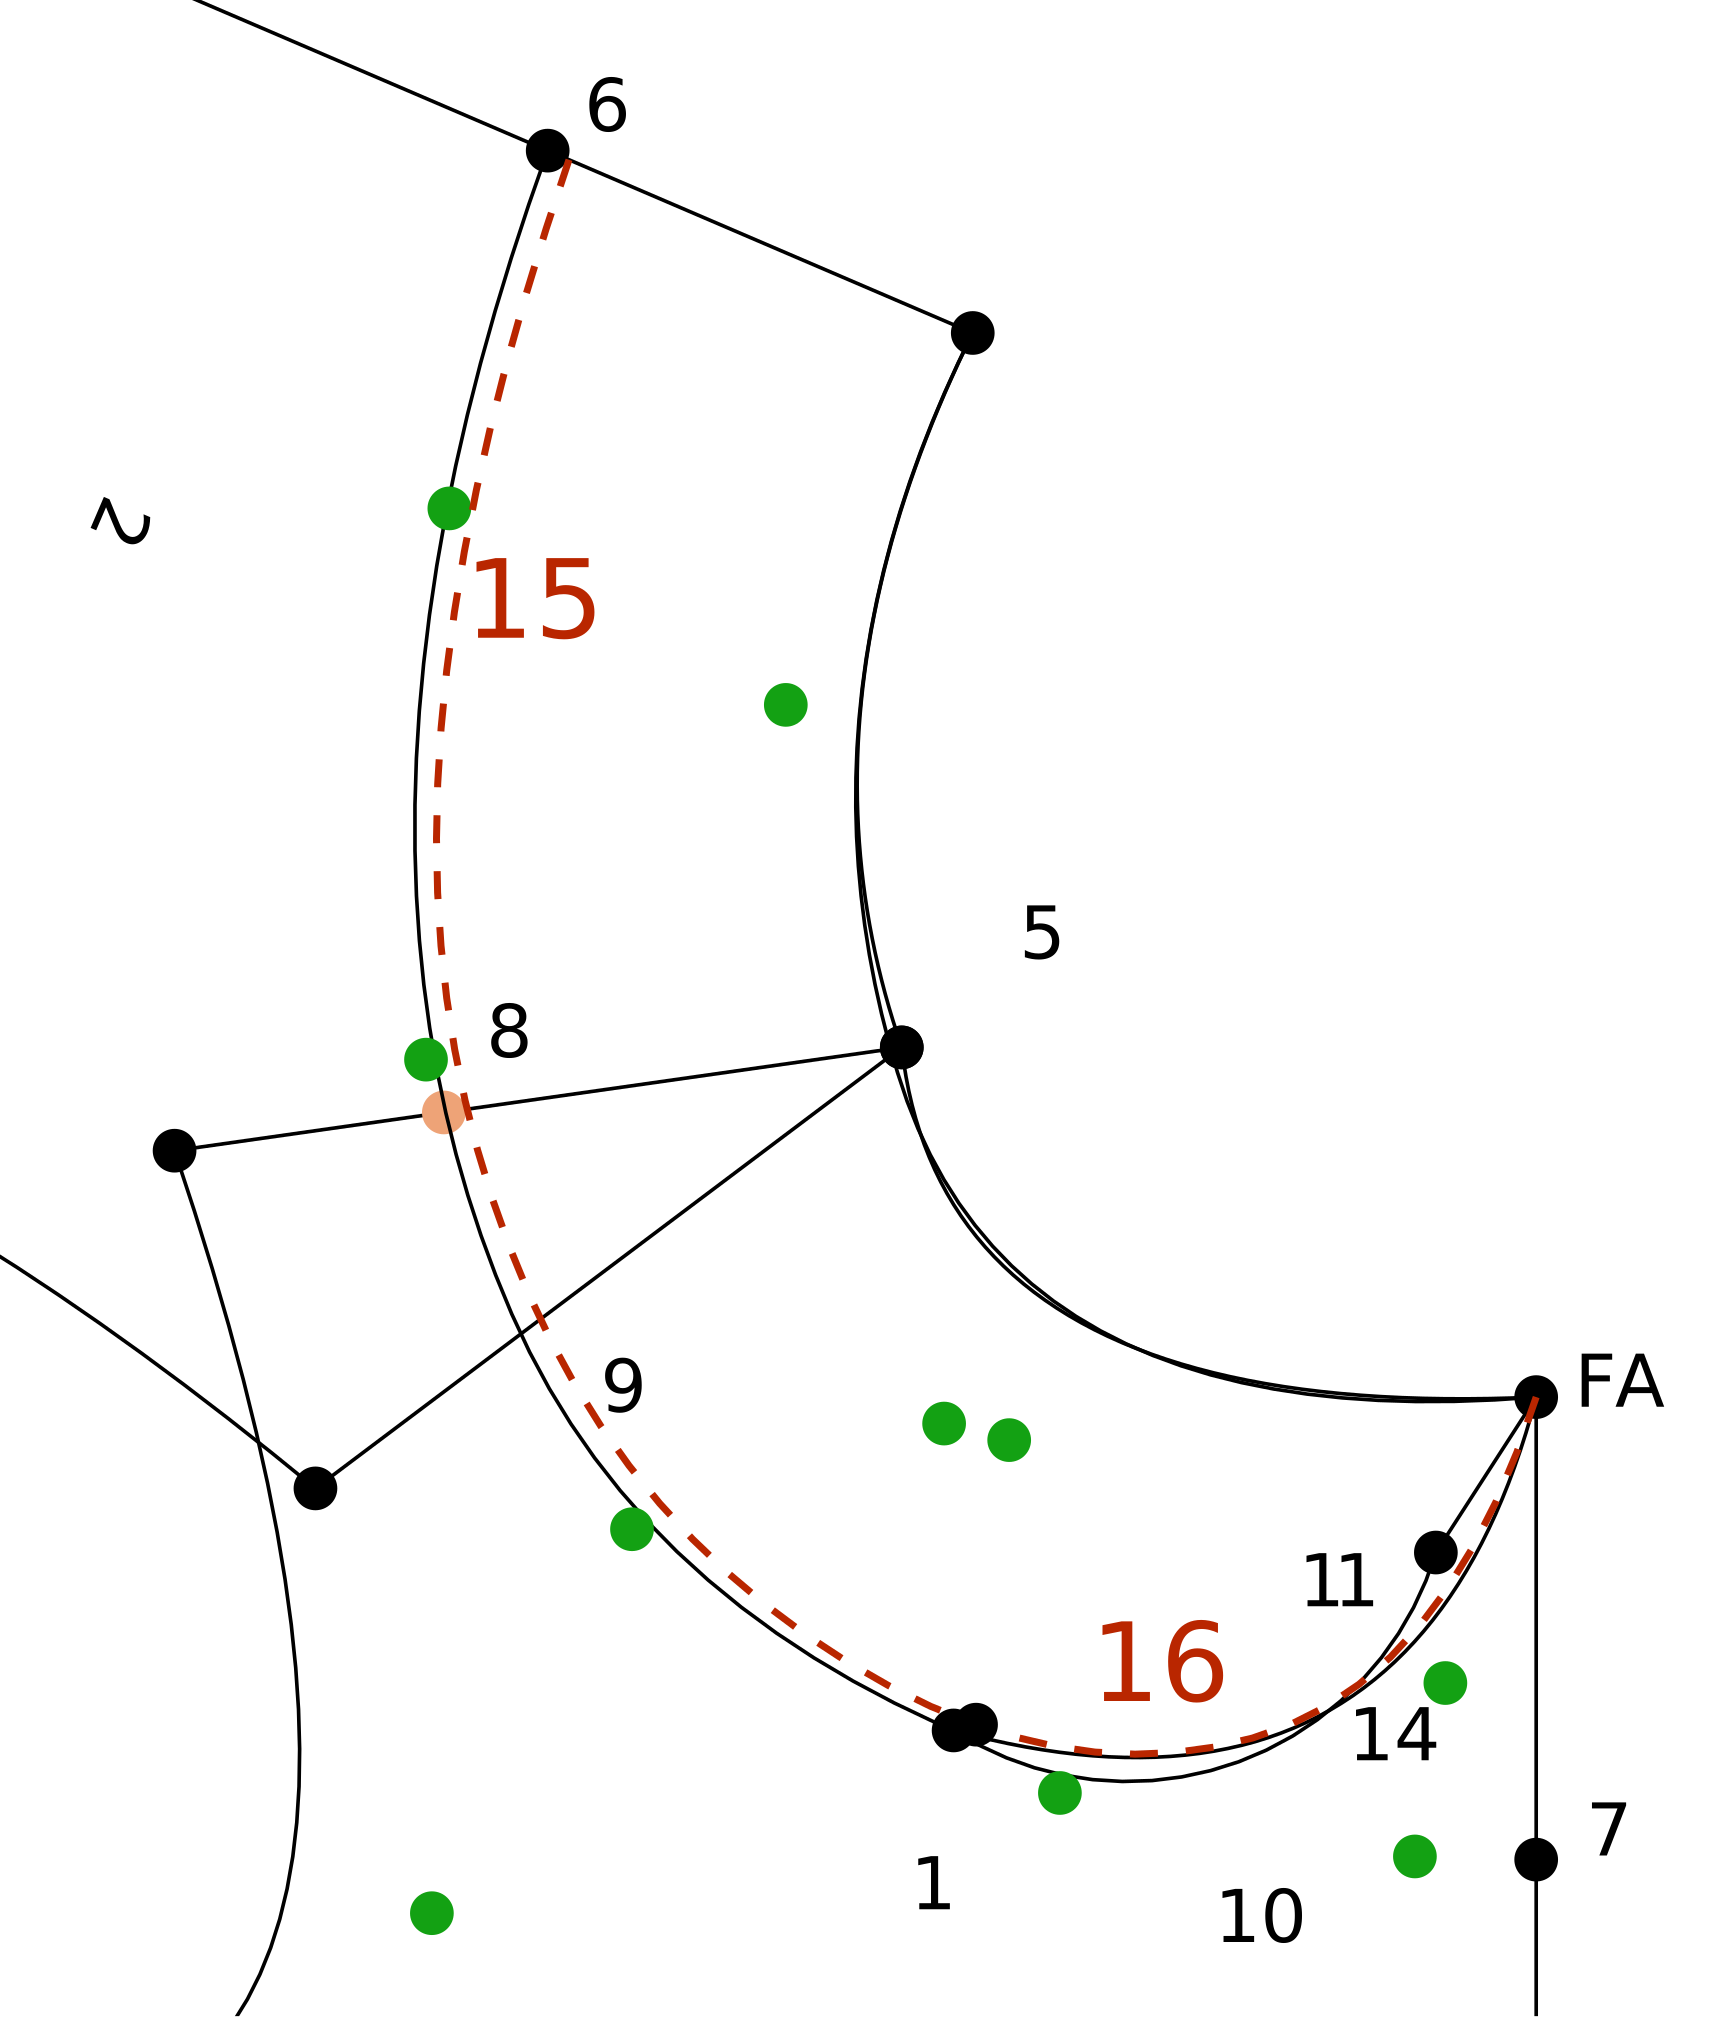
 Curves > Offset Curve
15Undercollar Offset
Select: 9Collar Edge
Distance: 0.125 or 3 mm
Style: Black Dashed
Make sure the curve goes inside the pattern.
Curves > Add Curve16Undercollar Curve
From: 15Undercollar Offset end point closest to CF to FACenter Neck Front
Curve Points: 2
Distance of 15Undercollar Offset and then taper to 0 offset at the FACenter Neck Front.
Style: Black Dashed
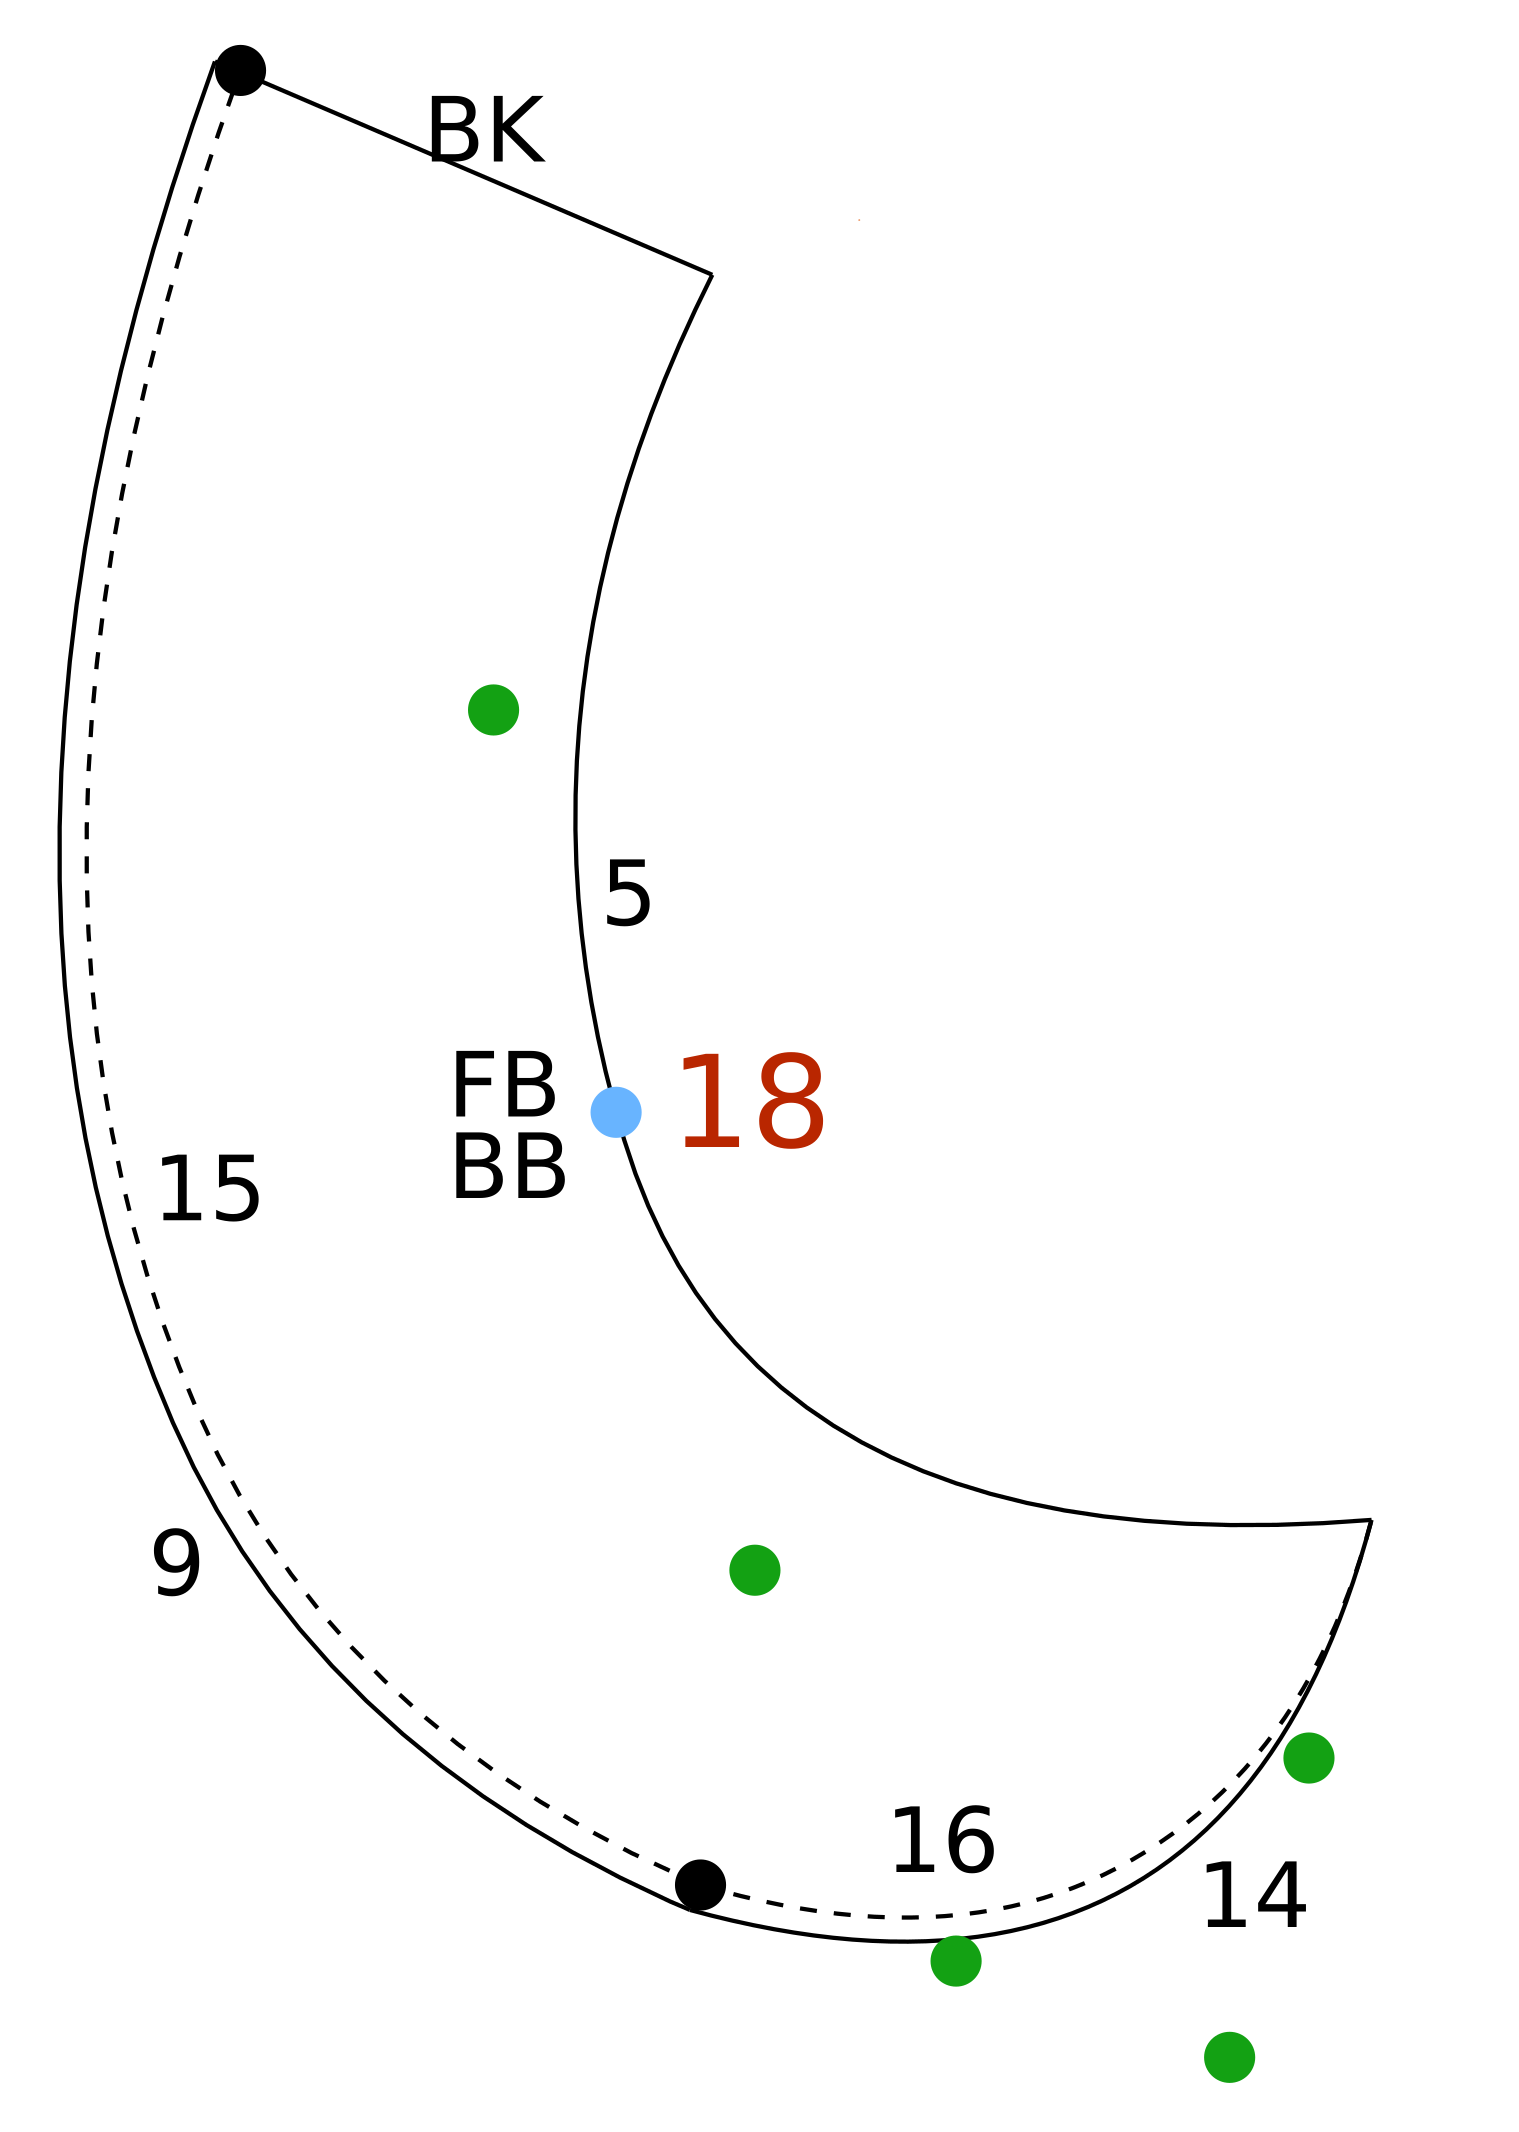
 Layers > Move Items to Layer
17Collar Final
Select: BKCenter Back, 5Collar Neckline, 14Collar Edge, 9Collar Edge, 15Undercollar Offset, 16Undercollar Curve
New Layer: Collar Final
Parent: PMP
Save & Switch
 Points > Add Free Point
18Align Shldr
Select: Place the point on the 5Collar Neckline at the FBSide Neck Front / BBSide Neck Back position. This will align to the shoulder seam of the bodice.
Style: Blue Solid
Layers > Layer Visibility19Hide Layers
Hide all layers except Collar Final.
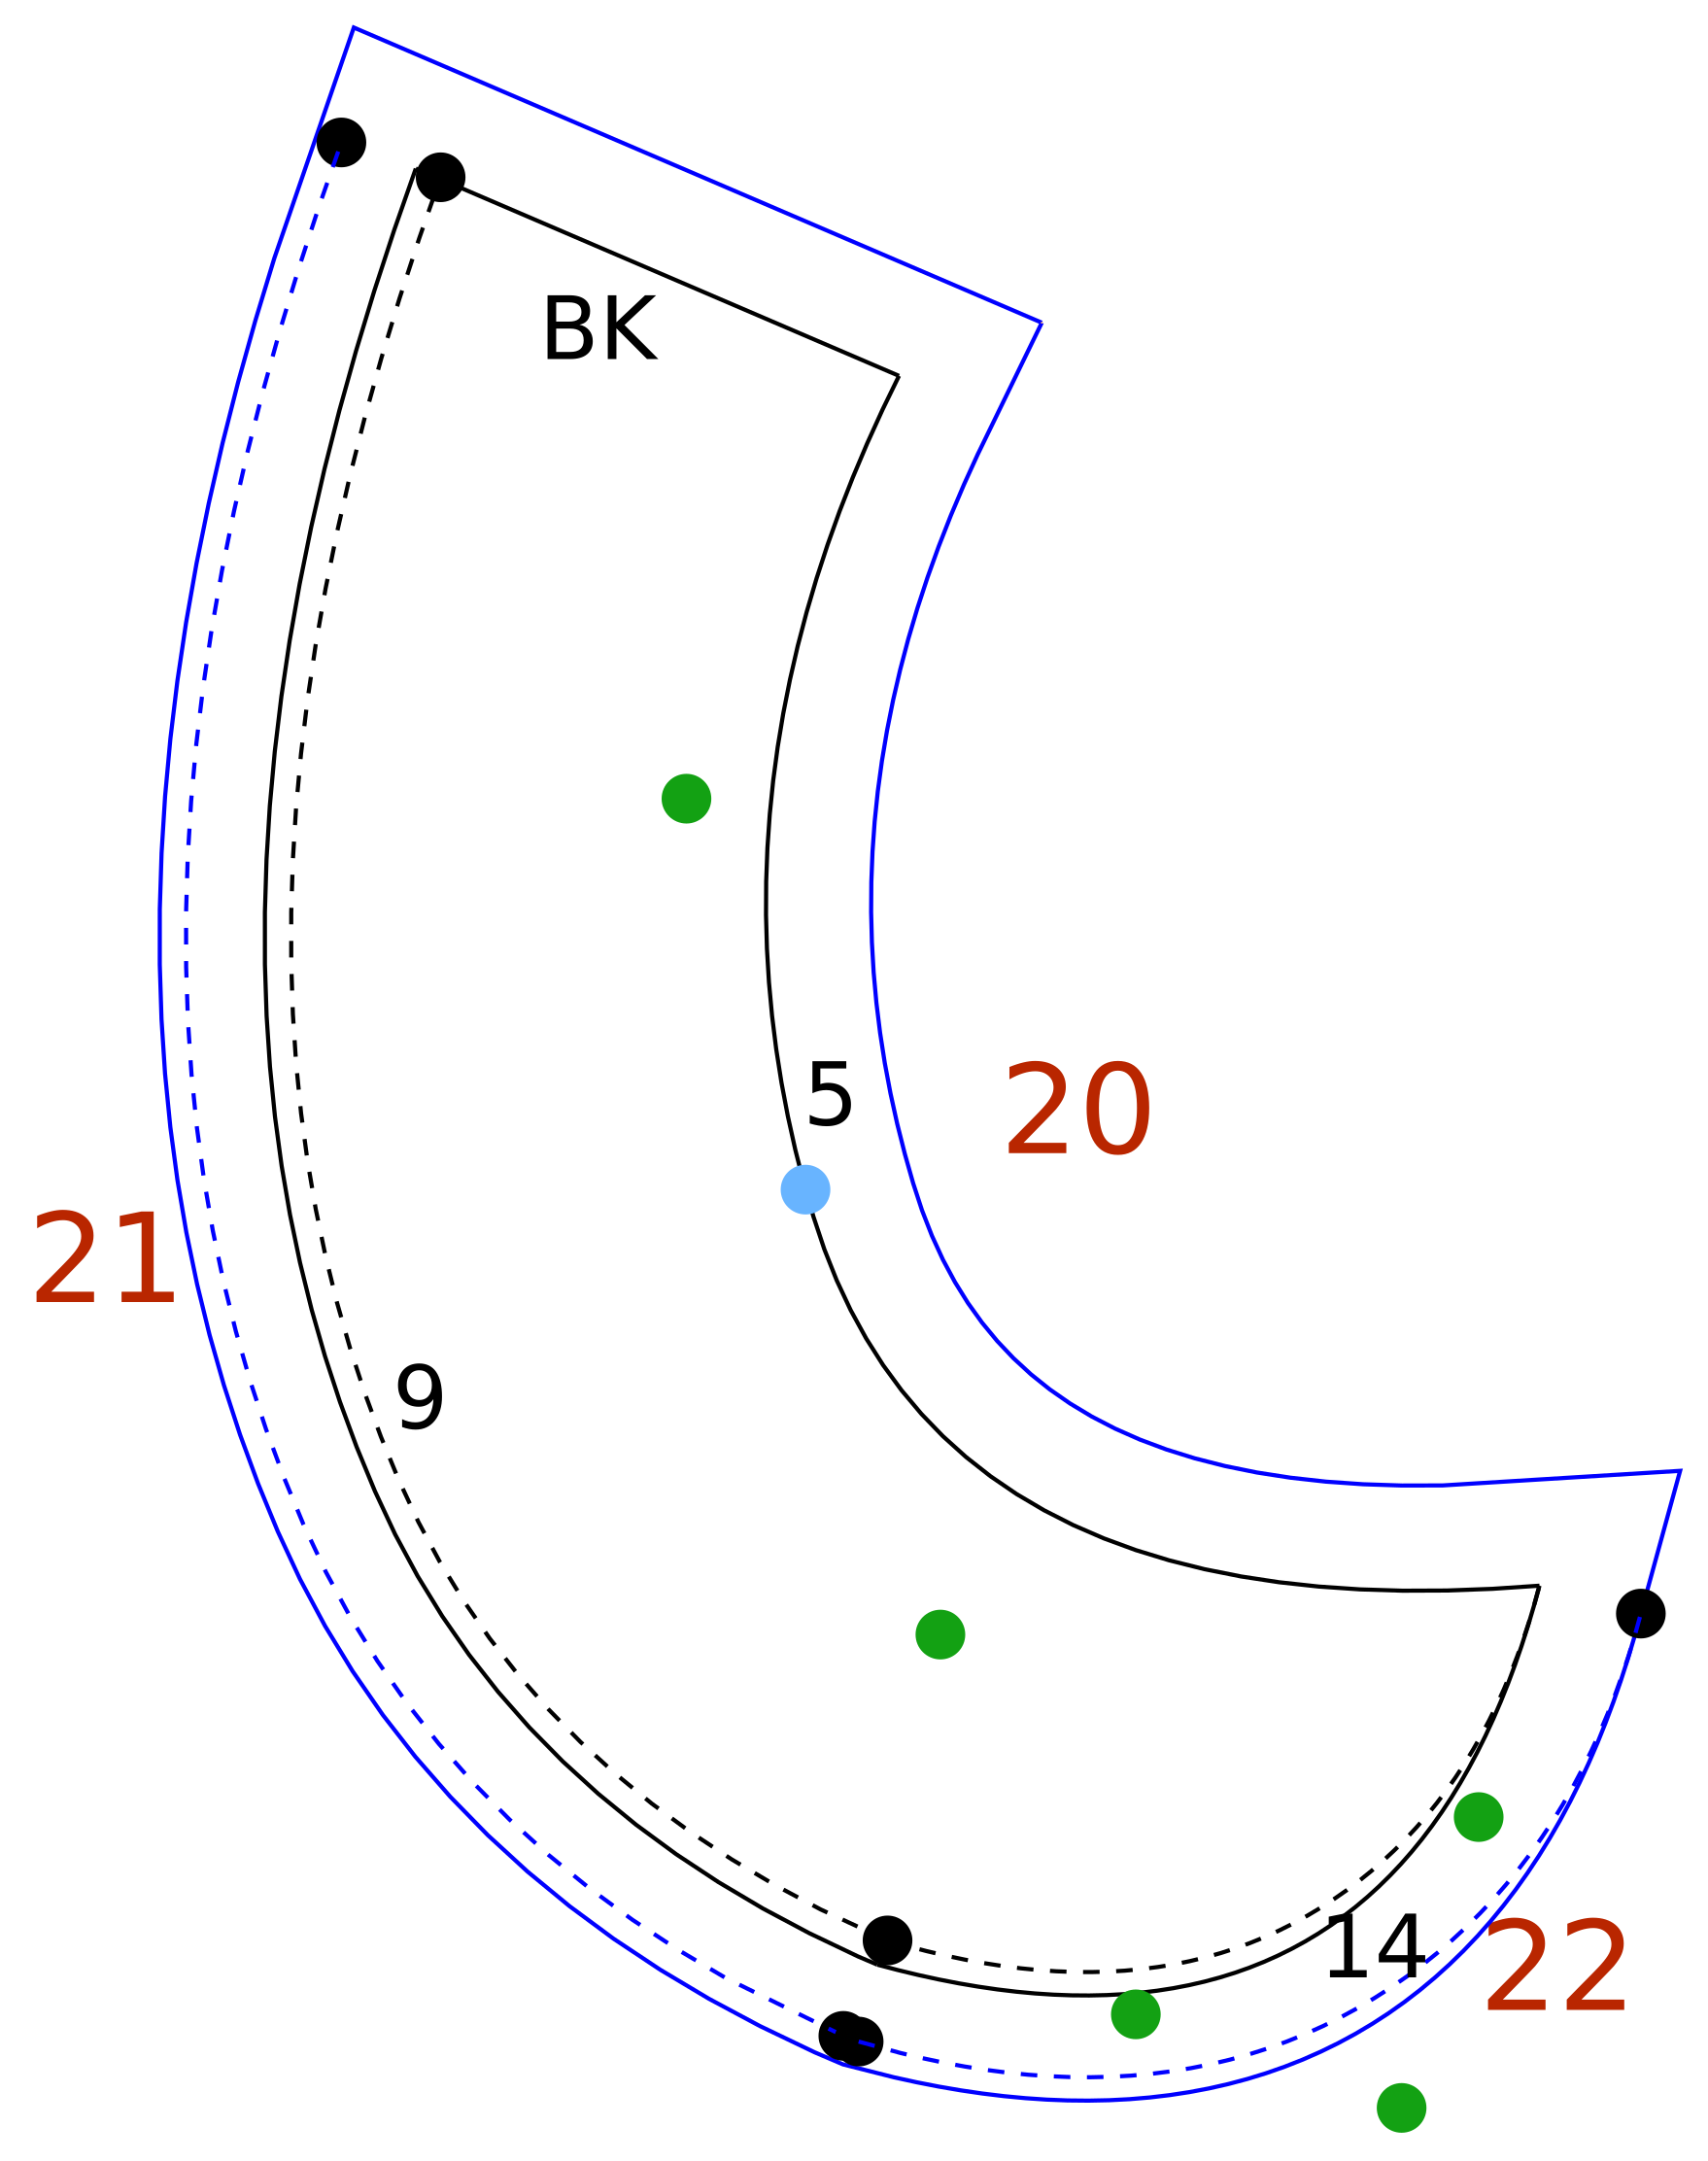
 Finish > Add Seam Allowance to Pattern
20Seam Allowance
Select: BKCenter Back, 5Collar Neckline, 14Collar Edge, 9Collar Edge
Type: Single Outline
Other Side if inside pattern.
Curves > Offset Curve21Undercollar SA
Select: 15Undercollar Offset
Distance: Enter your seam allowance value
Style: Dark Blue Dashed
Curves > Offset Curve22Undercollar SA
Select: 16Undercollar Curve
Distance: Enter your seam allowance value
Style: Dark Blue Dashed

 Finish > Add Text at Point
23Collar Label
Select a location for the pattern label. Note the name of the pattern, measurement set used, date and cutting instructions
 Finish > Hide Points
24Hide Points
Hide points.
25Export PDF
File > Export PDF
Choose appropriate page and print.
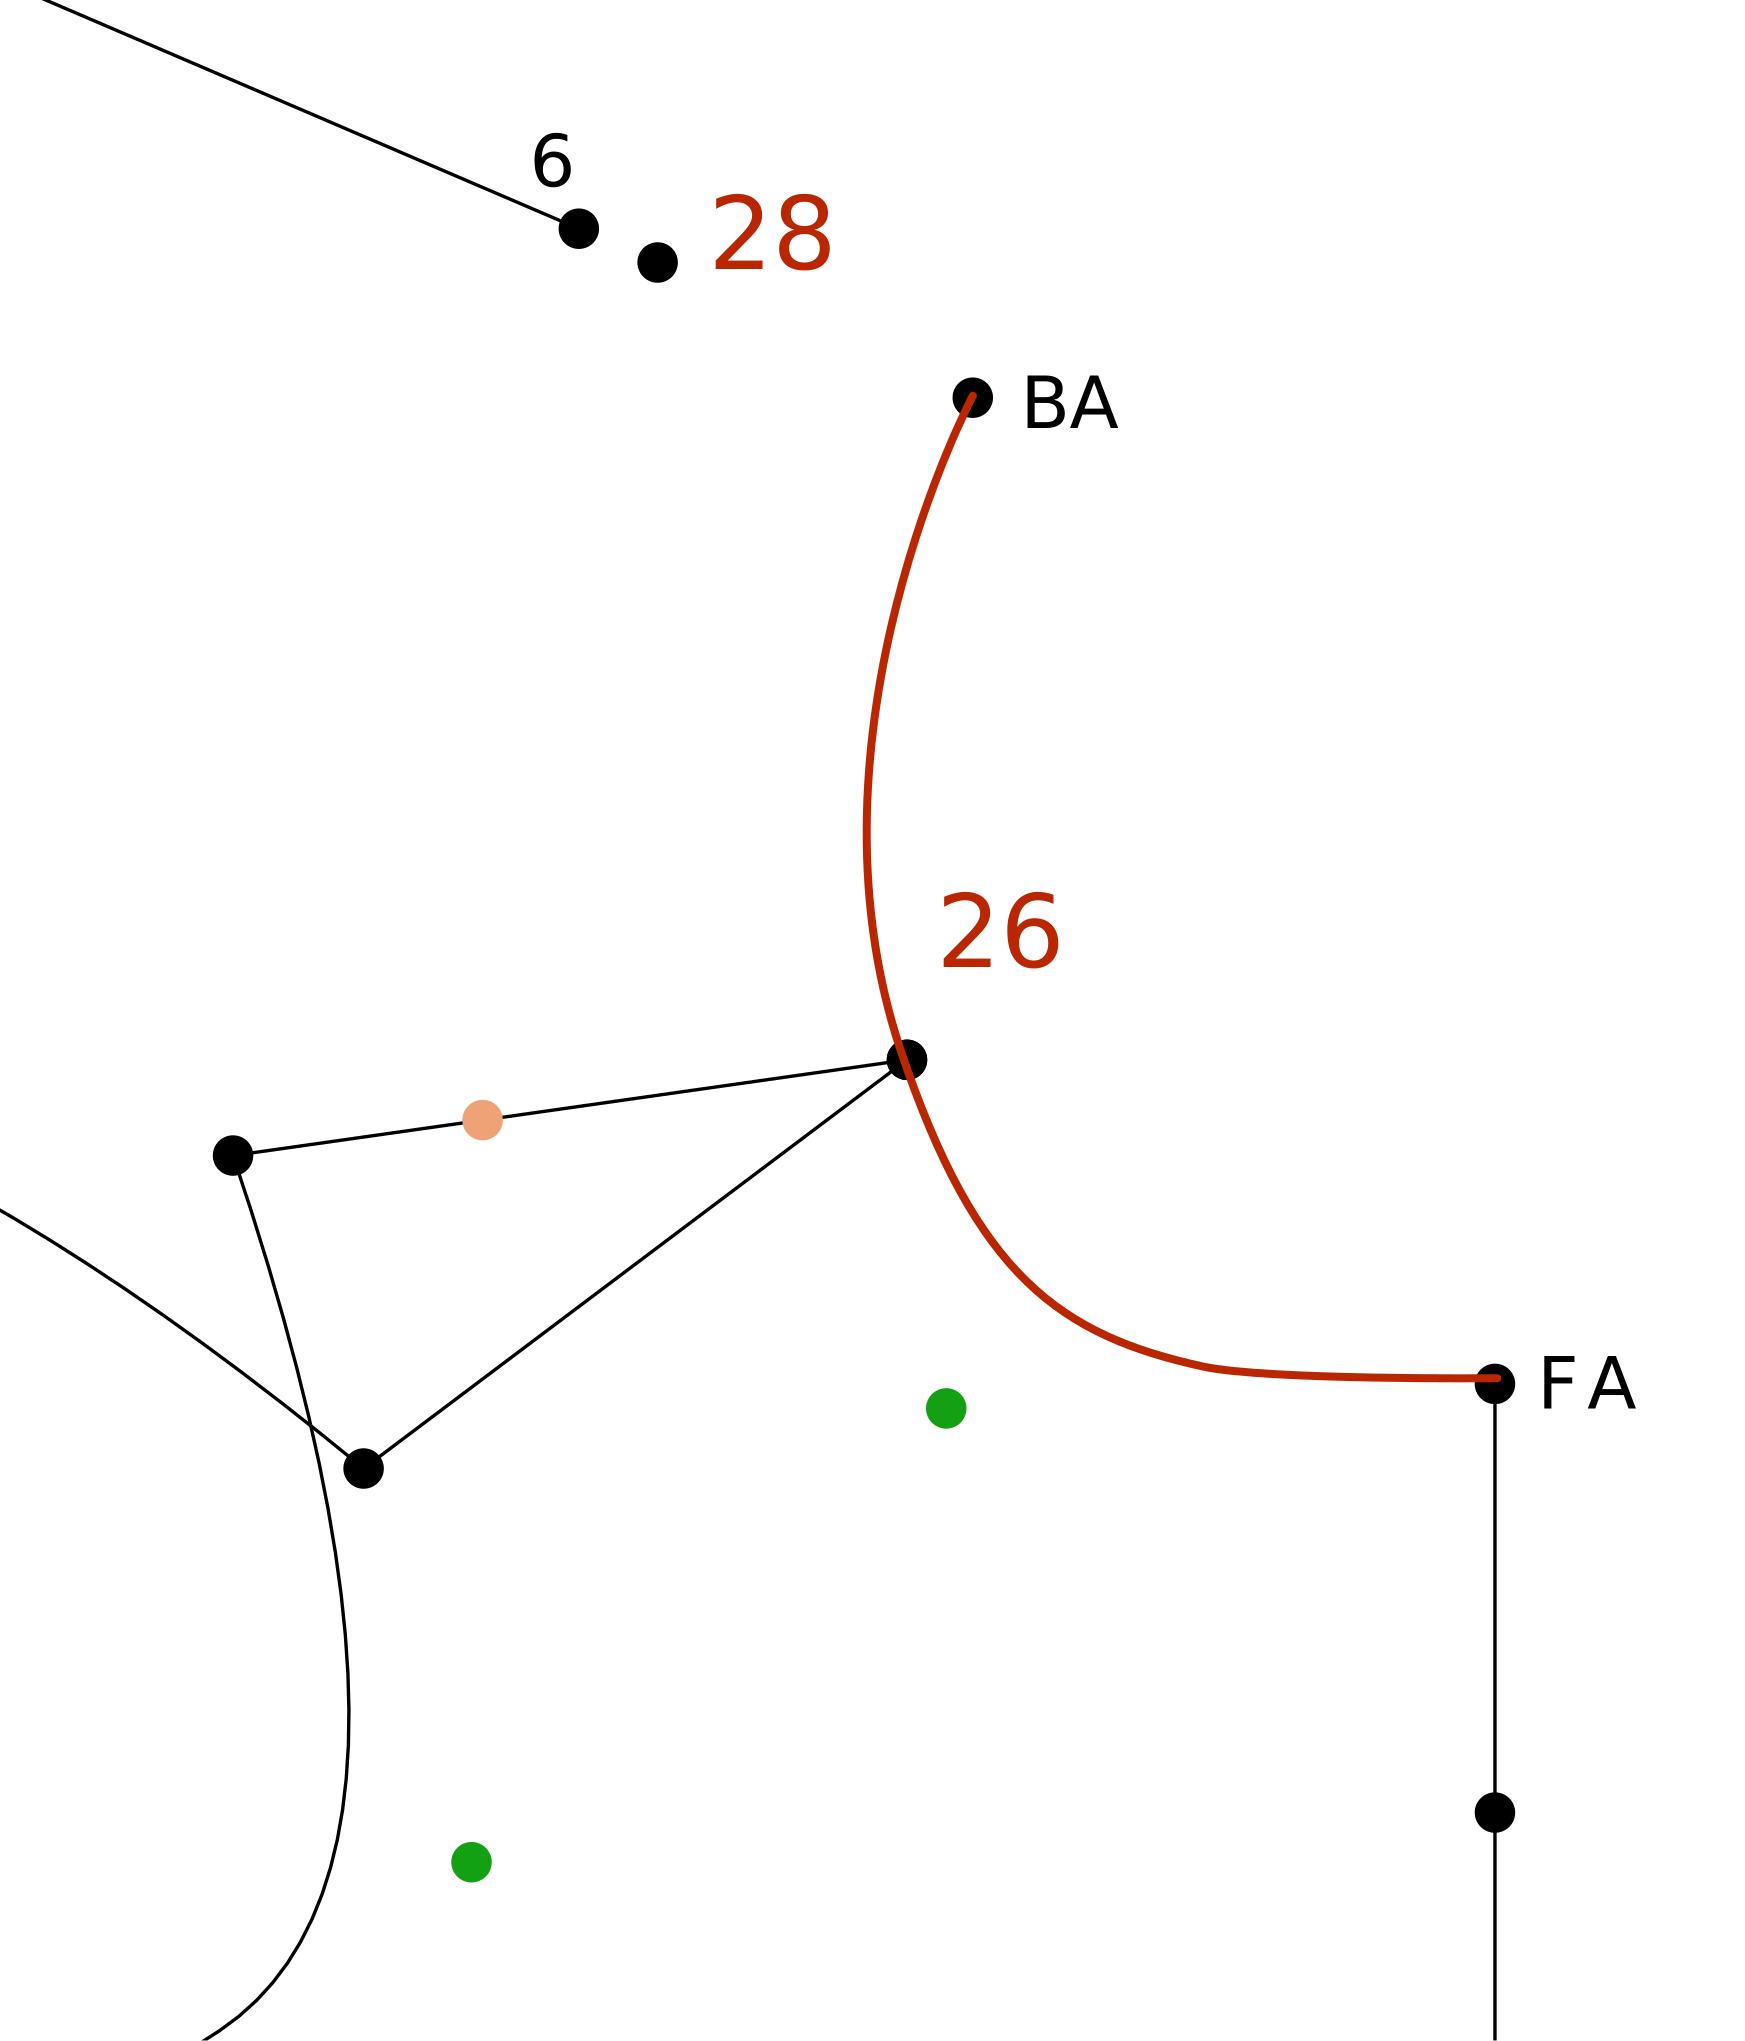 Layers > Copy Items to Layer
26Facing Neckline
Select: 5Collar Neckline
New Layer: Facing
Parent: PMP
Find: Collar
Replace: Facing
Save & Switch
Layers > Layer Visibility27Hide/Show Layers
Hide the 17Collar Final layer and show 1Collar Trace Front and 2Collar Trace Back
 Points > Add Point on Vector
28Facing CB
Start: BACenter Neck Back
Vector: 6Collar CB
Distance: 2" or 50 mm
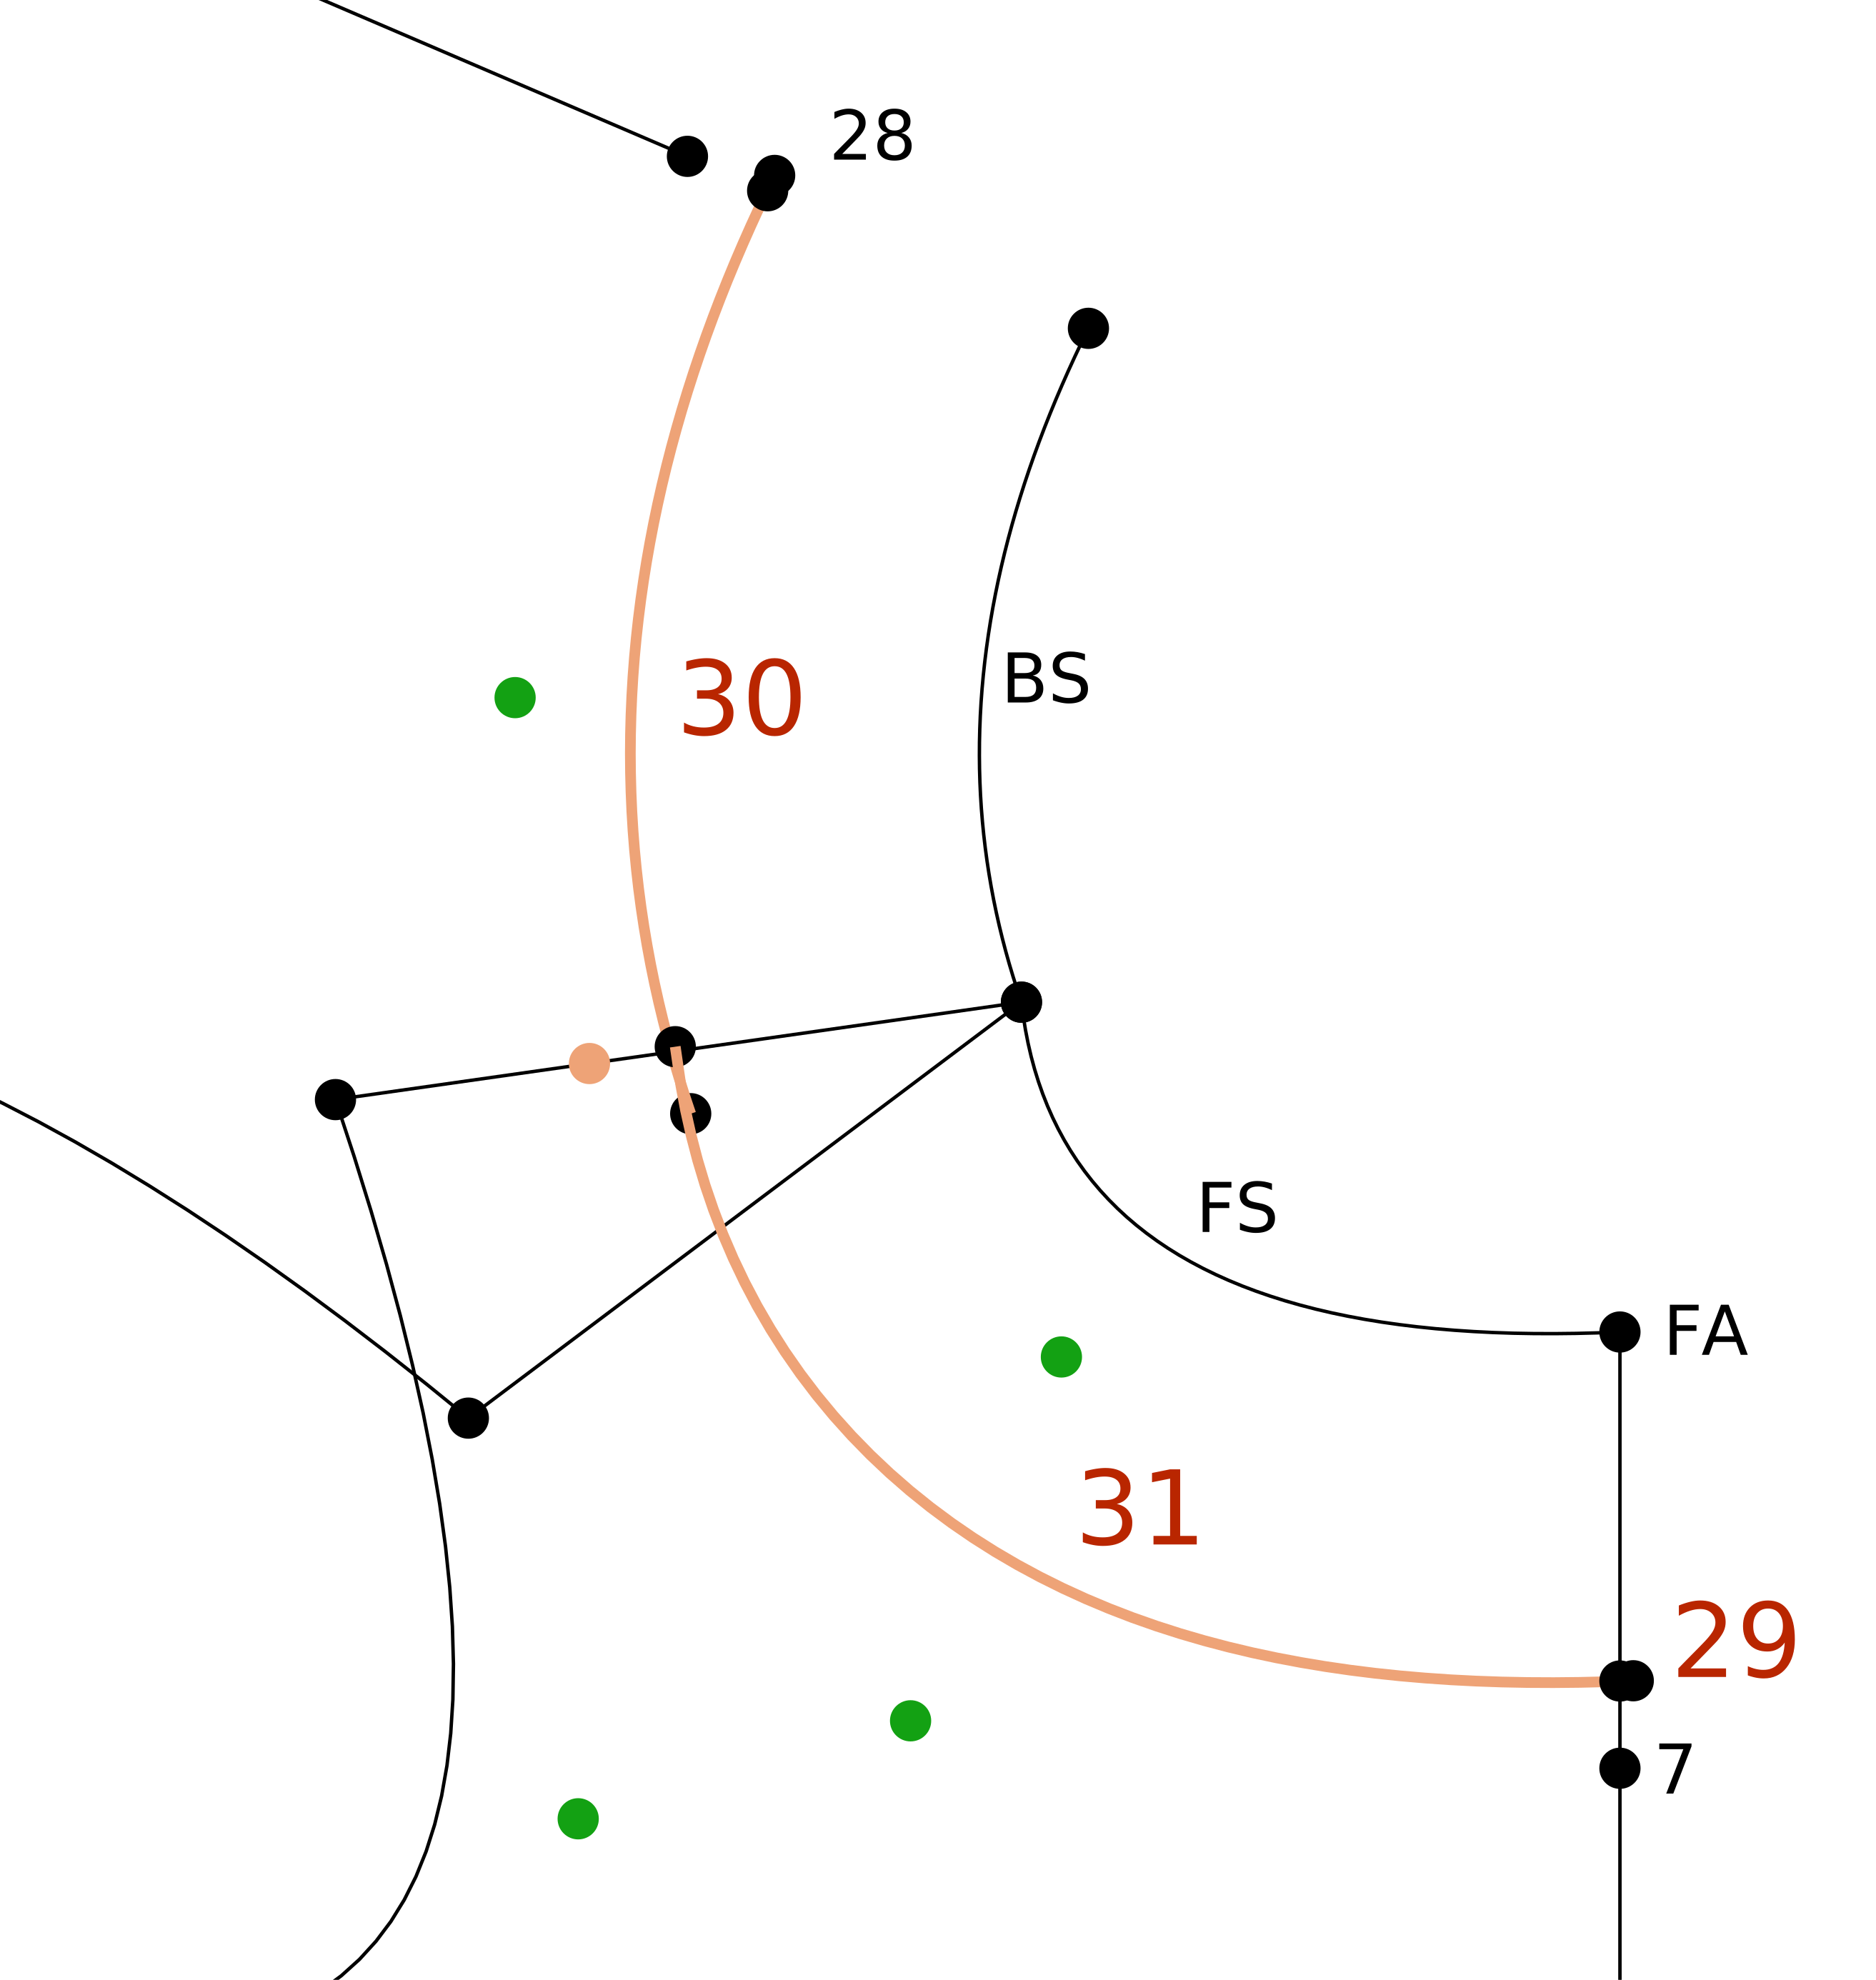 Points > Add Point on Vector
29Facing CF
Start: FACenter Neck Front
Vector: 7Collar CF
Distance: 2" or 50 mm
Curves > Offset Curve30Curve Guide
Select: BSNeckline Back
Distance: 2" or 50 mm
Style: Orange
Curves > Offset Curve31Curve Guide
Select: FSNeckline Front
Distance: 2" or 50 mm
Style: Orange
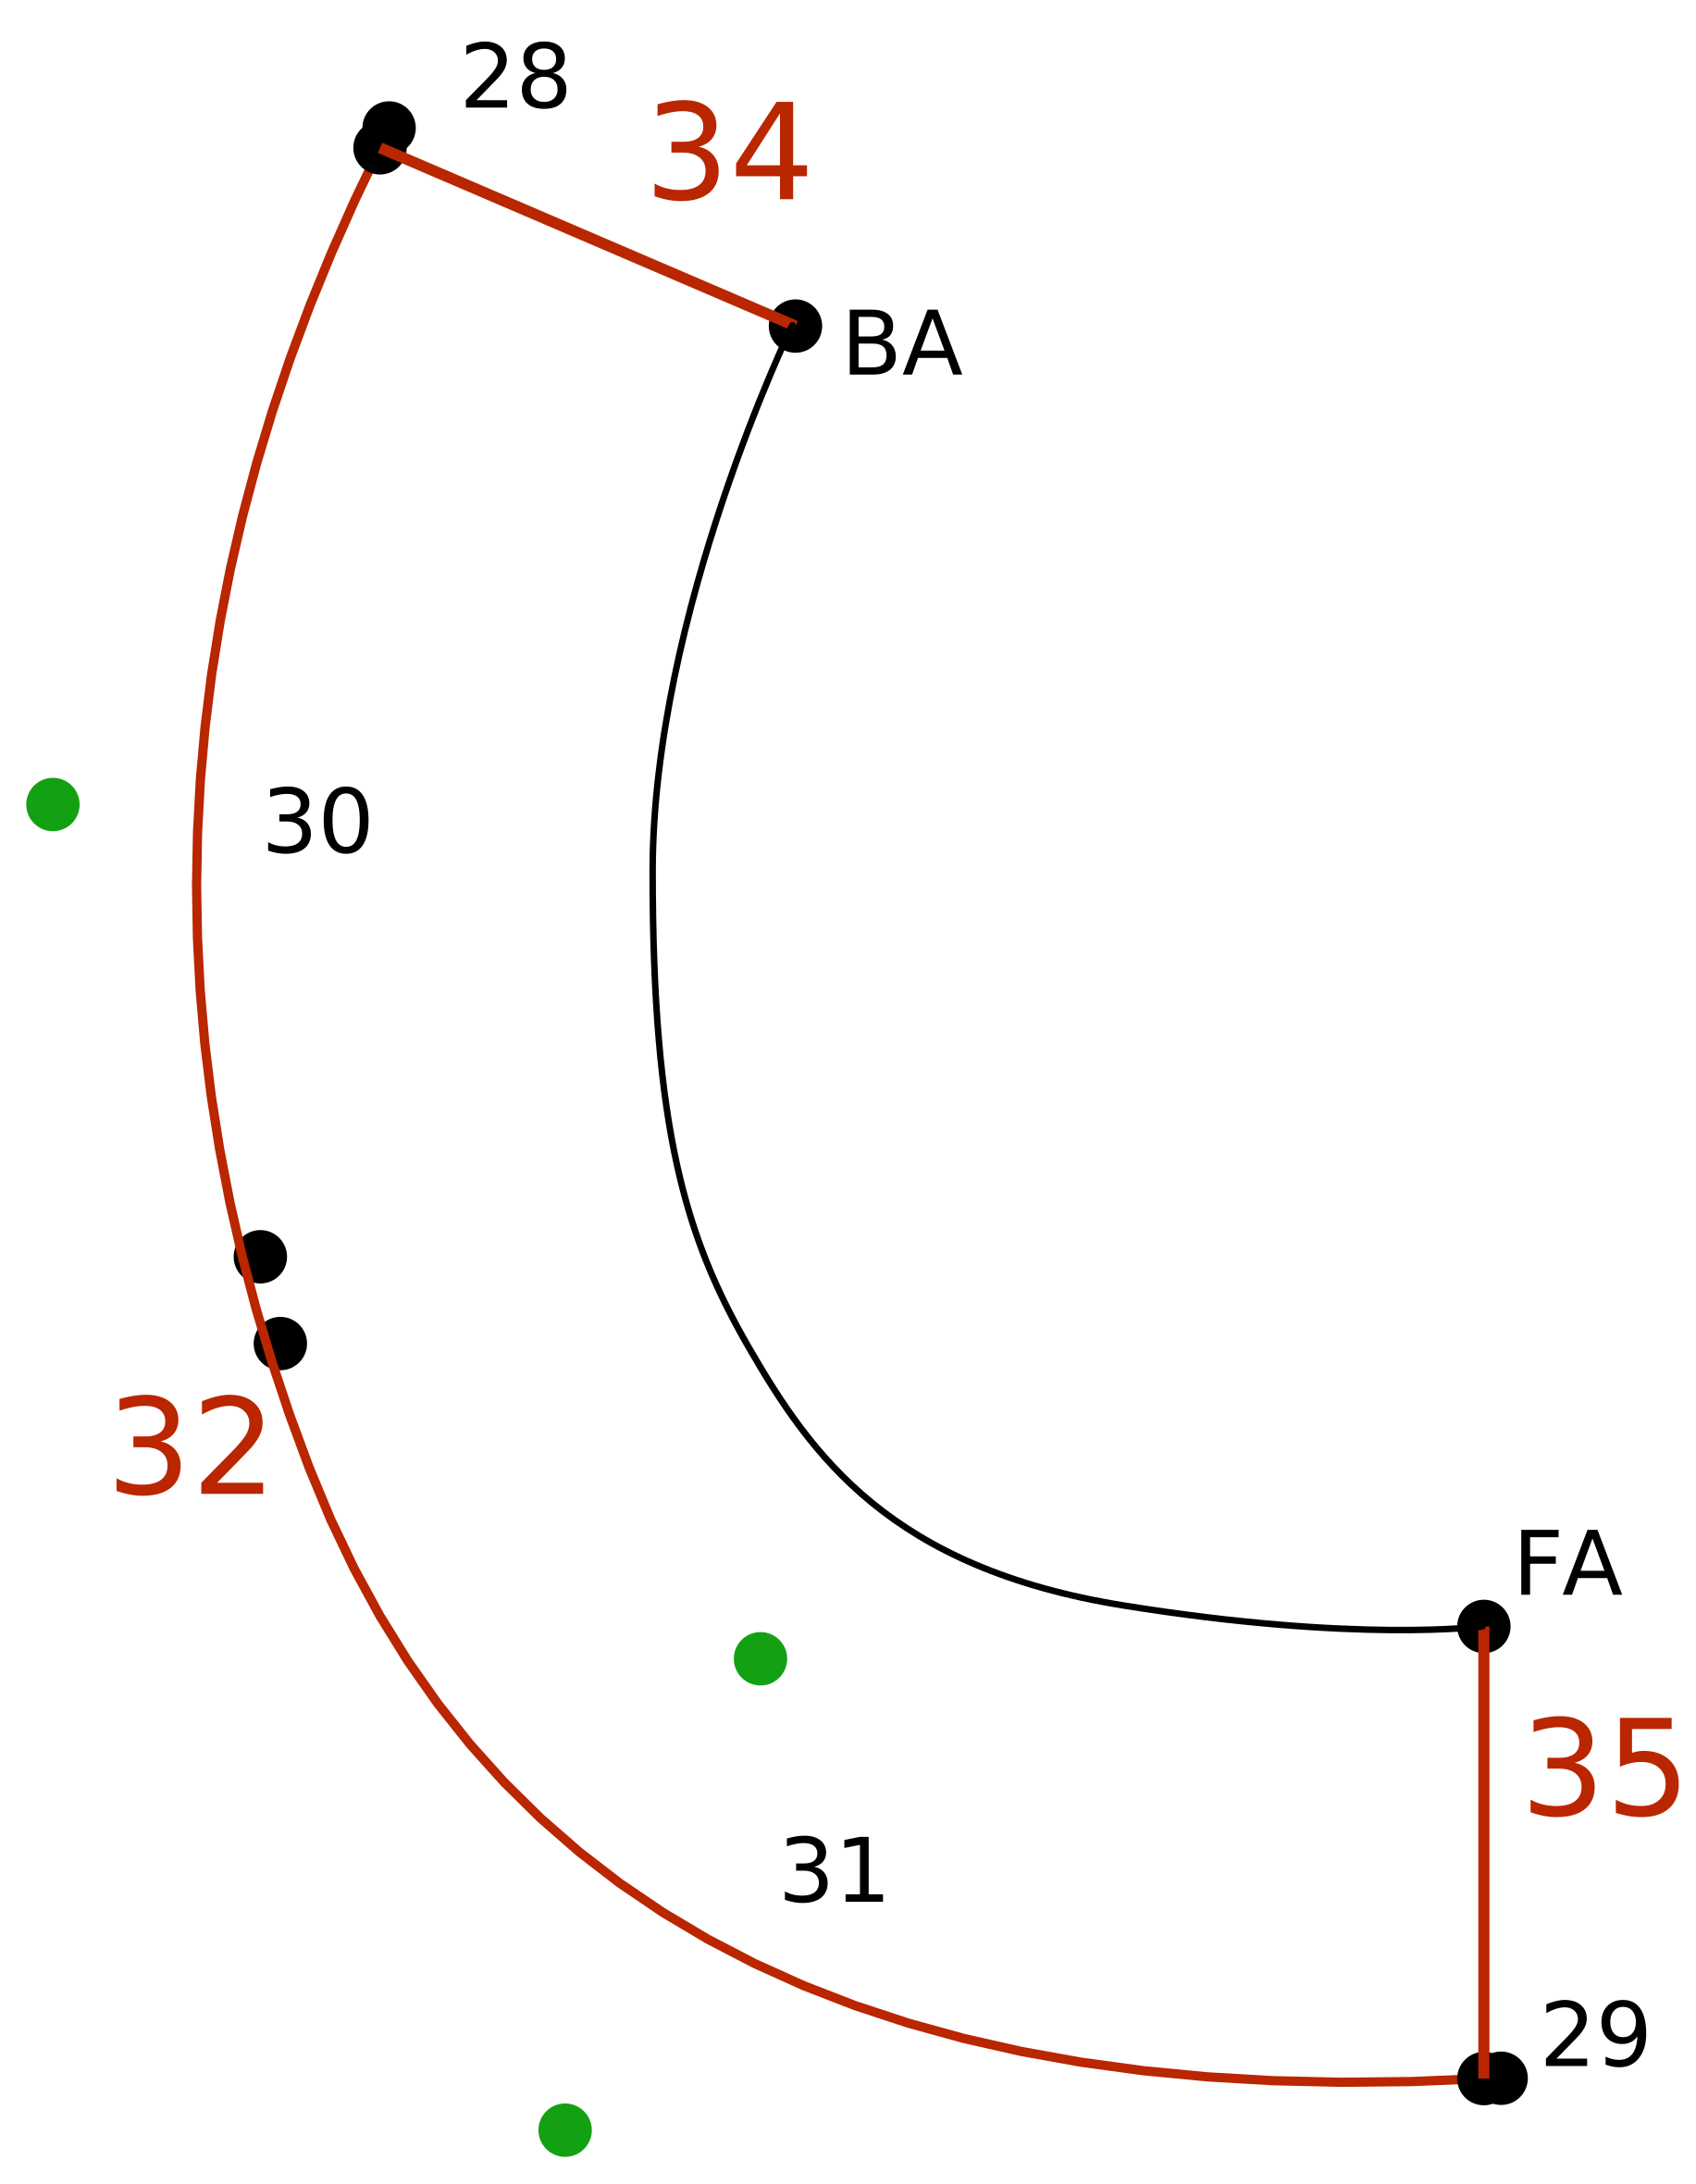 Curves > Add Curve
32Facing Curve
From: 28Facing CB to 29Facing CF
Curve Points: 2
Follow 30Curve Guide and 31Curve Guide
Make sure the start and end points are not the guide's points.
Layers > Layer Visibility33Hide Layer
Hide the all layers except Facing.
Lines > Add Line34Facing CB Line
From: 28Facing CB to BACenter Neck Back
Lines > Add Line35Facing CF Line
From: 29Facing CF to FACenter Neck Front
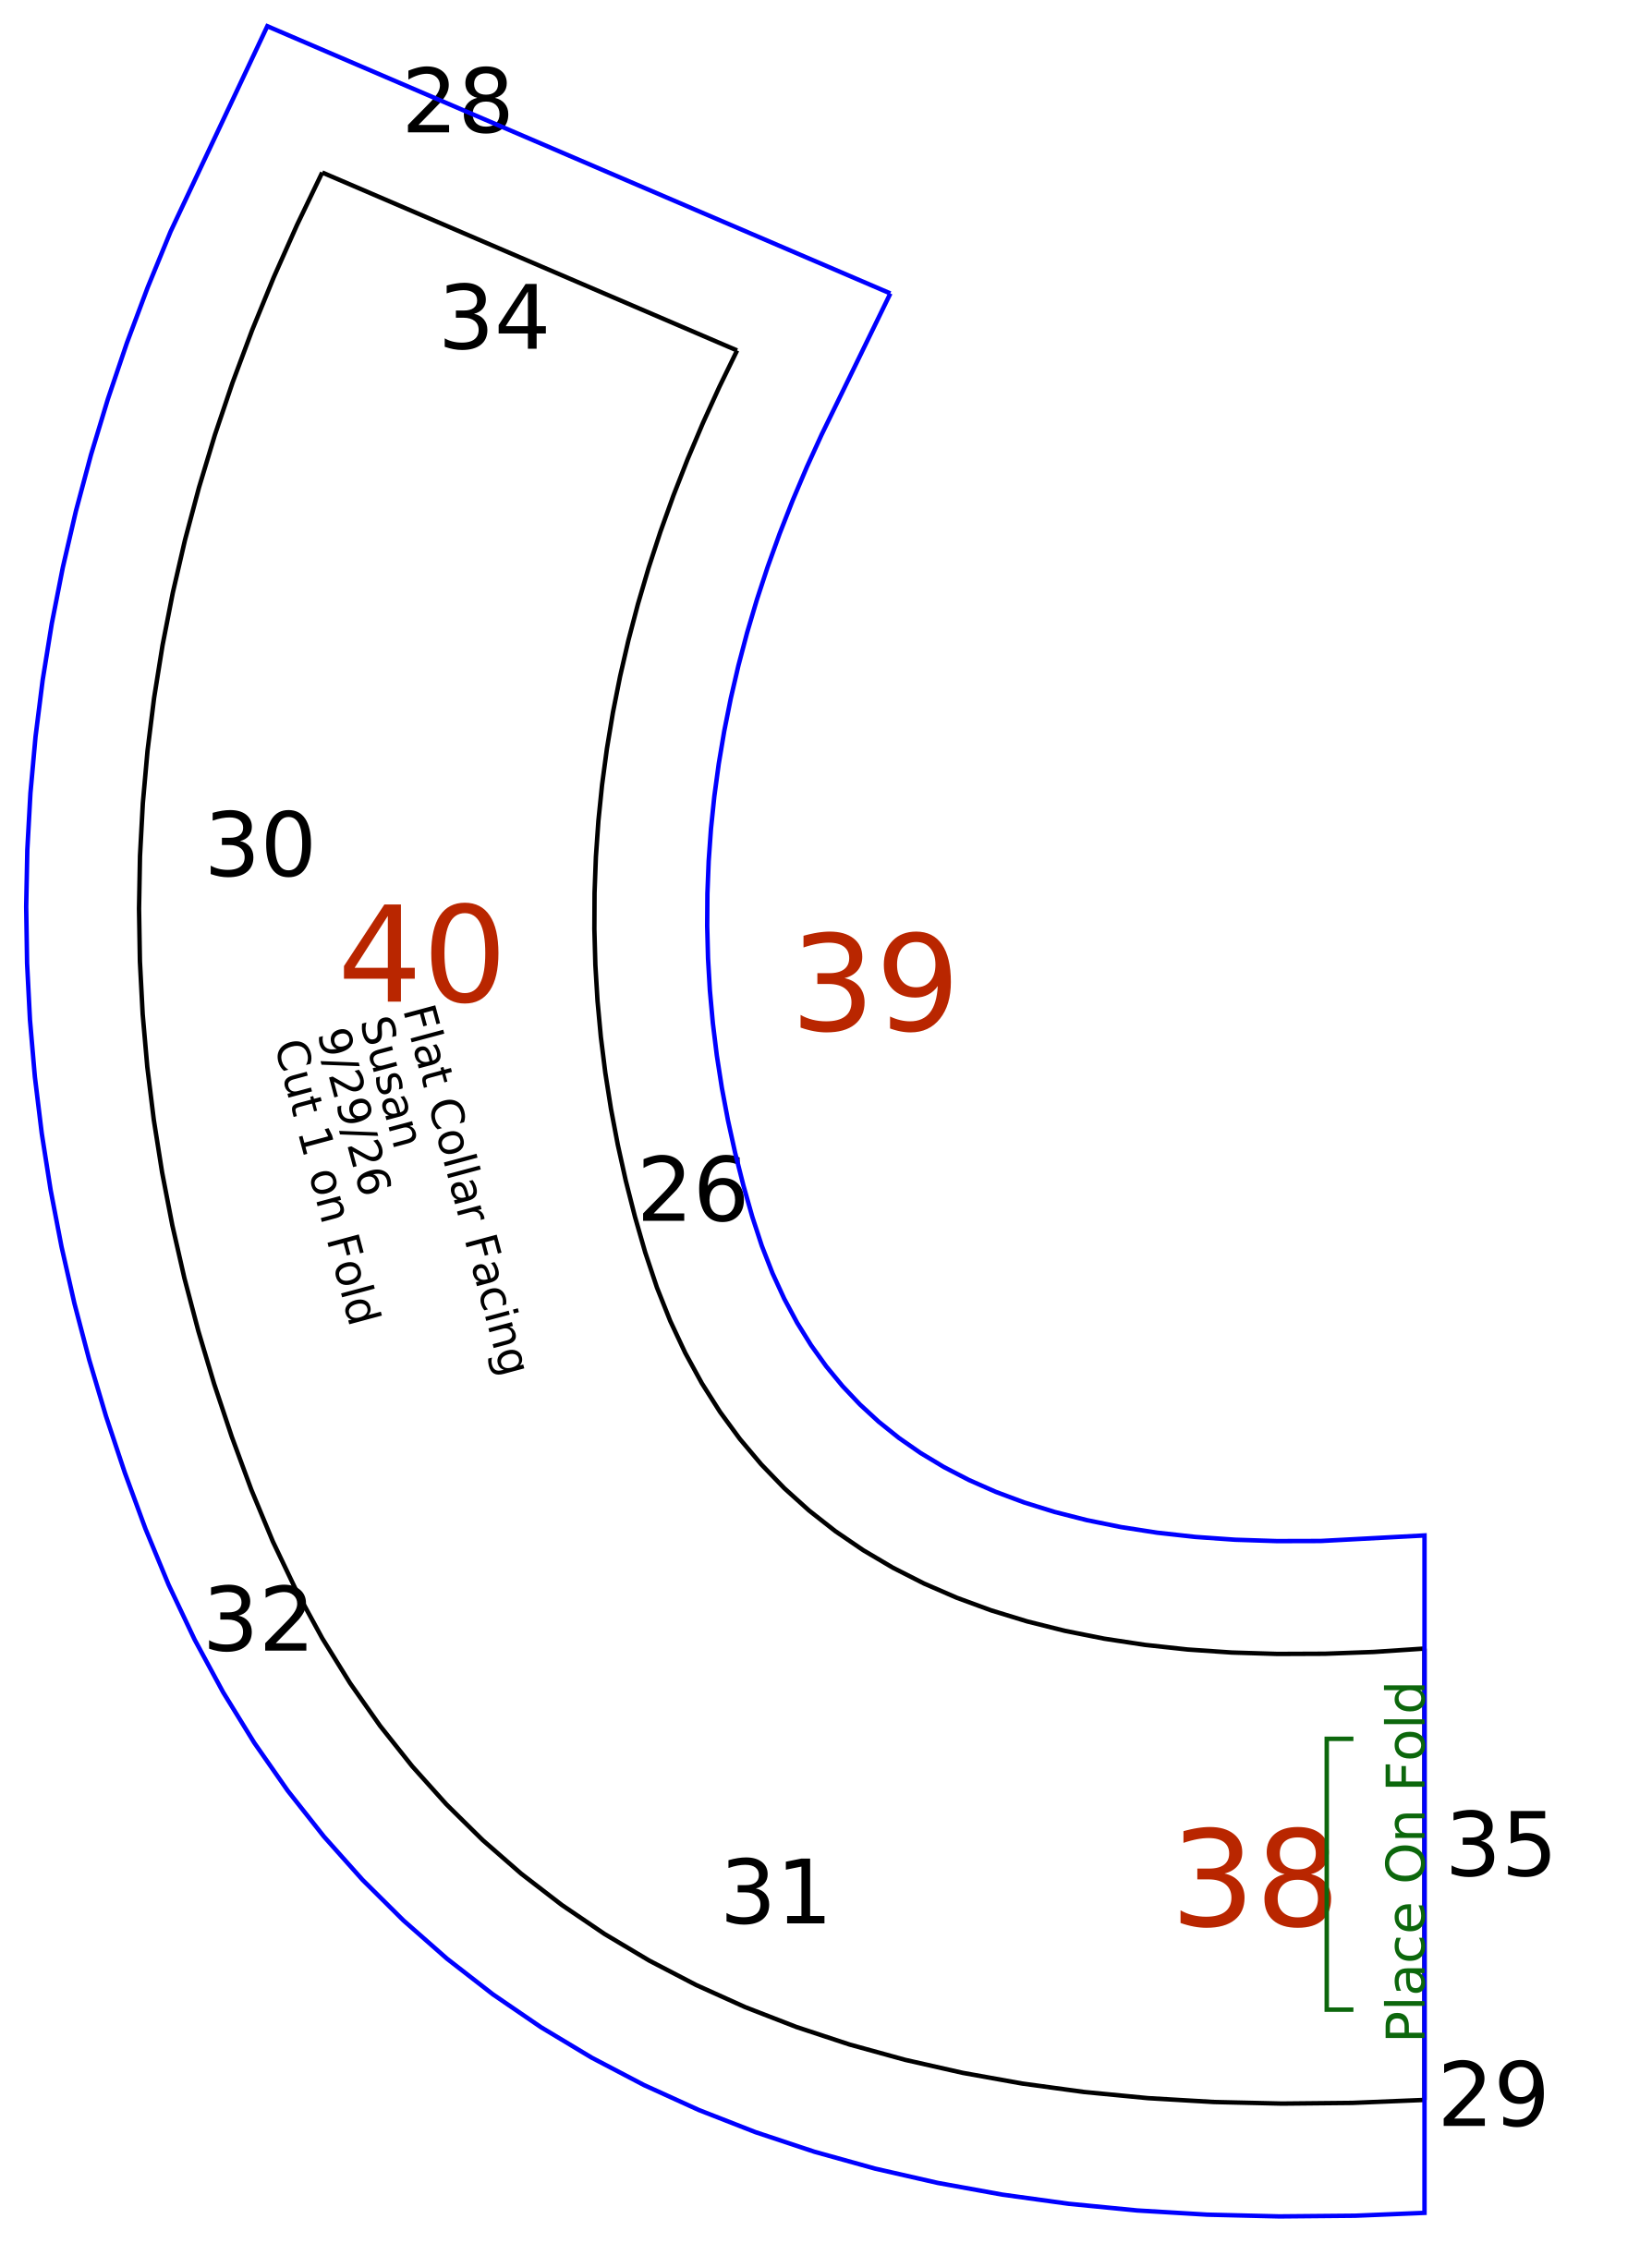 Layers > Move Items to Layer
36Hide Guides
Select: 30Curve Guide, 31Curve Guide
Existing Layer: Any hidden layer (front tracing)
Save
 Finish > Change Line/Curve Seam Allowance
37Fold SA
Select: 35Facing CF Line
Value: Custom
Width: 0 (zero)
 Finish > Add Cut on Fold
38Cut Fold
Select: 35Facing CF Line
Other Side if outside pattern.
Finish > Add Seam Allowance to Pattern39Facing SA
Select: 34Facing CB Line, 26Facing Neckline, 35Facing CF Line, 32Facing Curve
Other Side if inside pattern.
Finish > Add Text at Point40Facing Label
Select a location for the pattern label. Note the name of the pattern, measurement set used, date and cutting instructions
Finish > Hide Points41Hide Points
Hide points.
42Export PDF
File > Export PDF
Choose appropriate page and print.