Aligning the front and back patterns at the shoulder to draft necklines, collars, or facings is a destructive process. Complete all of your neckline shaping on the original drafts first. When you are ready to create facings, copy the outlines and necessary points from both the front and back onto separate, dedicated layers.
Hide your working layers and build your facings from these duplicates to keep your original blocks intact. While these steps are detailed in the instructions below, using duplicate layers will quickly become second nature for all your drafting.
Layers > Select Active Layer
1Front Pattern
Switch to the Front Pattern layer.
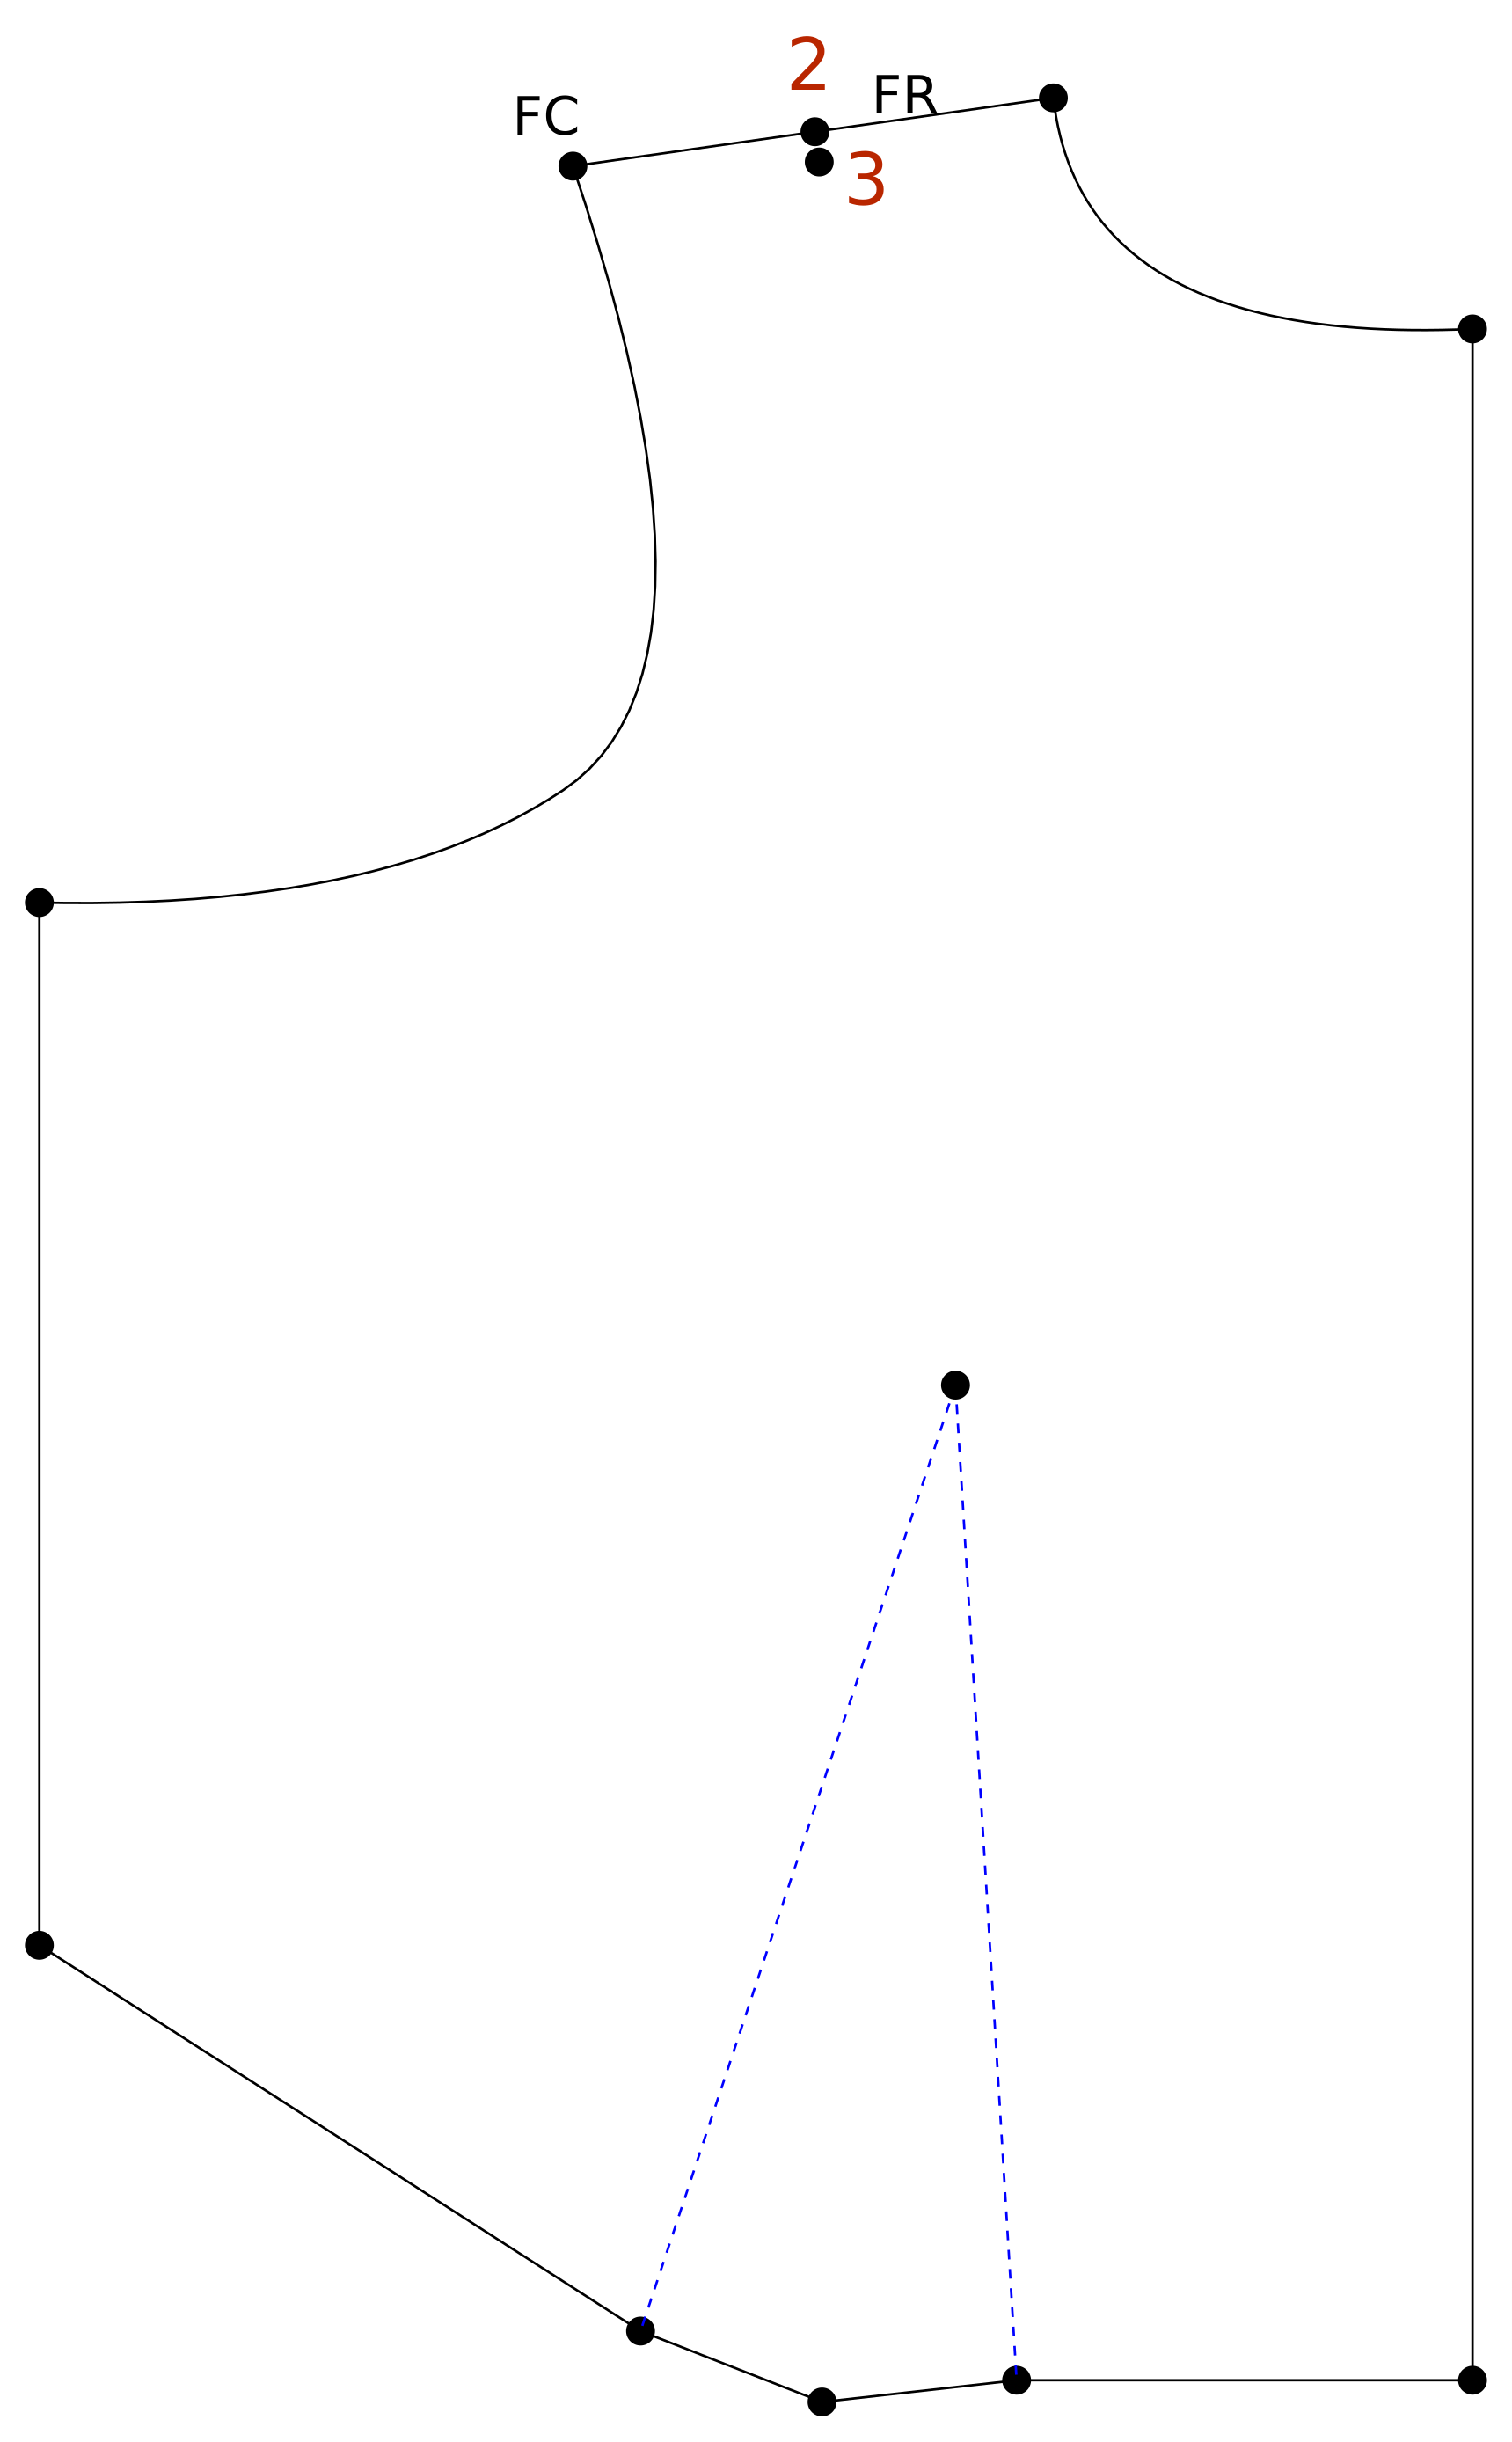
Points > Add Point on Line/Curve
2Pre Side Nk Fr
Select:FRShoulder Line Front
End:FCShoulder Front
Distance: 2" or 50 mm
Save & Split
Points > Add Point Perpendicular
3Side Nk Fr
Origin:2Pre Side Nk Fr
Vector:FCShoulder Front
Distance: 0.25" or 6 mm
Make sure the point is below the 2Pre Side Nk Fr
Save
Points > Add Point on Line/Curve
4Ctr Nk Fr
Select:FKCenter Front
End:FACenter Neck Front
Distance: 5" or 127 mm
Save & Split
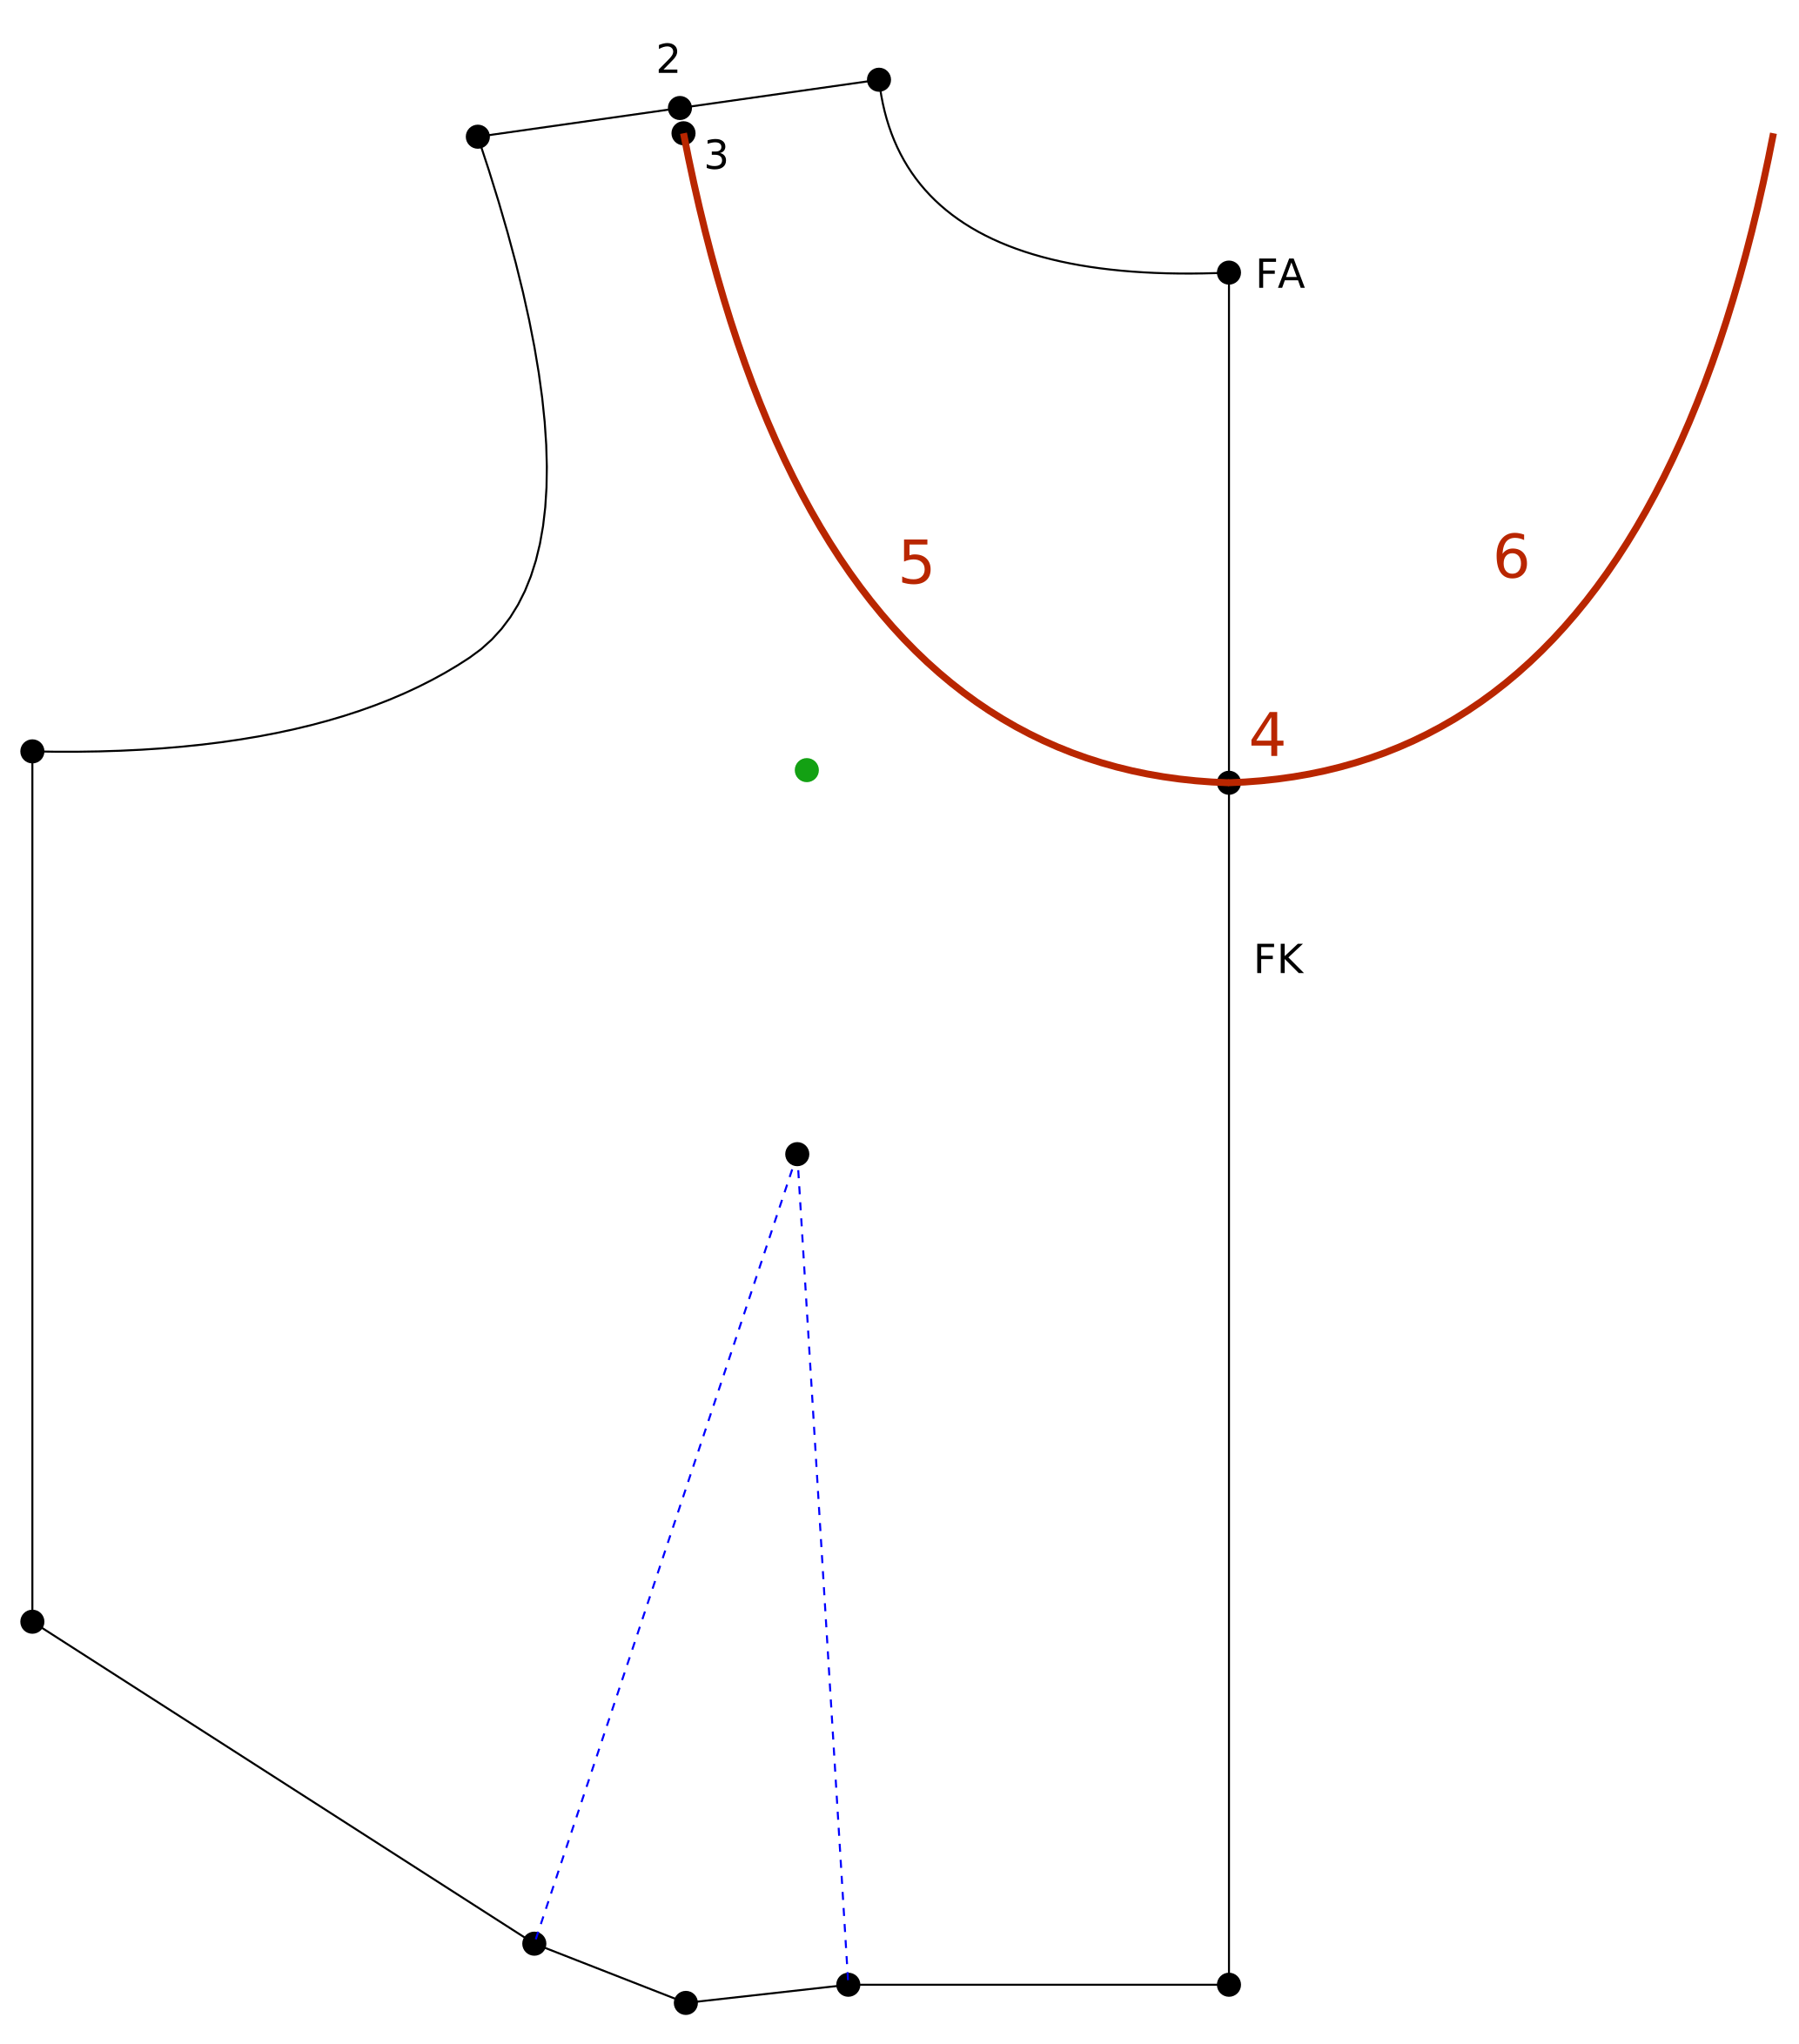
Curves > Add Curve
5Neckline Fr
From:4Ctr Nk Fr to 3Side Nk Fr
Curve Points: 1
Create a gentle scoop neckline.
Finish > Curve Truing
6True Neckline
First:5Neckline Fr
Seam:FKCenter Front 1
Second:5Neckline Fr
Seam:FKCenter Front 1
Move the green curve point to create a smooth curve. Update to view changes.
Lines > Add Line
7Shoulder Line Fr
From:FCShoulder Front to 3Side Nk Fr
Layers > Select Active Layer
8Back Pattern
Switch to the Back Pattern layer.
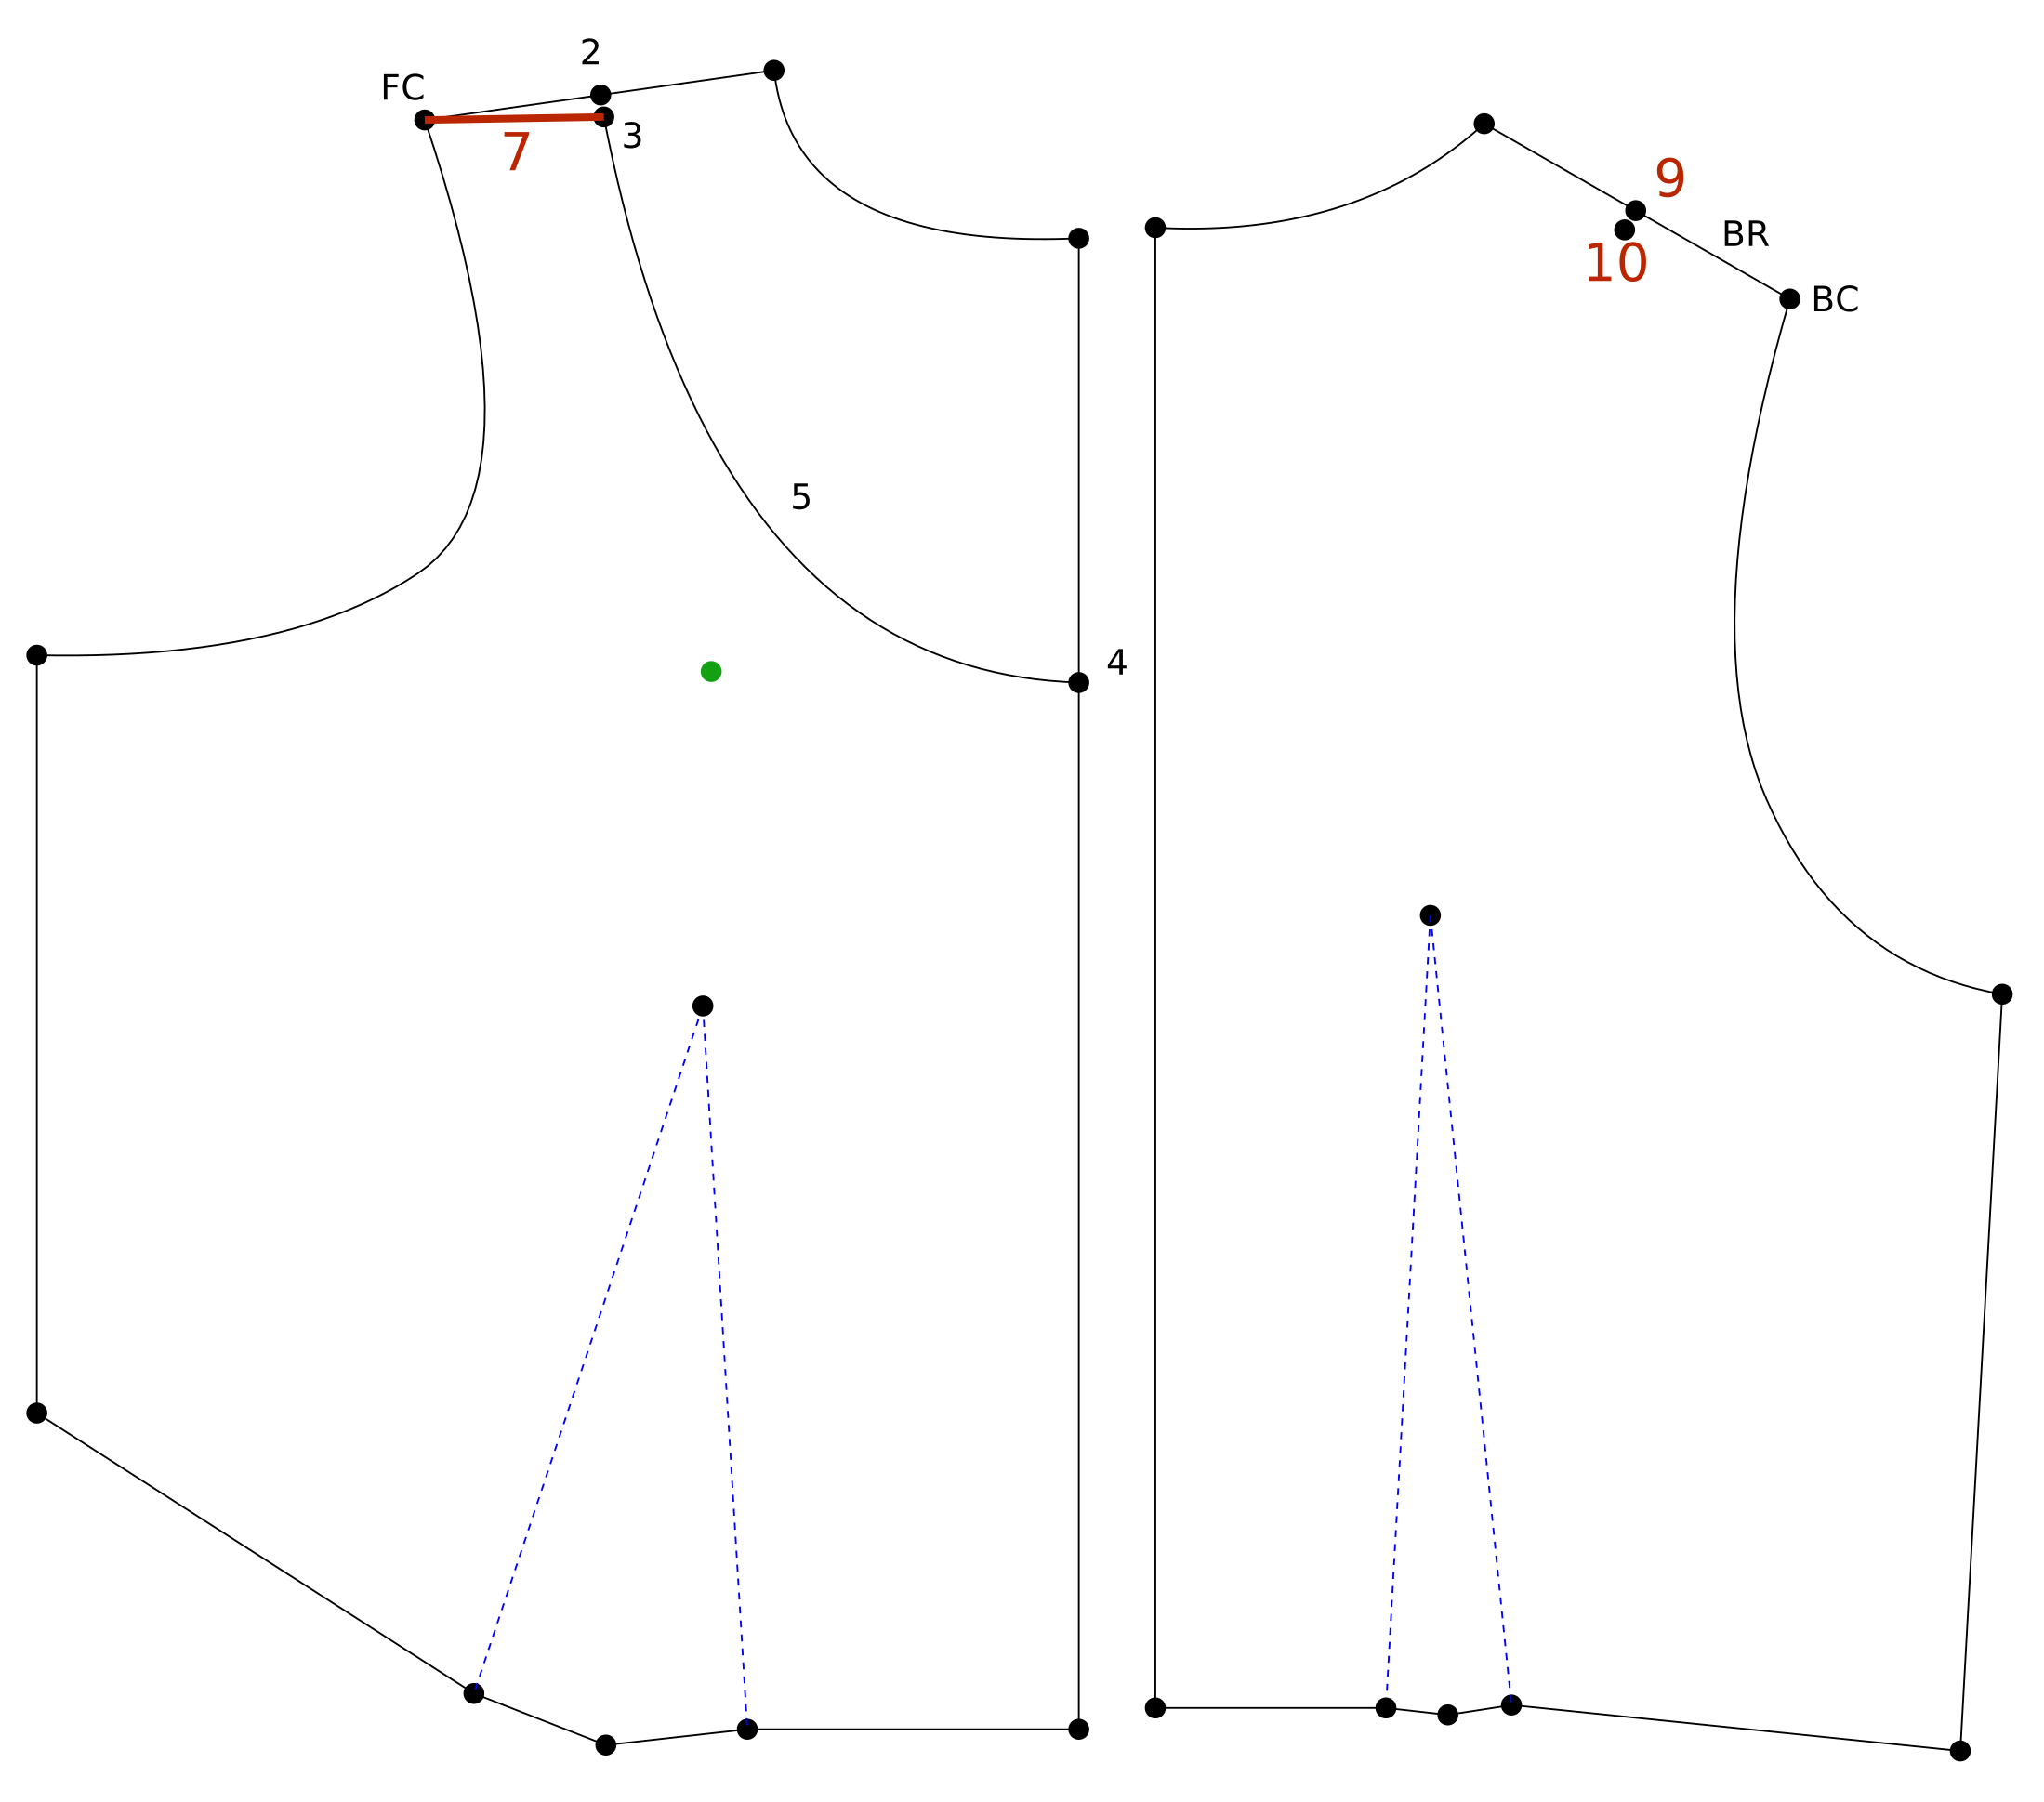
Points > Add Point on Line/Curve
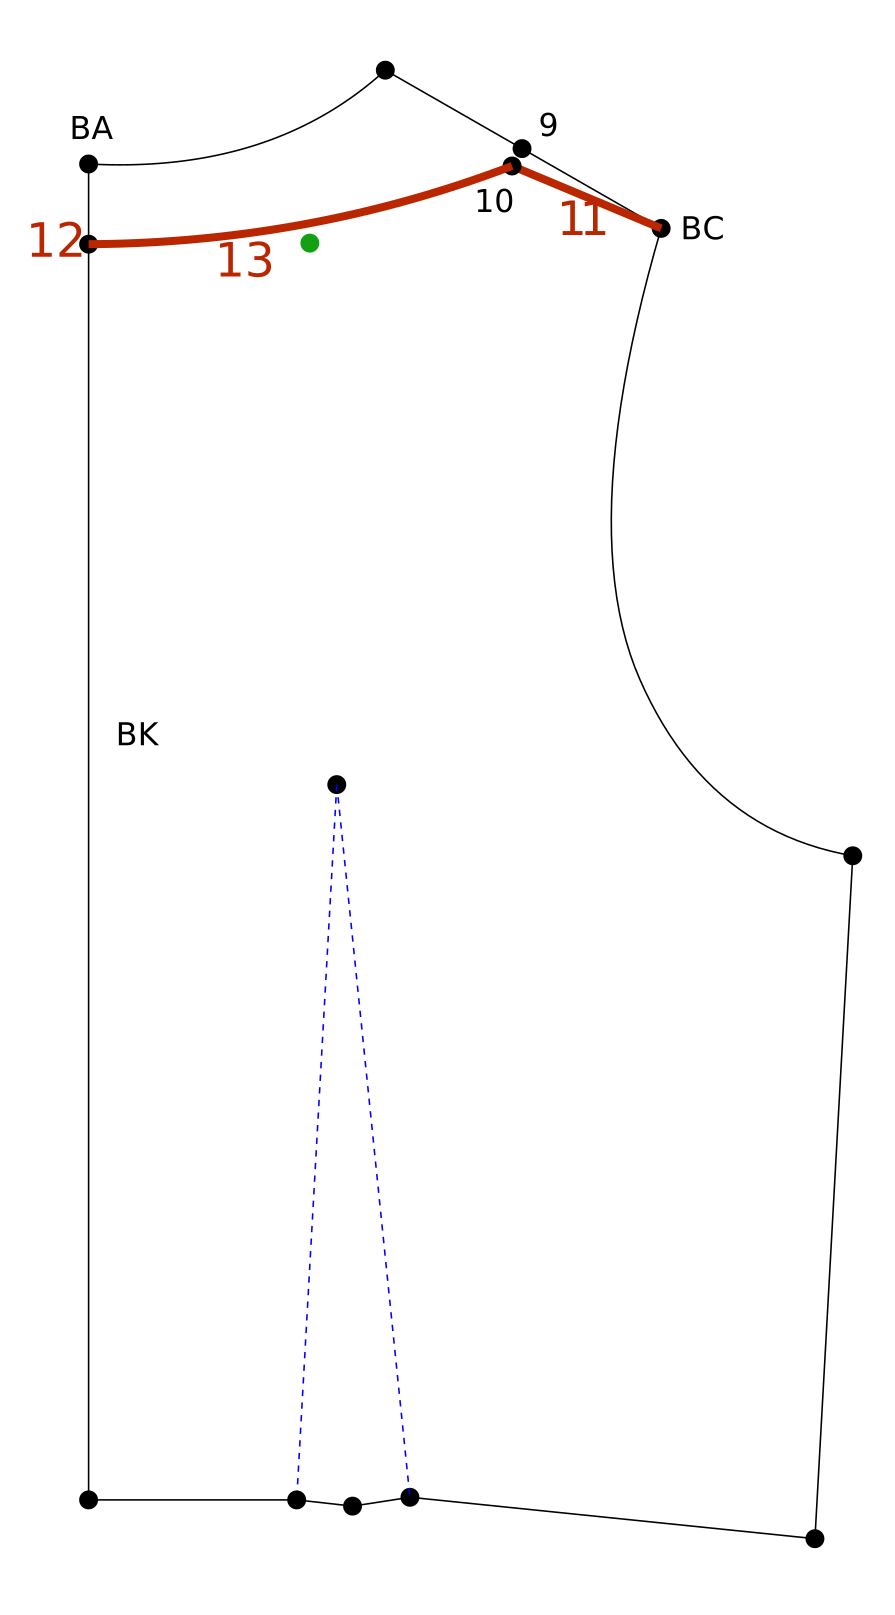
9Pre Side Nk Bk
Select:BRShoulder Line Back
End:BCShoulder Back
Distance: 2" or 50 mm
Save & Split
Points > Add Point Perpendicular
10Side Nk Bk
Origin:9Pre Side Nk Bk
Vector:BCShoulder Back
Distance: 0.25" or 6 mm
Make sure the point is below the 9Pre Side Nk Bk
Save
Lines > Add Line
11Shoulder Line Bk
From:10Side Nk Bk to BCShoulder Back
Points > Add Point on Line/Curve
12Ctr Nk Bk
Select:BKCenter Back
End:BACenter Neck Back
Distance: 1" or 25 mm
Save & Split
Curves > Add Curve
13Neckline Bk
From:12Ctr Nk Bk to 10Side Nk Bk
Curve Points: 1
Great a smooth slight curve.
Finish > Curve Truing
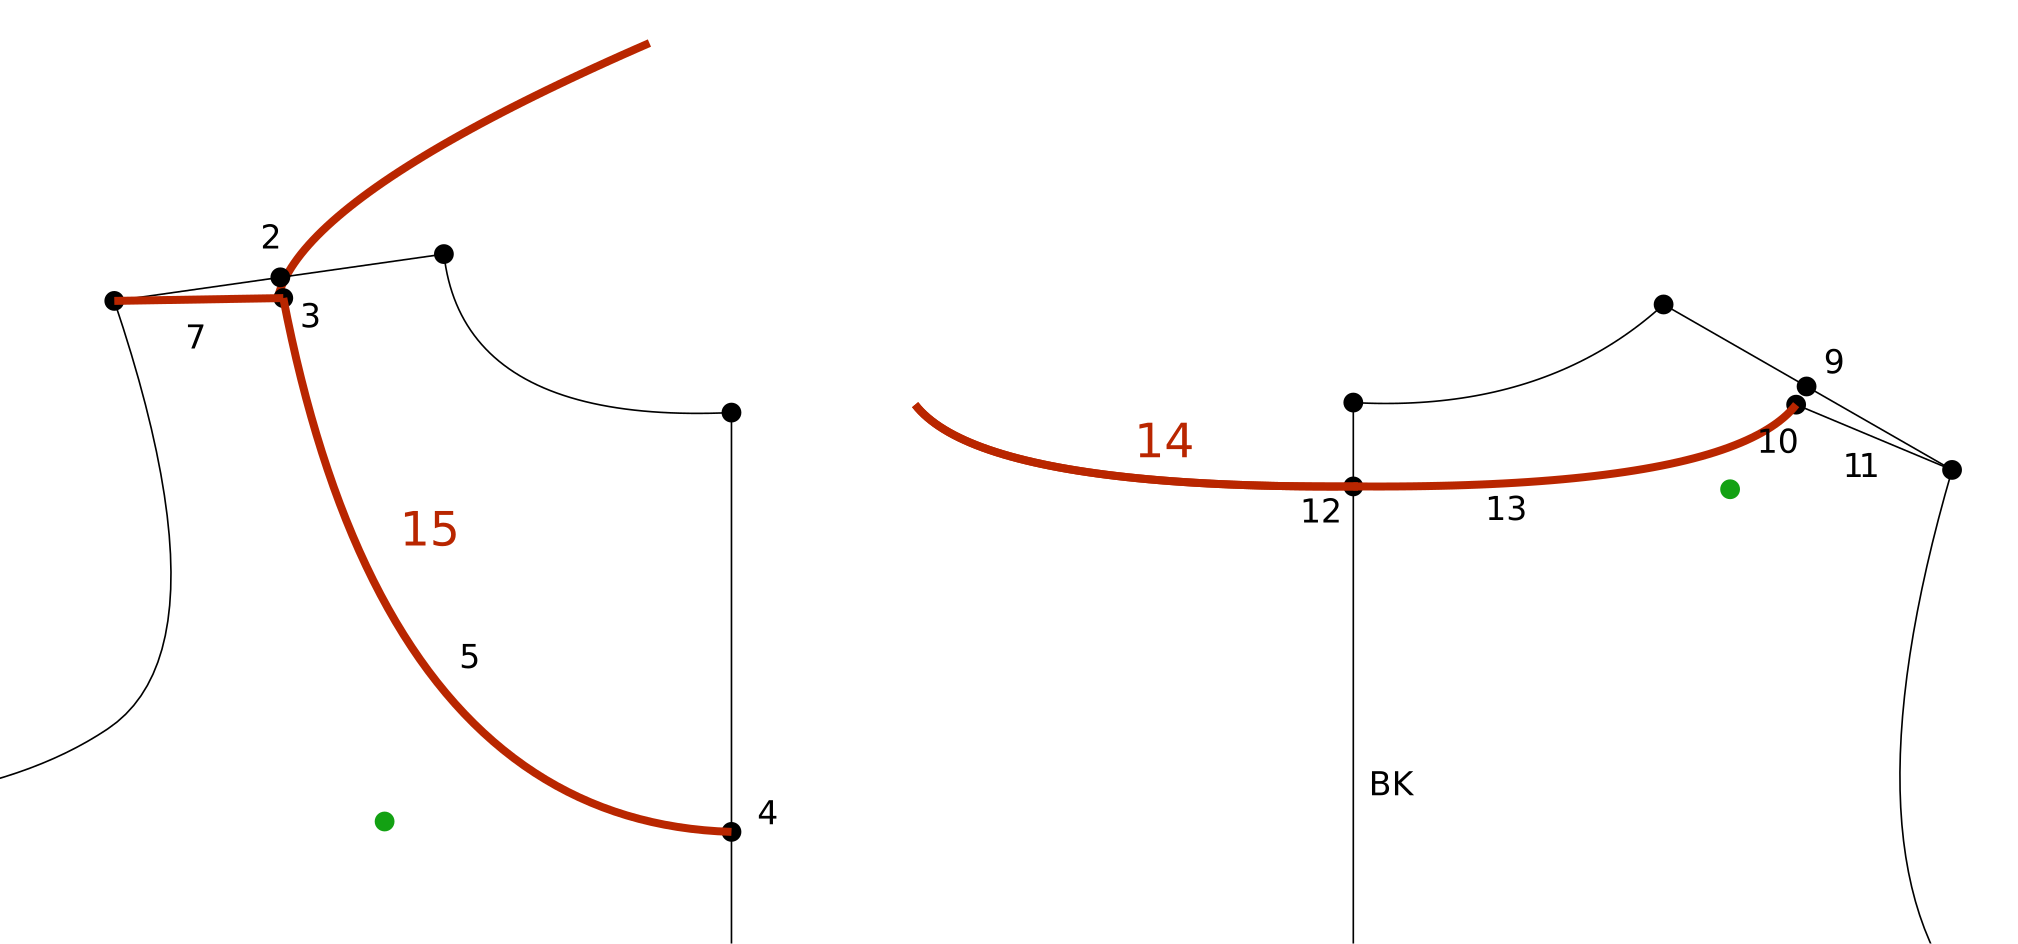
14True Neckline
First:13Neckline Bk
Seam:BKCenter Back_1
Second:13Neckline Bk
Seam:BKCenter Back_1
Create a smooth transition. Update to view changes.
Finish > Curve Truing
15True Shoulder
First:5Neckline Fr
Seam:7Shoulder Line Fr
Second:13Neckline Bk
Seam:11Shoulder Line Bk
Move the green curve points to create a smooth curve. Update to view changes.
16Finish Front & Back Patterns
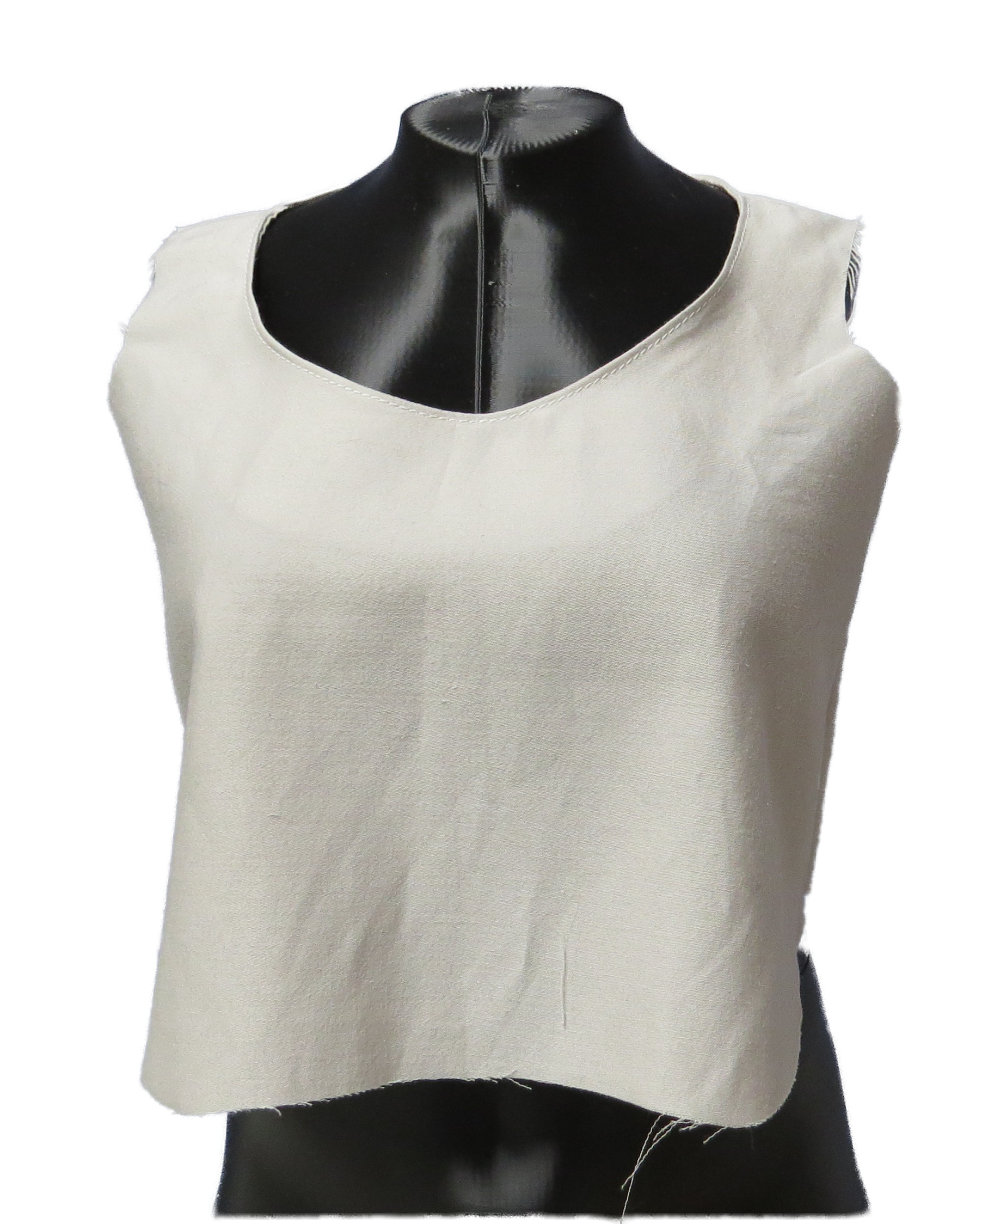
Finish the patterns as you normally would by adding seam allowances, labeling, grainlines, etc.
Now we will move on to the facing.
Layers > Copy Items to Layer
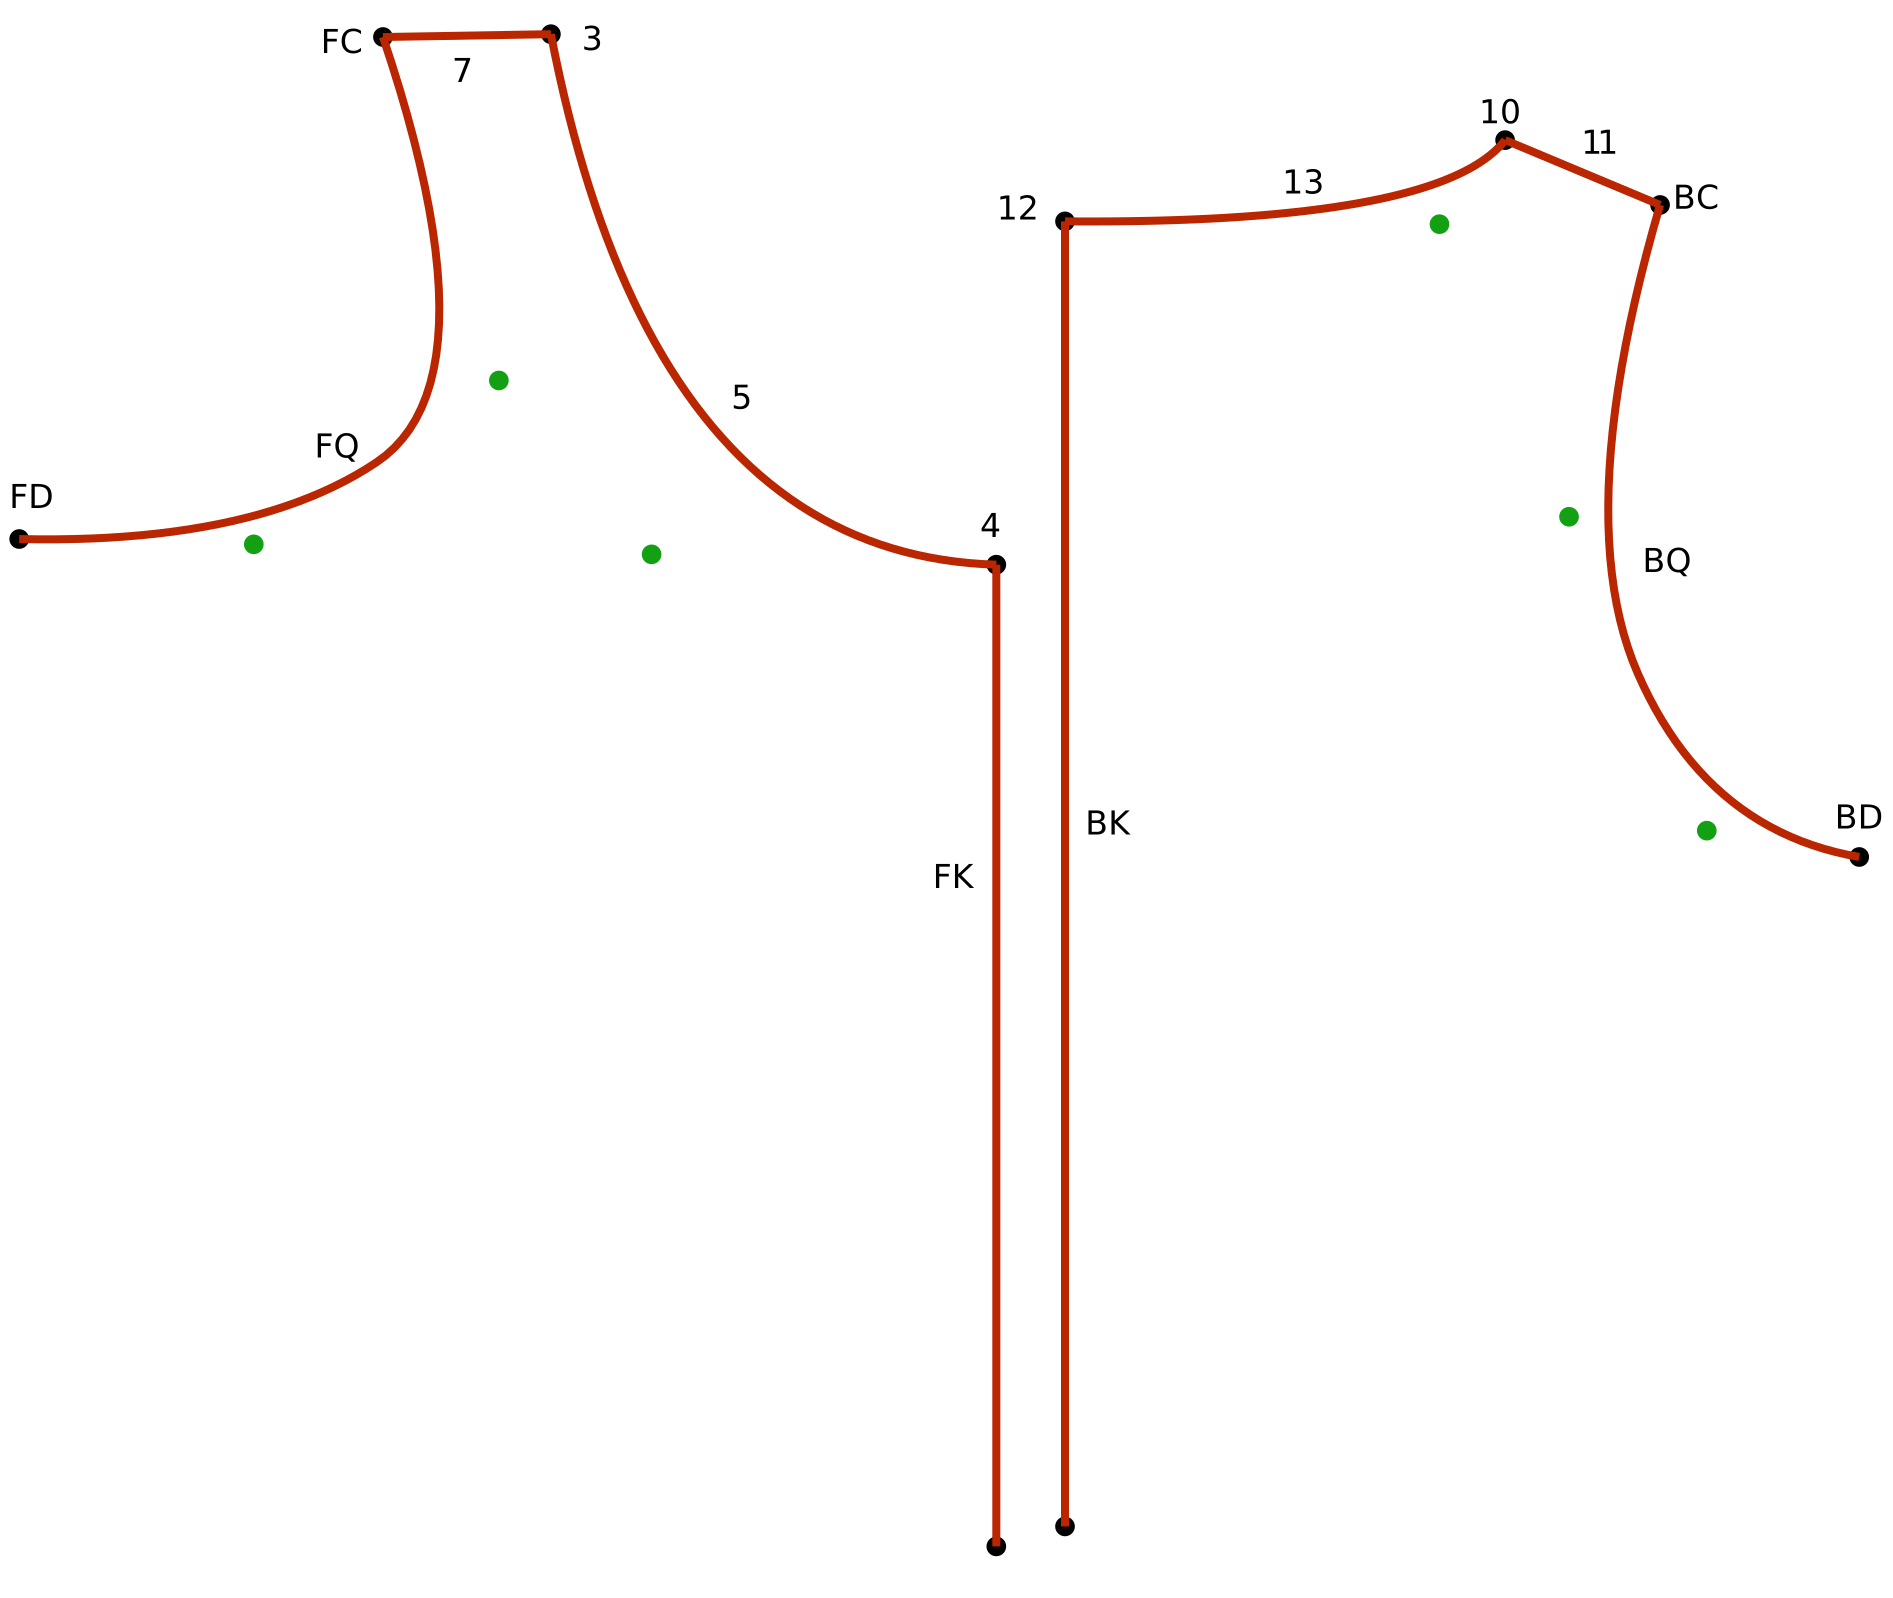
17Facing Trace Front
Select:FDArmpit Front, FQArmhole Front, FCShoulder Front, 7Shoulder Line Fr, 3Side Nk Fr, 5Neckline Fr, 4Ctr Nk Fr, FKCenter Front_1
New Layer: Facing Trace Front
Parent: PMP
Find: (leave blank) Replace: _Facing
Save
Layers > Copy Items to Layer
18Facing Trace Back
Select:BDArmpit Back, BQArmhole Back, BCShoulder Back, 11Shoulder Line Bk, 10Side Nk Bk, 13Neckline Bk, 12Ctr Nk Bk, BKCenter Back_0
New Layer: Facing Trace Back
Parent: PMP
Find: (leave blank) Replace: _Facing
Save & Switch
Layers > Layer Visibility
19Hide Layers
Hide all Layers except the Facing Trace layers.
Layers > Align Layers
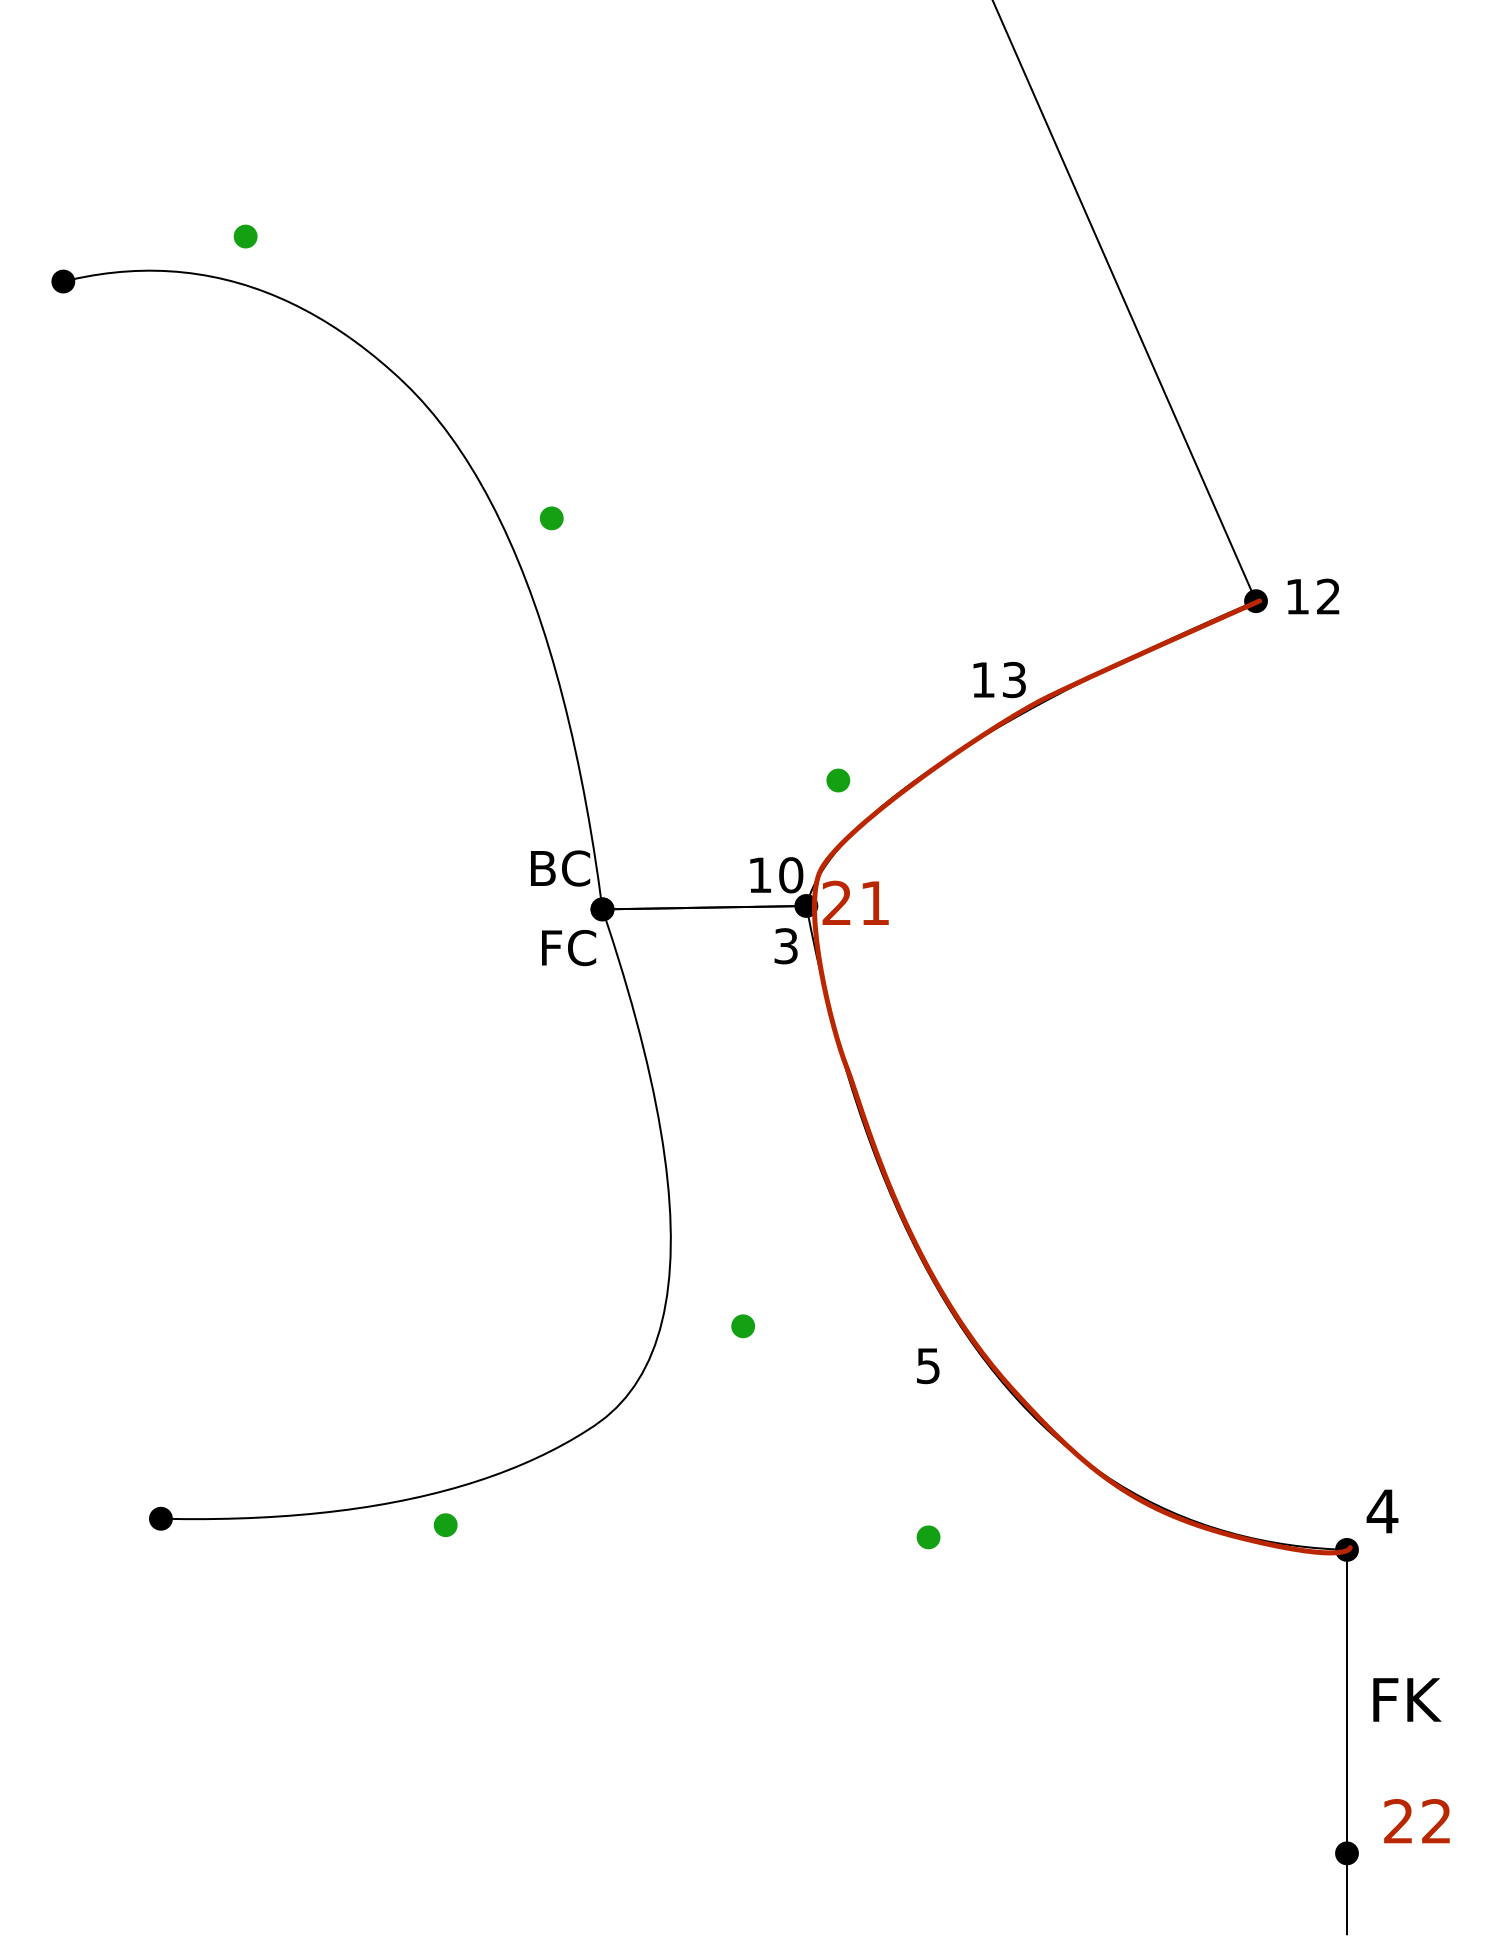
20Align Shoulders
Stay Layer: Facing Trace Front
Move Layer: Facing Trace Back
Stay Target:3Side Nk Fr
Move Target:10Side Nk Bk
Stay End:FCShoulder Front
Move End:BCShoulder Back
Overlap: 0 Zero
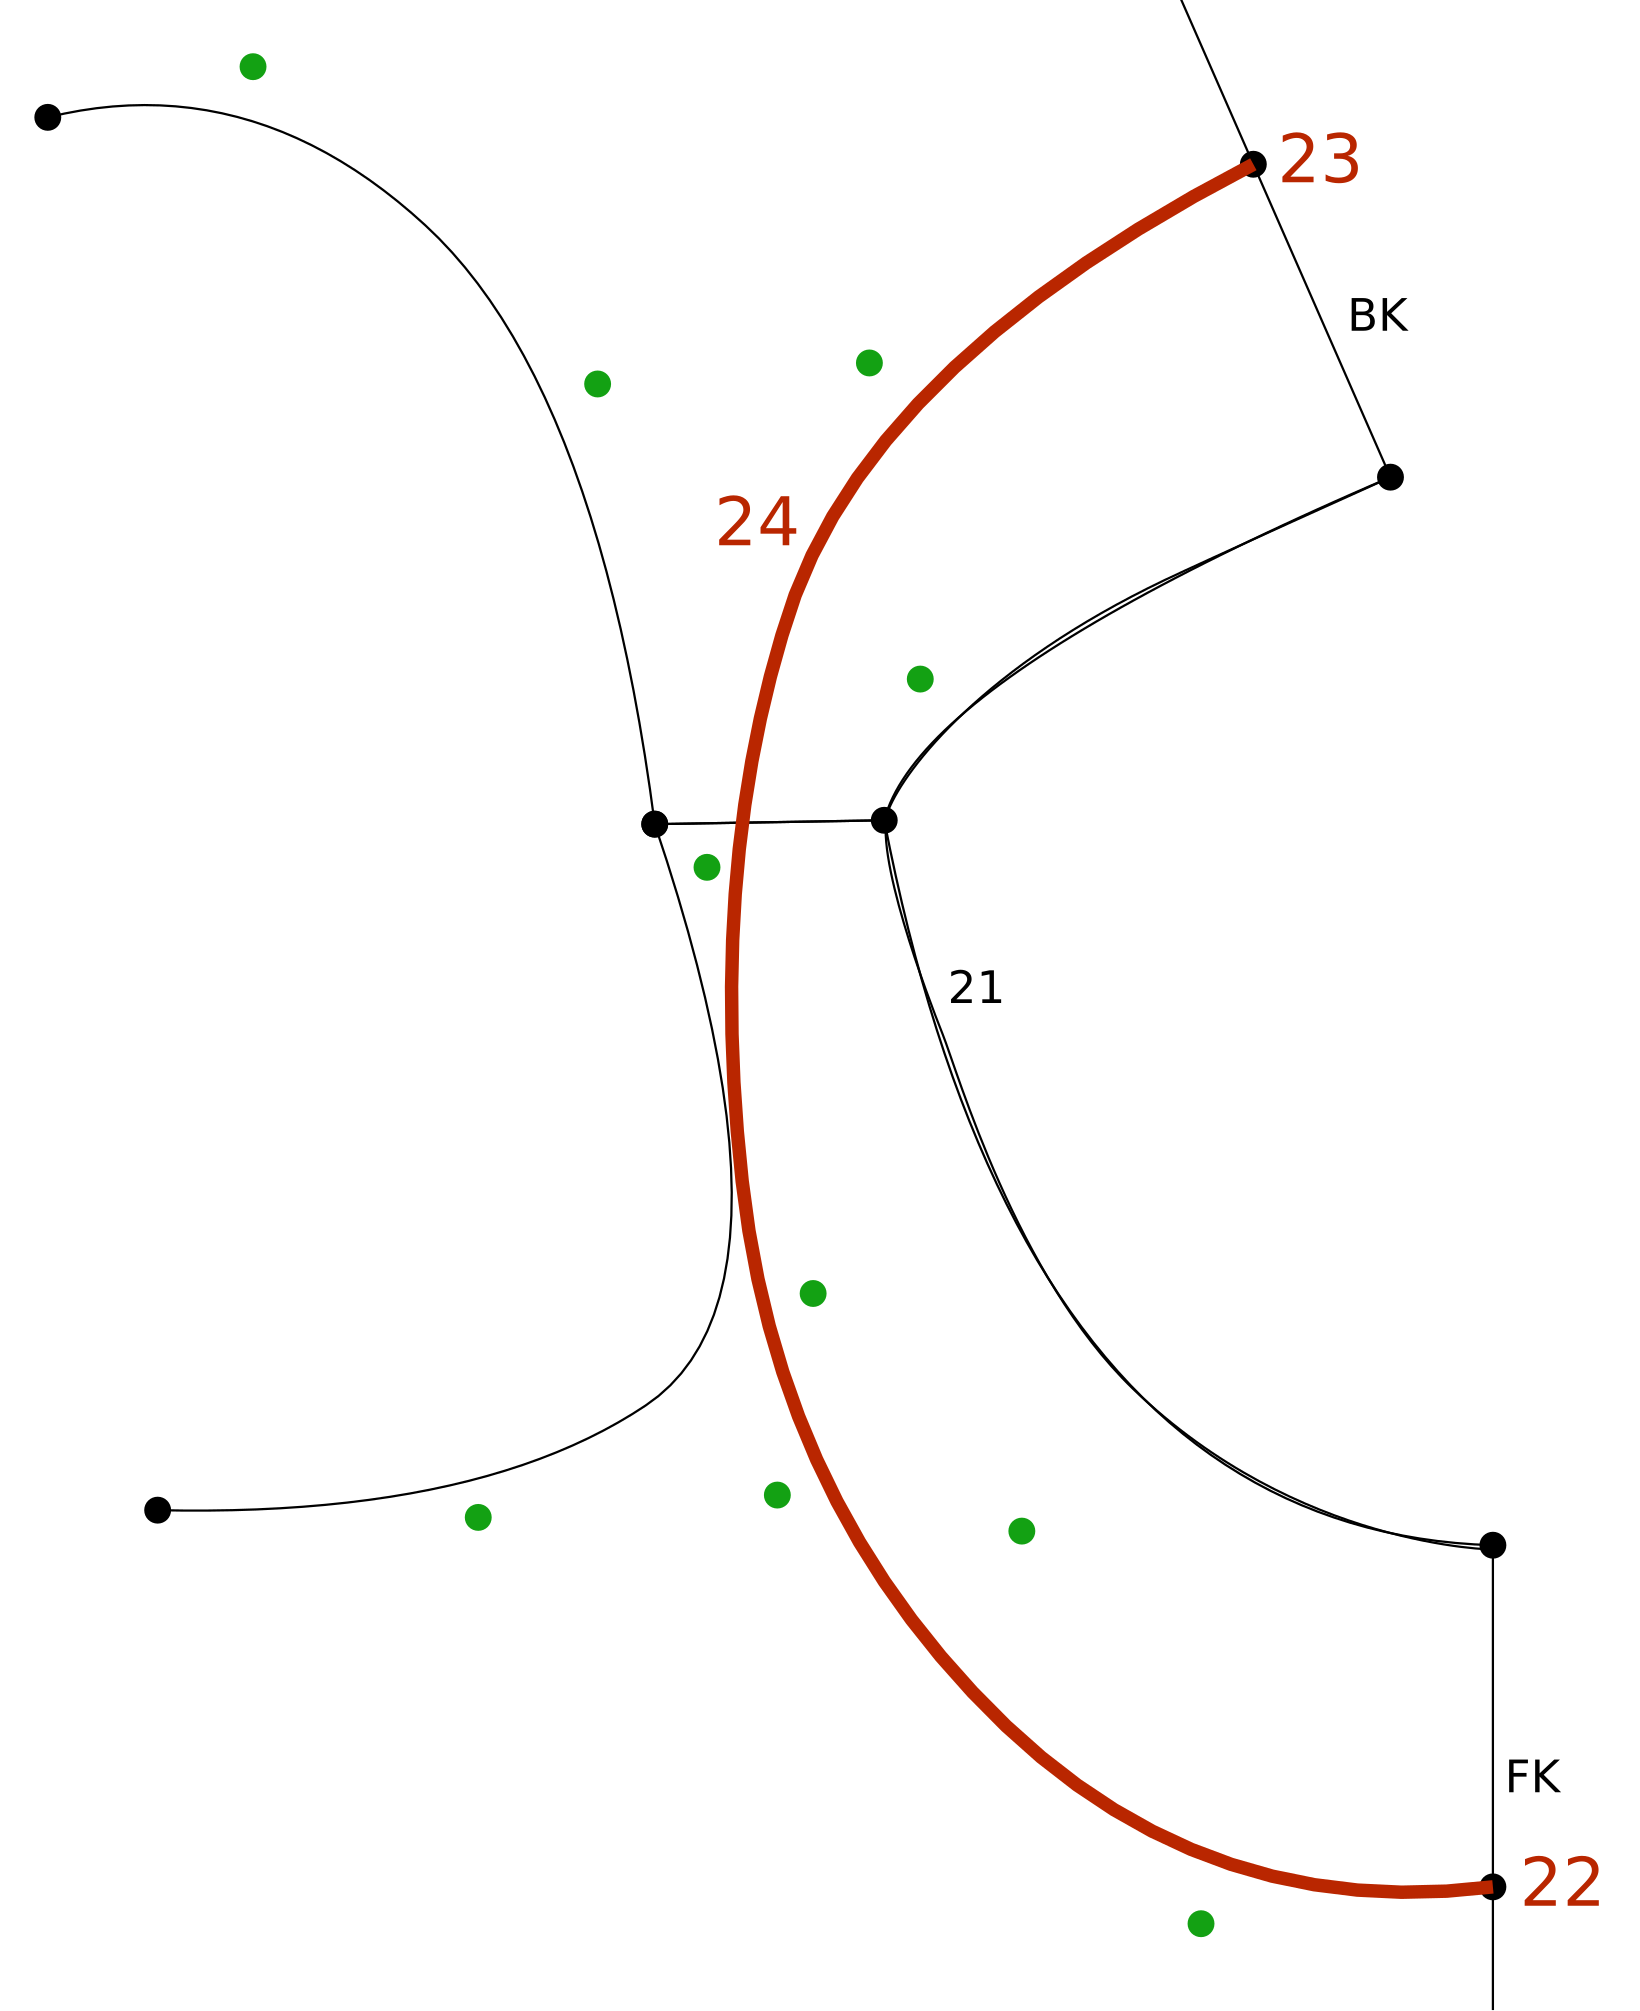
Curves > Add Curve
21Facing Neckline
From:4Ctr Nk Fr to 12Ctr Nk Bk
Curve Points: 2
Follow 13Neckline Bk and 5Neckline Fr curves smoothing at the shoulder join. Don't vary more than 0.625 to 0.125 (1.5-3 mm) away from the shoulder point.
Points > Add Point on Line/Curve
22Facing Ctr Fr
Select:FKCenter Front_1
End:4Ctr Nk Fr_Copy
Distance: 3" or 225 mm
Save & Split
Points > Add Point on Line/Curve
23Facing Ctr Bk
Select:BKCenter Back_0
End:12Ctr Nk Bk_Copy
Distance: 3" or 225 mm
Save & Split
Curves > Add Curve
24Facing Curve
From:22Facing Ctr Fr to 23Facing Ctr Bk
Curve Points: 4
Create a smooth edge for the facing not crossing the armhole outline.
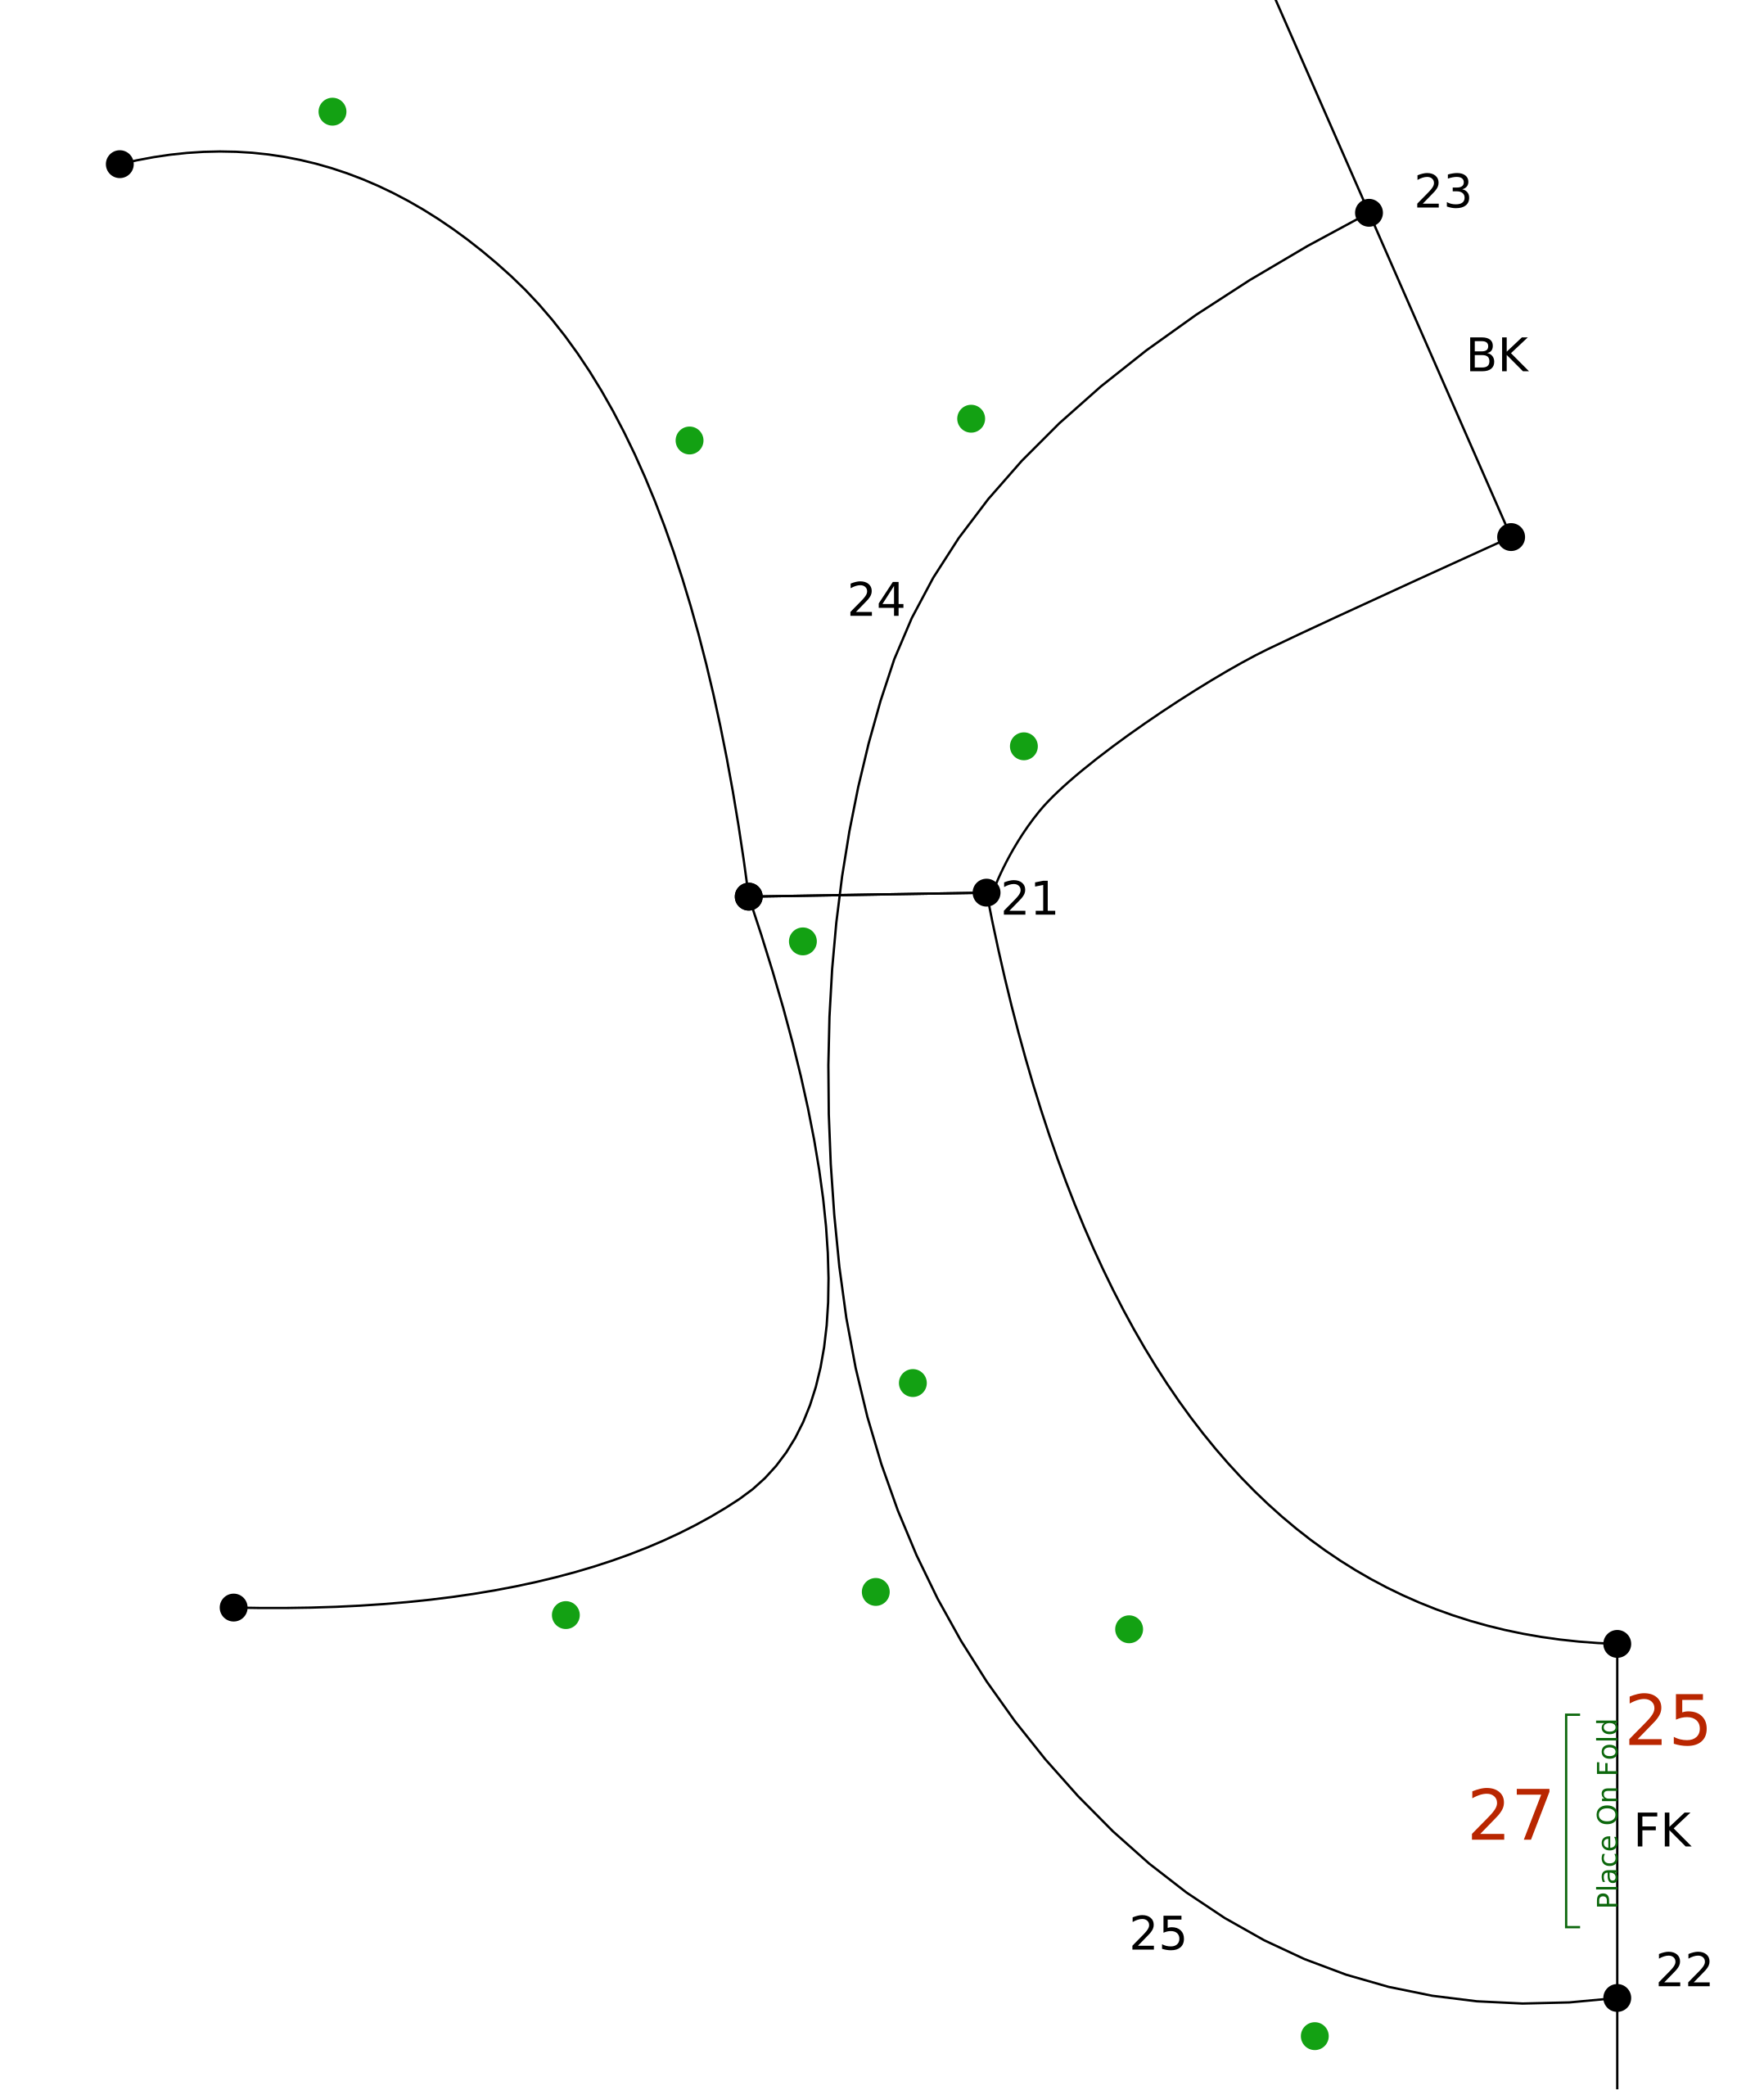
Finish > Change Line/Curve Seam Allowance
25Adj Seam Allowance
Select:24Facing Curve and whichever center line will be cut on the fold (FKCenter Front_1_Facing_0 or BKCenter Back_0_Facing_1).

 Layers > Select Active Layer
 Points > Add Point on Line/Curve
 Points > Add Point Perpendicular
 Curves > Add Curve
 Finish > Curve Truing
 Lines > Add Line
 Layers > Copy Items to Layer
 Layers > Layer Visibility
 Layers > Align Layers
 Finish > Change Line/Curve Seam Allowance
 Layers > Move Layer
 Finish > Add Cut on Fold
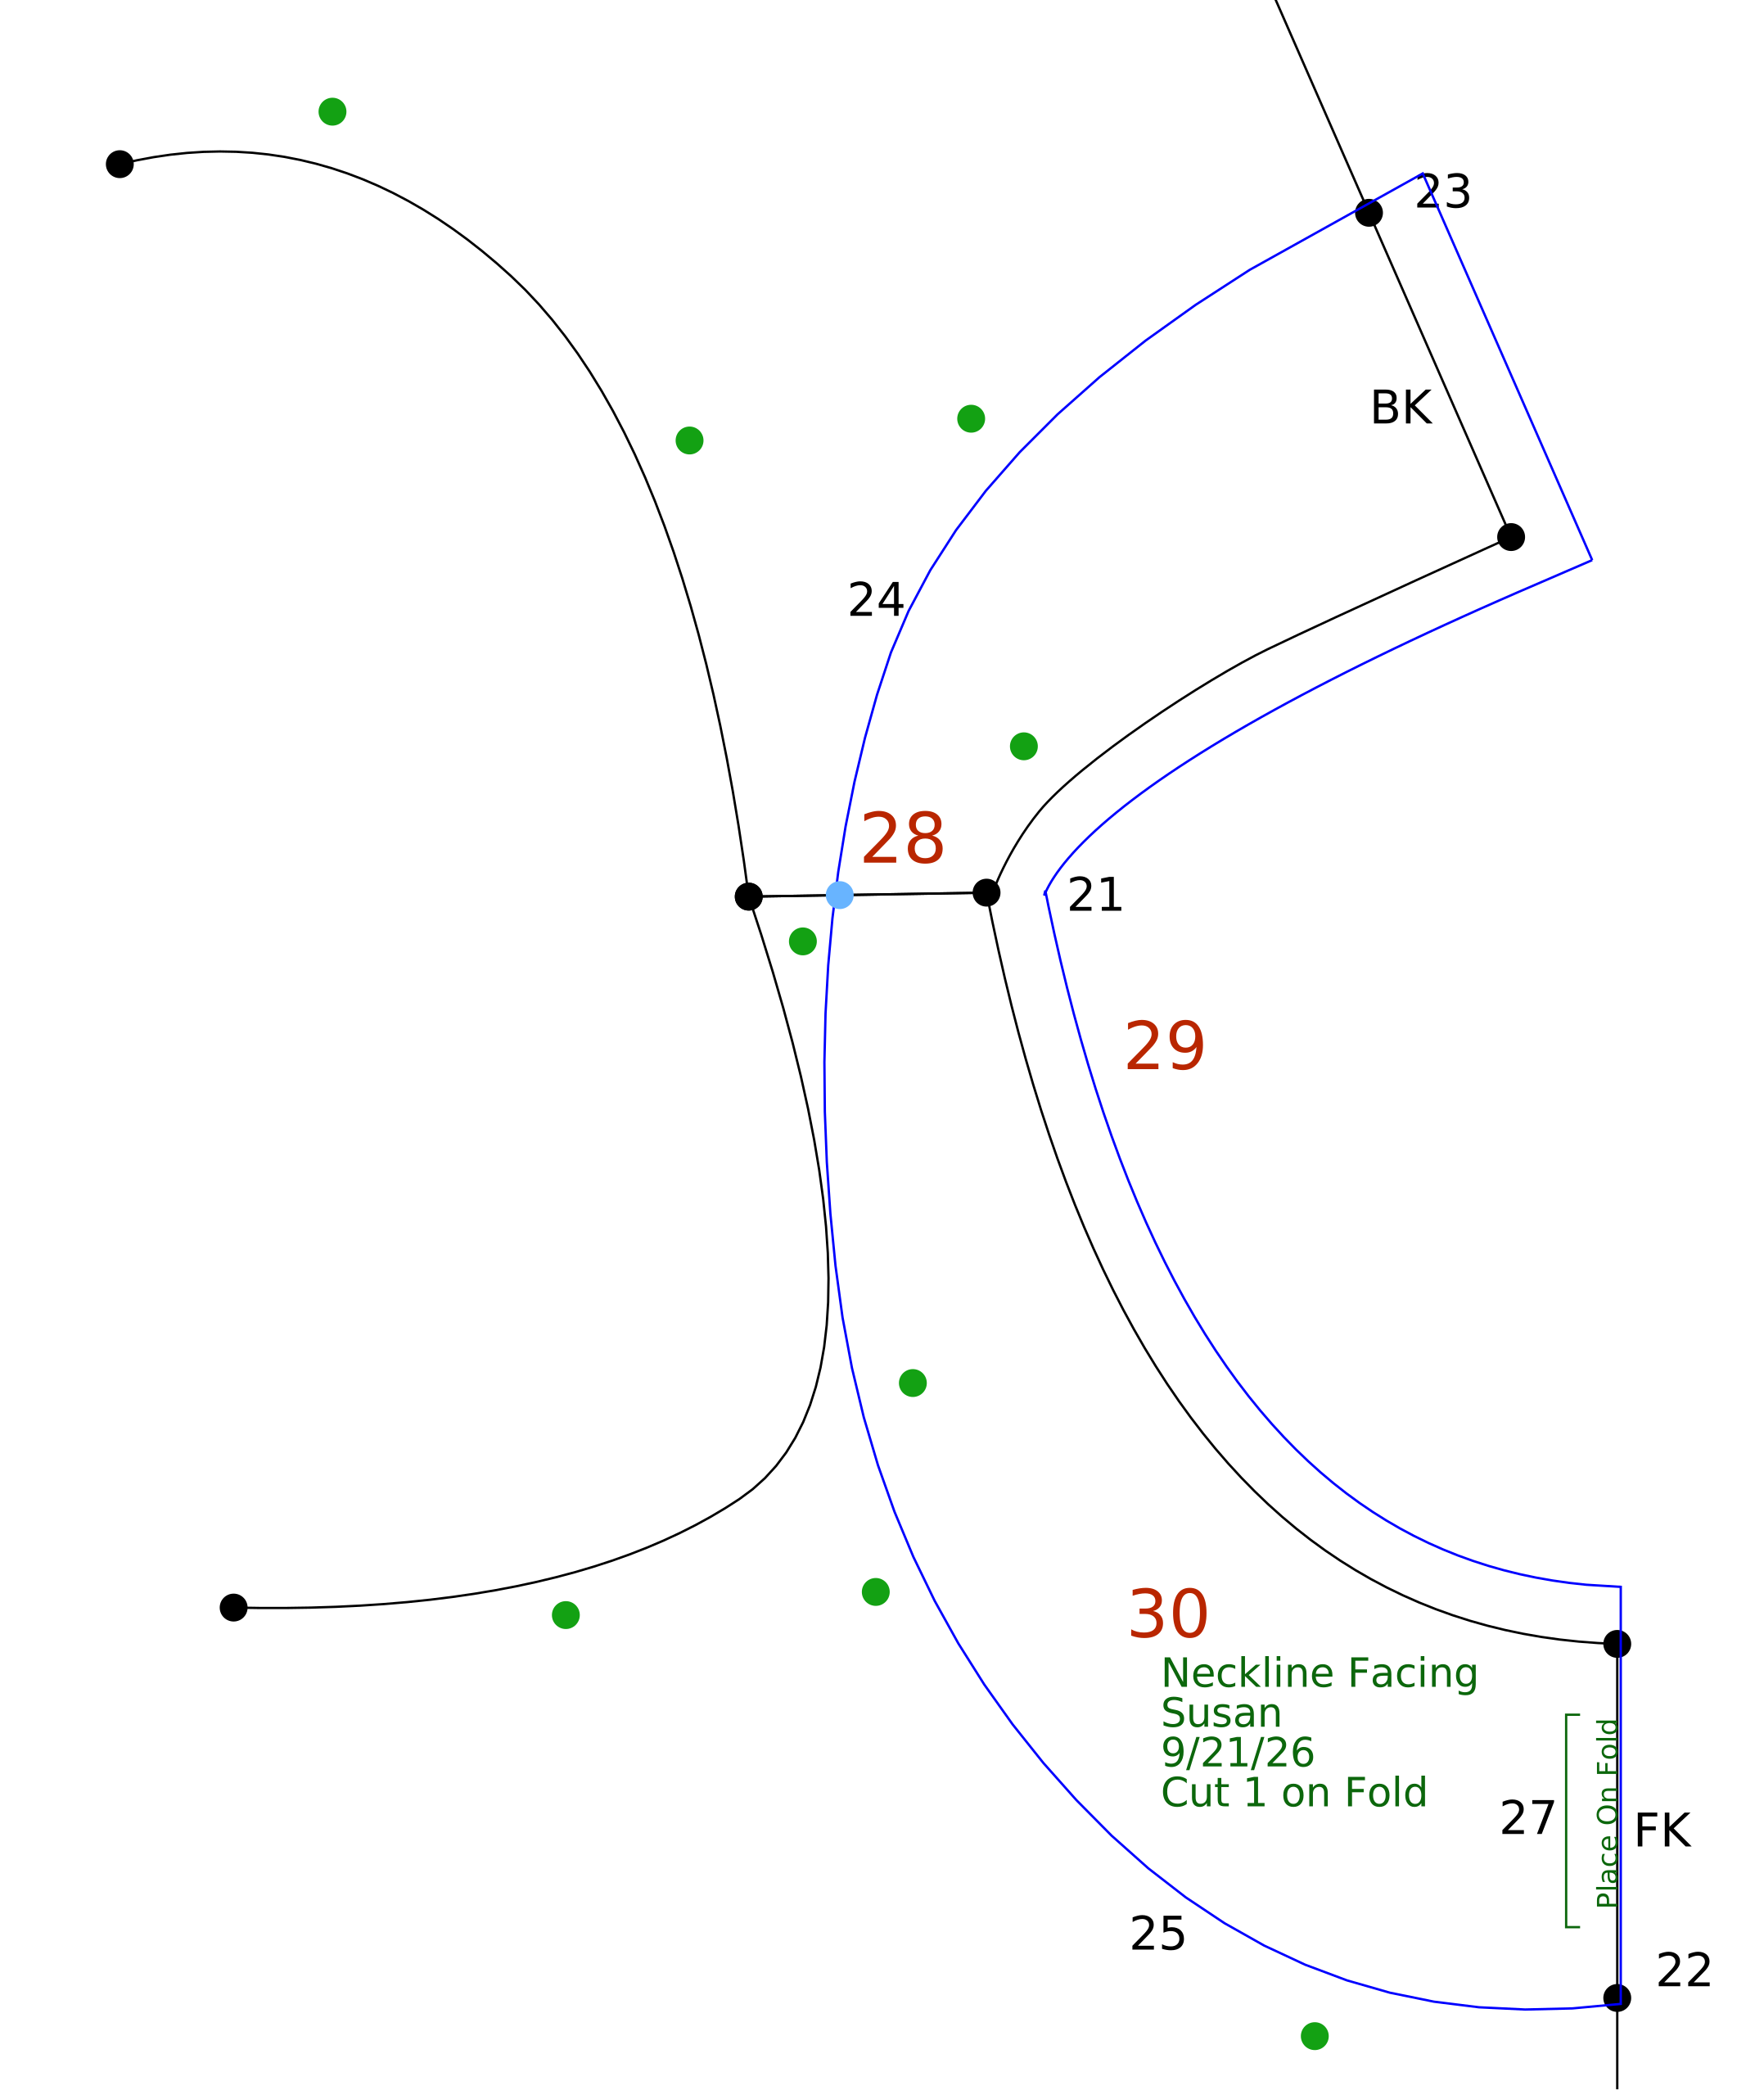
 Points > Add Point at Intersection
 Finish > Add Seam Allowance to Pattern
 Finish > Add Text at Point
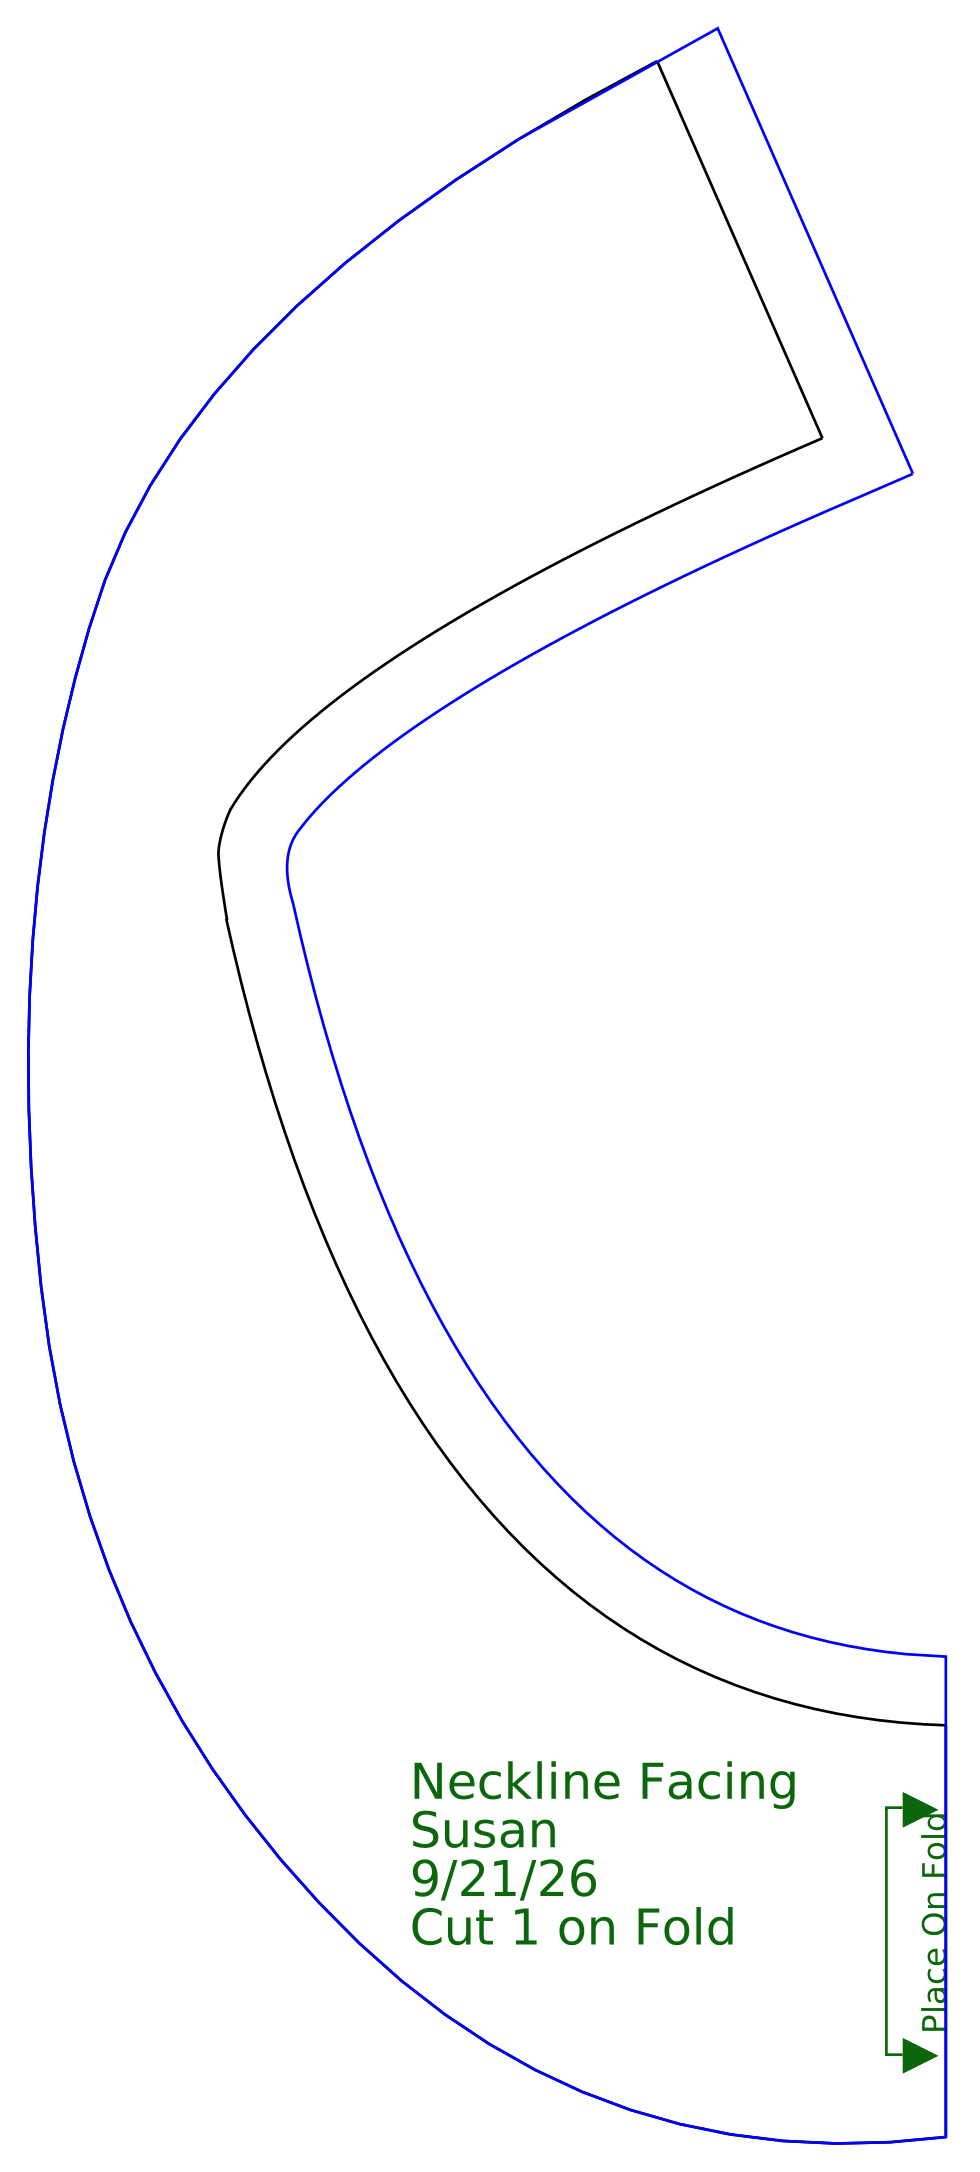
 Finish > Hide Points